
Racks, lights, trays. That’s the easy part. Getting your microgreens setup to consistently move you toward $100,000 is mostly about what happens after you seed: how you water, how you time blackouts, how you harvest, and how fast you can pack without bruising product.
A clean workflow turns trays into predictable weekly output, which is what restaurants and repeat customers actually pay for. A messy workflow creates wasted seed, uneven stands, and last-minute harvest stress.
This guide is built for real basements and real schedules. You’ll learn a practical layout, a simple rotation plan, and a step-by-step flow from seeding to delivery so your system stays stable as orders grow.
Why Workflow Matters More Than “Perfect” Equipment
Microgreens is a speed business. Not “rushing,” but repeatable speed.
The difference between earning a decent side income and building a real 6-figure operation often comes down to how long it takes you to do the core cycle:
- Sanitize and prep trays
- Plant
- Water and manage
- Harvest
- Pack
- Reset and repeat
If your grow room forces you to:
- walk across the room to fetch supplies,
- squeeze past racks while carrying trays,
- backtrack to the sink repeatedly,
- bump into helpers,
- search for tools or packaging…
…you’ll pay for it in labor, fatigue, and inconsistency.
So instead of asking, “Which rack is best?” start asking:
“How does a tray travel through my space?”
That mindset instantly changes everything.
The “Tray Journey” Method: Build Your Farm Like a Tight Kitchen
Andy’s explanation is easy to remember:
In a kitchen, you don’t want to walk long distances to cook a meal. You set it up so the process flows.
Microgreens are the same. A tray shouldn’t be zig-zagging across the room all day. It should move through a logical sequence with minimal steps.
Here’s the ideal tray journey:
1) Wash/Sanitize Zone (Start Point)
Every tray begins and ends here.
- Dirty trays come in
- Washed and sanitized trays leave
Key rule: This zone must be close to your dump/soil disposal route if possible. If not, you’ll drag mess through your clean area.
2) Drying Zone
Right after washing:
- trays drip off
- You avoid puddles everywhere
- You avoid stacking wet trays (mold risk + smell)
Key rule: Drying should be close enough that you’re not carrying dripping trays across the room.
3) Clean Tray Storage
Once dry, trays sit clean and ready.
Key rule: Storage must be near planting—because planting is where you’ll grab trays repeatedly.
4) Planting Zone (The “Build Station”)
This is your production line.
- trays laid out
- soil added
- seed applied
- weights/dom es used
- labels added
Key rule: Put every frequently used item within arm’s reach (not “somewhere in the room”).
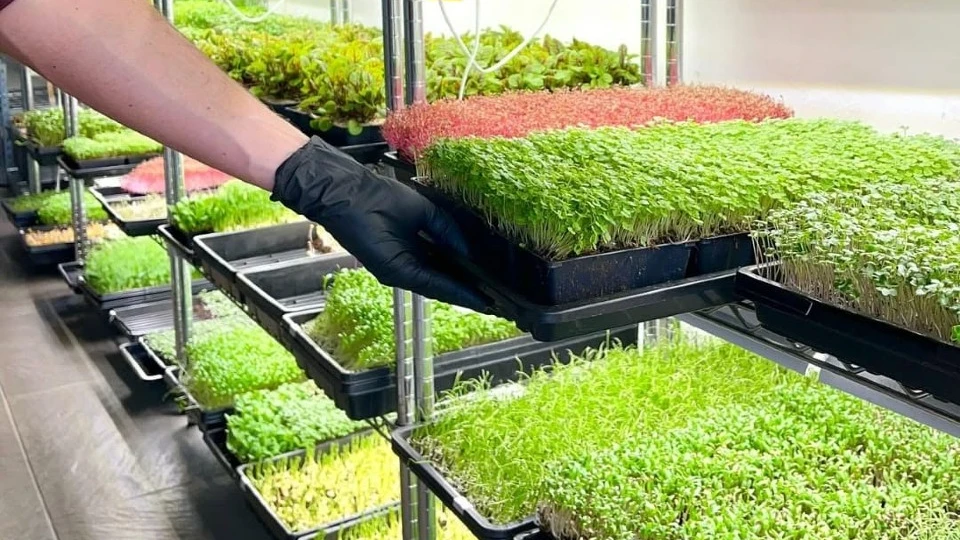
5) Grow Racks Zone
After planting, trays go straight to racks—ideally with short, clean transport.
Key rule: Your racks should be arranged so you can access them without awkward turns or tight corners while holding trays.
6) Harvest + Pack Zone
Harvest is where quality and speed decide profit.
- cut greens
- weigh
- pack
- label
- box for delivery
Key rule: Harvest and packaging supplies should be close together, and your workflow should let two people work without bumping into each other.
7) Waste/Soil Dump Route
After harvesting:
- Soil gets dumped
- trays return to the wash zone
Key rule: Waste must move out quickly—don’t let it sit in your clean areas.
8) Back to the Wash Zone
Circular loop complete.
This loop is the “engine.” Your setup should support it.
🌿 Recommended Microgreens Supplies |
The Circular Flow Layout: The Best Way to Avoid Chaos
A big takeaway from Andy’s workflow is the idea of a circular rotation. Instead of having “random stations,” everything connects.
Why circular flow works
- You don’t cross clean and dirty tasks
- Your team doesn’t collide in bottlenecks
- The farm stays cleaner with less effort
- You spend less time walking and more time producing
Even if you’re in a small room, you can still create a “mini circle.”
Home example (small space):
- Sink → drying rack → clean tray stack → planting table → racks → harvest table → trash/compost bin near door → back to sink
Commercial example:
- Same idea, but with bigger zones, rolling carts, and clearer “clean vs dirty” separation.
How to Set Up Each Zone (Practical and Realistic)
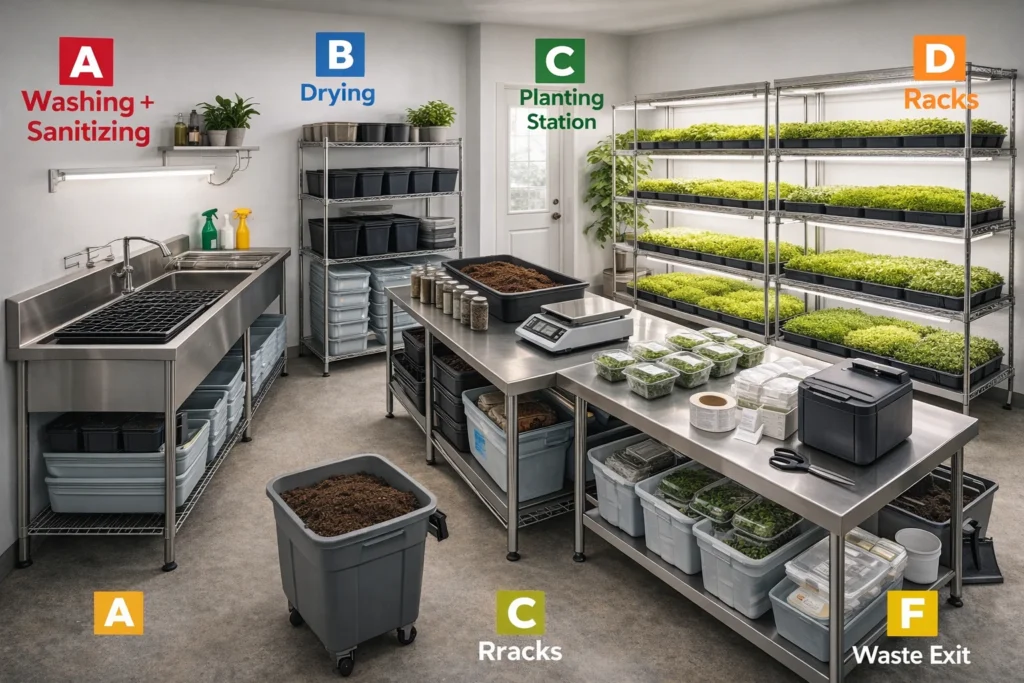
Zone A: Washing + Sanitizing (Don’t overcomplicate this)
This area should have:
- a deep sink or tub setup
- scrub brush or sponge
- sanitizer (food-safe)
- drying racks nearby
- a place for “dirty tray staging.”
Pro tip: Create a visual separation:
- left side = dirty trays
- right side = clean trays
You’ll reduce cross-contamination and confusion instantly.
Zone B: Drying (Simple, but important)
Drying racks can be:
- metal racks
- dish drying racks
- bakery sheet racks (if you scale)
- even stacked racks with airflow
What matters:
- Trays aren’t left soaking wet
- Water isn’t dripping onto walk paths
- trays don’t get funky smells
Zone C: Planting Station (The money station)
If your planting area is messy, everything else is messy.
Your planting station should include:
- soil bags or soil storage
- measured scoops or containers
- seed containers
- labels/markers
- weights/dom es
- spray bottles (if you use them)
- a bin for trash and spilled soil
One powerful improvement:
Set up planting like an assembly line:
- trays lined up
- soil filled
- leveled/pressed
- seed applied
- misted (if needed)
- weighted/covered
- moved to the rack
Do it the same way every time.
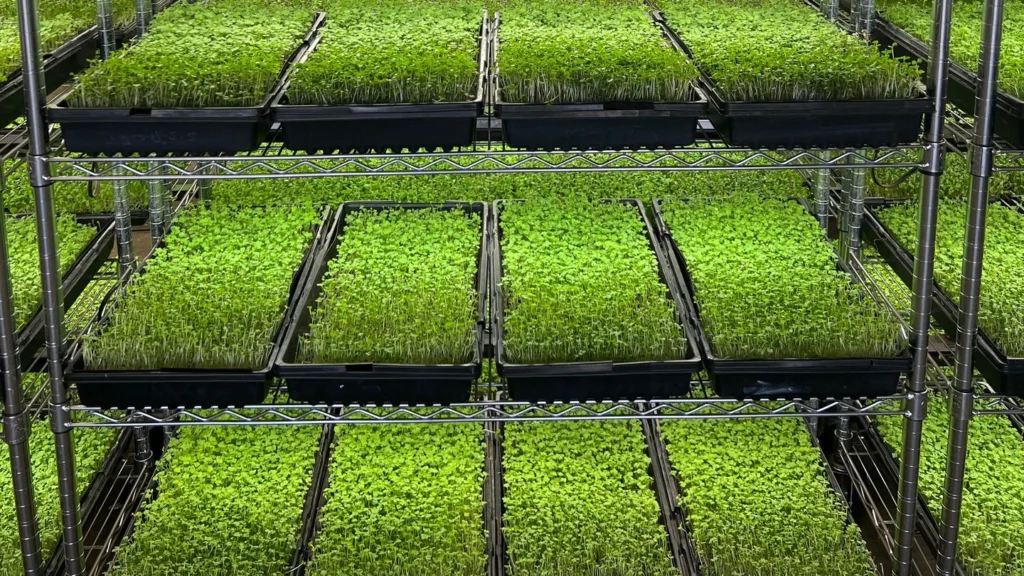
Zone D: Racks (Make them accessible, not just “packed”)
People love maximizing rack count. But too many racks can reduce profit if they cause:
- tight walking lanes
- difficulty reaching trays
- slow watering access
- poor airflow
Rule of thumb:
If you can’t comfortably carry a tray through an aisle without turning sideways, you’ve built a bottleneck.
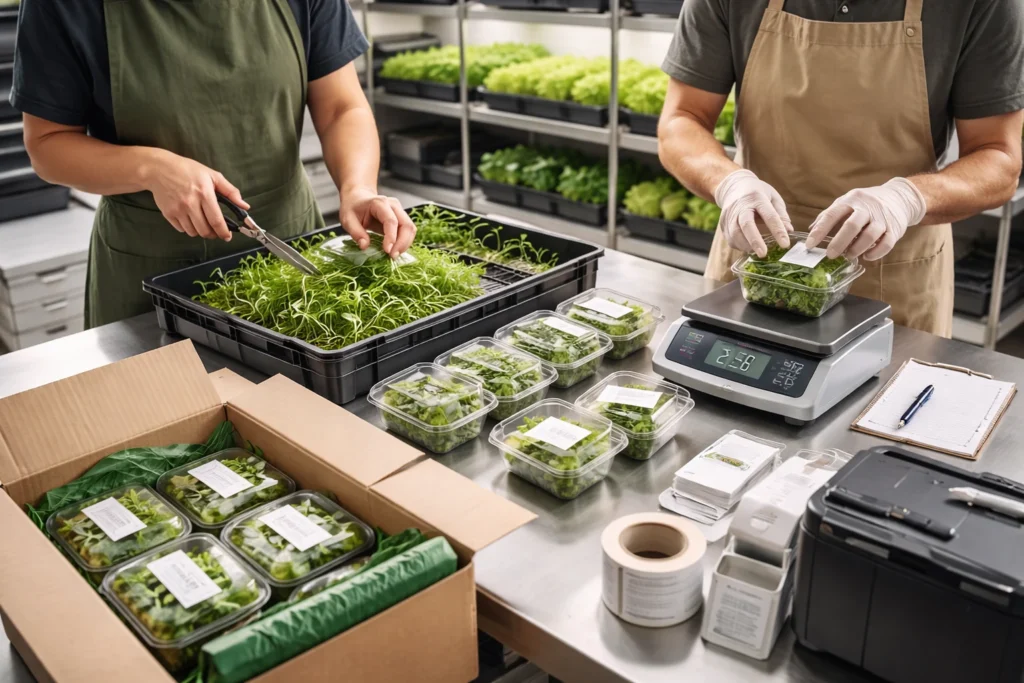
Zone E: Harvest + Pack (Treat this like a mini factory)
Harvest is where you want zero hunting for tools.
Include:
- sharp knives/scissors
- food-safe cutting boards
- scales
- clamshells/bags
- labels
- wipes/sanitizer
- bins for finished product
- a cooler/fridge nearby if you have it
High-profit habit:
Place packaging supplies on both sides of the table if two people work together, so each person can grab what they need without crossing.
Zone F: Waste Exit (Remove dirt fast)
A lot of farms get messy because waste “parks” inside.
Better approach:
- Use a rolling cart or bin
- dump waste quickly outside (garage door, back door, etc.)
- Return trays to the wash station immediately
This reduces pests, smell, and clutter.
Your Secret Weapon: Rolling Carts and “Batch Movement”
One of the easiest ways to speed up your farm (without buying expensive machines) is batch movement.
Instead of carrying 1–2 trays at a time:
- load 6–12 trays on a rolling cart
- move them in one trip
Use carts for:
- moving planted trays to racks
- moving harvest trays to the harvest table
- moving dirty trays back to the wash zone
- moving waste to disposal
This cuts steps drastically and protects your back.
Efficiency is Profit: Why Saving 5 Minutes/Day Adds Up
Andy mentions something that sounds small but is huge:
If we can save five minutes every day, it adds up fast in labor.
Let’s make that real.
If you save 5 minutes/day:
- That’s ~35 minutes/week
- ~2.5 hours/month
- ~30 hours/year
Now imagine you save 20 minutes/day through a better layout:
- that’s ~2.3 hours/week
- ~10 hours/month
- ~120 hours/year
That’s three full work weeks you just got back.
And if you pay a helper (or value your own time), that’s real money.
Efficiency isn’t a “nice bonus.” It’s the difference between:
- feeling overwhelmed
- and running a clean, repeatable system that can scale
Common Workflow Mistakes That Kill Scaling
Mistake 1: Mixing Dirty and Clean Zones
If dirty trays pass through your harvest/pack area, your farm will never feel clean.
Fix: create an obvious route for dirty items that avoids clean processing.
Mistake 2: Storing supplies “wherever they fit.”
Packaging in one corner, labels in a drawer, spray bottle somewhere else—this is death by a thousand steps.
Fix: all harvest supplies live on one rack next to the harvest table. All planting supplies live next to the planting.
Mistake 3: Overpacking racks and shrinking walk lanes
You feel productive because you “fit more racks,” but everything becomes slower.
Fix: widen lanes, improve access, and reduce awkward movement.
Mistake 4: No standard routine
If each planting day is different, mistakes rise and speed drops.
Fix: create a repeatable sequence and stick to it.
How to Improve Your Setup Over Time (Without Rebuilding Everything)
Andy also says they’re always thinking of new ways to improve—rotating tables, adjusting workflow, getting team feedback.
That’s exactly what you should do too.
Here’s a simple method:
Step 1: Track where you waste time
For one week, write down:
- Tasks that feel “annoying.”
- moments you walk back and forth
- areas where two people collide
- tools you keep searching for
Step 2: Fix the biggest “friction point”
Don’t change 10 things. Change one thing that saves time daily.
Examples:
- Move the packaging rack next to the harvest
- Add a second scale so workers don’t wait
- Add a small shelf for labels
- Reposition a table to reduce walking
Step 3: Ask your helpers (if you have them)
Your team will spot inefficiencies you’ve stopped noticing.
Ask one question:
“What’s the most annoying extra step we do every day?”
Fix that first.
A Simple Workflow Checklist You Can Copy
Daily flow checklist
- ✅ Wash + sanitize trays
- ✅ Dry trays
- ✅ Stage clean trays near planting
- ✅ Plant in an assembly line
- ✅ Move trays to racks via cart
- ✅ Harvest + pack with supplies within reach
- ✅ Remove waste immediately
- ✅ Return trays to the wash zone
“Layout” checklist
- ✅ Sink near dirty tray staging
- ✅ Drying area next to sink
- ✅ Clean tray storage next to planting
- ✅ Planting table close to rack entry
- ✅ Harvest area close to packaging + cooler
- ✅ Waste route avoids clean areas
- ✅ Walk lanes wide enough for carrying trays
- ✅ Supplies stored at point of use
What a 6-Figure Workflow Feels Like (The Real Goal)
A six-figure microgreens setup doesn’t feel like a constant hustle.
It feels like:
- walking fewer steps
- cleaner surfaces
- faster planting
- smoother harvest days
- less “Where is that thing?”
- fewer mistakes
- predictable output
That’s why workflow comes first.
You can start in a basement and still design a professional system if you:
- Follow the tray journey
- Create a circular flow
- store tools at the point of use
- keep improving one small friction point at a time
And when you get to the point of hiring help, your farm won’t collapse into chaos—because the system is already designed for movement.
Final Takeaway
If you only remember one thing, make it this:
Build your farm around the path a tray takes.
Every improvement you make should reduce steps, reduce confusion, and reduce wasted movement.
Because microgreens are not just about growing.
It’s about producing—efficiently, cleanly, and consistently.
If you want, tell me your space type (basement/room/garage) and the rough size, and I’ll map a workflow layout for it (zones + suggested placement + “tray journey” path) in a simple, easy-to-follow plan.