
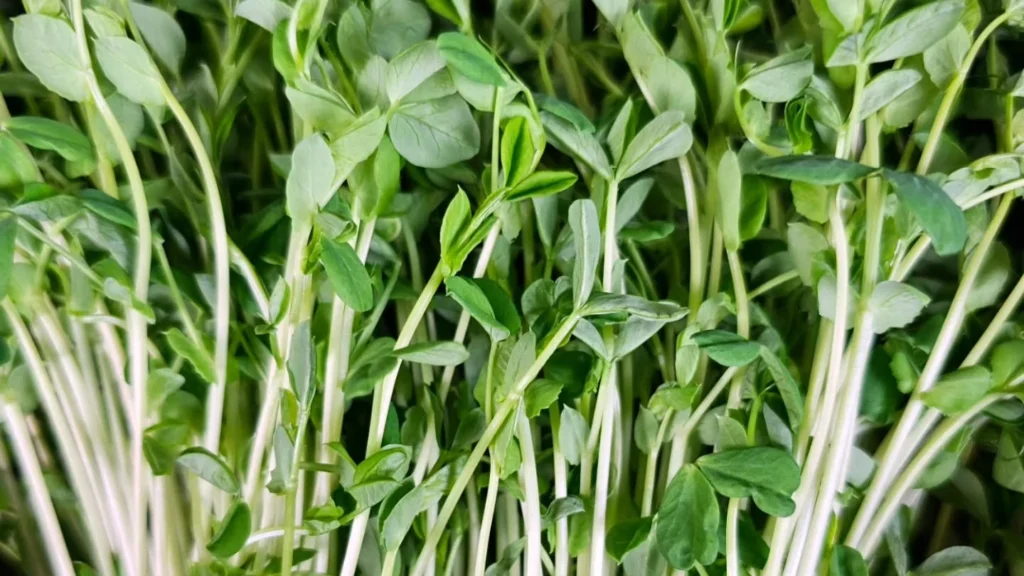
Pea microgreens are hands-down one of the easiest and most rewarding crops you can grow right at home. They’re fast, flavorful, and packed with that fresh garden crunch everyone loves.
These tiny greens come with bold tendrils, sweet flavor, and a harvest that’s so full it practically overflows from the tray. In just 10 days, you can go from seed to plate with minimal effort and no messy soil needed.
All you need is a few basic supplies, a little water, and a shelf with light. That’s it. If you’re after fresh food, high yield, and a whole lot of satisfaction, this is the grow project for you 🌱✨💚
Growing Trays
Growing trays are the backbone of any microgreens setup. Without them, there’s no structure to hold seeds, water, or medium. The most widely used tray size in the microgreens industry is the 10×20 tray, also known as a 1020 tray, which refers to its dimensions in inches. This size is standardized, allowing for consistency in seeding, watering, and harvesting.
There are typically three types of trays used together or in different combinations, depending on the growing method:
Trays Without Holes
These trays are completely solid at the base. They’re used to catch water when watering from below (a method known as bottom watering) or placed on top of the growing tray during germination to apply weight. Mandi, a microgreens grower, uses two no-hole trays—one on the bottom to hold water and one on the top to carry a 15-pound paver that helps press down the seeds during early germination. The top tray keeps light out and applies even pressure across the seed surface to help with uniform sprouting.
Mesh Trays
These are trays with a grated or open-weave bottom that allows for maximum airflow and root penetration. They’re primarily used in hydroponic growing setups where no soil or medium is used. In the speckled pea grow demonstration, a mesh tray is used as the primary growing surface. The roots are allowed to grow through the mesh into the bottom tray, where water and nutrients are delivered directly to them. This setup is effective for large-seeded crops like peas, which have strong root systems capable of anchoring themselves without a medium.
Tray Stacking
In the no-medium approach used by Mandi, three trays are stacked in a specific order:
- Bottom tray: no holes, used for bottom watering
- Middle tray: mesh, where seeds are placed directly
- Top tray: no holes, used to apply weight
This three-tray system is ideal for peas and other microgreens with robust roots. It supports healthy germination and simplifies the cleanup process after harvest.
Growing Medium (Optional, Depending on Method)
A growing medium provides support and moisture retention for germinating seeds. However, not all microgreens require it. The decision to use a medium depends on the type of crop, available equipment, and personal preference.
Soil-Based Medium
For beginners, using a light, well-draining soil or seed-starting mix can buffer against overwatering andprovides a forgiving environment for a wide variety of microgreens. Soil also adds trace nutrients that can be beneficial during the early growth stages. When using soil, it’s placed in a tray with holes, and a second tray beneath it catches excess water.
Hydroponic or No-Medium Approach
Some microgreens thrive without any soil at all. Speckled pea microgreens, for example, grow so aggressively that their root systems can support themselves without a substrate. In the setup demonstrated by Mandi, pea seeds were placed directly onto a mesh tray without any growing medium. The seeds were misted twice daily during the germination stage and then bottom-watered once they were exposed to light.
The root structure of pea microgreens is so strong that it eventually lifts the tray from the bottom tray as roots expand. This no-medium method reduces cost, simplifies post-harvest cleanup, and makes the system more sustainable.
Seeds
Choosing the right seeds is crucial when growing microgreens. Not all seeds are created equal, and the characteristics of each variety will affect the soaking time, germination rate, harvest window, and final taste.
Seed Quality Matters
Always use high-quality, untreated, and preferably organic seeds for microgreens. These seeds are typically not treated with fungicides or other chemicals that are common in seeds meant for field crops. Microgreens are consumed within 7 to 14 days of germination, so ensuring seed purity is critical.
Seed Quantity
The amount of seed used per tray varies depending on the crop. For speckled peas, which are larger than many other microgreen seeds, the optimal amount per standard 1020 tray is 250 grams. This specific amount was determined through hands-on trials and gave the best germination and harvest yield in Mandi’s system.
Pre-Soaking Seeds
Pre-soaking is a key step for many large-seeded microgreens. It softens the seed coat, speeds up germination, and prevents uneven sprouting. For pea seeds, soaking times can range from 4 to 12 hours, depending on conditions. In one example, a grower tested 4.5 hours and 12 hours. The 12-hour soak proved to be the most effective, leading to even germination and strong early growth.
After soaking, seeds should be thoroughly rinsed and drained to avoid mold and bacterial buildup. They are then either spread directly onto the medium or mesh tray and misted before starting the germination phase.
Watering Equipment
Watering is a critical factor in microgreens production. Too much water encourages mold and root rot; too little, and you risk poor germination or stunted growth. That’s why having the right watering tools is non-negotiable for success.
Misting Bottles (Sprayers)
During the germination phase, microgreens benefit most from gentle surface misting. This is especially important when no medium is used, as seen in the speckled pea growing method. A light mist ensures that seeds stay moist without becoming waterlogged. Mandi uses a small spray bottle filled with regular tap water to mist seeds lightly twice a day—once in the morning and once at night—during the first few days of germination.
Bottom Watering Systems
Once the seeds sprout and begin root development (typically around day 4 for peas), watering transitions from misting to bottom watering. This technique helps prevent mold and damping-off disease by keeping the foliage dry. In the pea grow example, the mesh tray with growing microgreens is placed inside a solid tray with no holes. A nutrient solution is poured into the bottom tray, allowing the roots to soak up moisture as needed.
This method is extremely effective for crops like peas, which develop long, vigorous root systems that drink heavily. It also encourages the roots to grow downward, leading to stronger plants overall.
Watering Frequency
Post-germination, watering is typically done twice a day—once in the morning and once in the evening. This consistent routine maintains even moisture without oversaturating the roots.
Lighting
Light is essential for microgreens to develop chlorophyll, grow upright, and achieve their full nutritional potential. Lack of light leads to pale, leggy, and weak greens, which are less desirable both visually and nutritionally.
Lighting During Germination
During the germination stage, light is intentionally blocked. Seeds are kept in darkness using a blackout dome or simply by stacking a solid tray on top. In Mandi’s approach, a second no-hole tray is placed directly on the seeds with a 15-pound paver added on top to simulate soil pressure and keep light out. This blackout period usually lasts 3 to 4 days, depending on the variety.
Post-Germination Lighting
Once the seeds sprout (in the case of peas, around day 4), the blackout tray is removed, and the growing tray is placed under lights immediately. Speckled pea microgreens are not put back into blackout because they continue to grow tall and strong even without that stress period.
Light Type and Duration
Full-spectrum grow lights are recommended to provide the correct wavelengths needed for photosynthesis. LED grow lights are the most efficient option today because they emit low heat and consume minimal electricity. For ideal growth, microgreens should receive around 12 to 16 hours of light daily.
Placement
Lighting should be placed a few inches above the canopy to prevent plants from stretching and becoming leggy. As the greens grow taller, the lights can be adjusted upward. In tight setups, shelving units with built-in LEDs are often used to maximize space.
Weighting Tools
Applying weight to microgreens trays during germination may seem counterintuitive, but it plays a critical role in seed-to-seed contact, even germination, and stronger plant growth.
Purpose of Weighting
When seeds are freshly sown, they require even pressure to simulate the resistance they would normally face in soil. This improves root anchoring and encourages uniform sprouting. Without sufficient contact, some seeds may dry out or fail to sprout.
Materials Used
In Mandi’s setup, a 15-pound paver stone is placed inside the top no-hole tray to apply consistent weight across the entire seed surface. This helps ensure that all seeds push against the resistance evenly, leading to uniform growth. Other growers may use bricks, dumbbells, or other heavy, flat items.
Duration of Weighting
For speckled peas, weight is applied during the entire blackout period, which lasts about four days. After that, the weight is removed, and the tray is exposed to light. Notably, the speckled pea root structure becomes so robust that it can even begin to lift the growing tray out of the bottom tray as roots expand—an indication that the plant’s structure has benefited from proper initial pressure.
🌿 Recommended Microgreens Supplies |
Nutrient Solutions (Optional)
While microgreens generally don’t need added nutrients due to their short growth cycle, certain crops like peas can benefit from mild supplementation—especially in no-medium, hydroponic-style setups.
Ocean Solution Nutrient
In the speckled pea, a nutrient mixture called Ocean Solution is used after the germination phase. Starting on day 4, Mandi bottom-waters the tray with a half-cup of Ocean Solution diluted in water. This ensures that as the roots mature and stretch into the water reservoir, they can absorb essential minerals.
Ocean Solution is a type of ocean-derived mineral fertilizer containing trace elements that support plant metabolism, especially in hydroponic systems lacking soil-based nutrients. While the exact N-P-K ratio isn’t specified, it is considered gentle enough for microgreens and contributes to vibrant growth and taste.
Frequency and Caution
Nutrient solution is applied twice a day during bottom watering, once in the morning and once at night. It’s important not to overdo it, as microgreens are harvested young and can be sensitive to over-fertilization. For most growers, nutrients are optional, especially if a growing medium like compost or organic soil is used. However, in hydroponic systems, this light supplementation can enhance yield and flavor.
Harvesting Tools
A clean, sharp harvest is crucial to maintaining the integrity and appearance of microgreens. Using the right tools can dramatically affect how easy it is to cut, how clean the cuts are, and how long the greens stay fresh.
Knife Selection
A high-quality knife is the preferred harvesting tool. In the speckled pea grow demonstration, the grower uses a specialized knife praised for gliding smoothly through thick crop canopies. Pea microgreens, in particular, are more fibrous and tougher than delicate varieties like broccoli or radish, so a sturdy, sharp blade is essential.
The blade should be long enough to cut across a wide section of the tray and sharp enough to avoid tearing the stems, which can lead to quicker spoilage. Serrated knives are generally avoided for most microgreens because they can crush rather than slice.
Cutting Technique
The knife is balanced right above the surface of the tray to avoid cutting into the seeds or roots. This is particularly important with speckled peas since the seeds can become extremely hard. Biting into a stray seed could result in dental damage. Cutting just above the seed line ensures a clean harvest with minimal waste.
Harvesting in Batches
Microgreens like peas are easier to manage in sections. Holding a small bunch gently while slicing can help control the cut and keep the greens organized. Speckled peas, in particular, are known to group well during harvest, making them visually attractive and easy to package.
Weight Measurement
A digital scale is another important tool during harvest, especially for those selling commercially or tracking yields. In this example, the grower harvested 629 grams (1 pound 6.2 ounces) from a single 1020 tray—a very high yield by microgreens standards. Measuring the weight helps in planning future growth and pricing accurately for sale.
Clean-Up Equipment
Post-harvest hygiene is one of the most underestimated components of microgreens production. Residual organic matter in trays can foster mold, bacteria, and pests if not thoroughly cleaned.
Tray Cleaning
Because the speckled peagrowse does not require soil or a growing medium, cleanup becomes considerably easier. After harvest, what remains is a dense mat of roots clinging to the mesh tray. These root mats are often so firm that they can be peeled off in one piece after allowing them to dry for a few hours.
Scraping Tools
A flat-edged knife or scraper is recommended to loosen stubborn root mats. Simply sliding the blade across the bottom of the mesh tray can release the roots for easy disposal.
Disposal and Composting
Used root mats can be composted or even repurposed. Some growers feed them to chickens or livestock. In this case, the root mats were composted, contributing to a sustainable growth cycle.
Sanitization
Once debris is removed, trays should be disinfected with food-safe cleaning agents such as diluted hydrogen peroxide or vinegar. This step ensures that no pathogens or mold spores are transferred to the next growth cycle.
Environmental Control Tools
Consistent temperature, humidity, and airflow are essential for growing healthy, mold-free microgreens. While not always required for beginners, environmental controls become crucial as production scales.
Shelving with Lighting
In the pea grow setup, the trays are placed on multi-tiered shelving with built-in lights. This setup allows growers to expand vertically and optimize space in small grow rooms. Adjustable shelves help in maintaining the correct light distance as the plants grow.
Humidity and Temperature Monitoring
While exact figures weren’t mentioned, peas generally thrive at temperatures between 65–75°F (18–24°C). Humidity should be kept around 40–60%, especially once the canopy is dense, to avoid fungal issues. A basic hygrometer and thermometer combo can help monitor these conditions.
Airflow and Ventilation
Although not explicitly shown, airflow is essential, particularly once the tray is uncovered and exposed to light. Good airflow prevents stagnant, humid conditions, which can encourage mold. Small fans are often used to circulate air gently across the trays.