
Fresh greens right from your kitchen counter? It’s easier than you think. Growing kale microgreens indoors is one of the simplest ways to add powerful nutrition to your meals without needing a garden or fancy tools.
These tiny greens are packed with vitamins and come with a satisfying crunch that makes everything from omelets to sandwiches taste better. You don’t need much space or time.
Just a small tray, a bit of light, and a few days of care can give you a harvest that’s full of color, flavor, and life. The best part is they’re ready in as little as 10 to 14 days. Let’s get those greens growing 🌱💚✨
Nutritional Value of Kale Microgreens
Kale microgreens are considered a superfood due to their high concentration of essential nutrients. Studies indicate that microgreens can contain up to five times more nutrients per gram than their mature counterparts. This includes elevated levels of vitamins C, E, K, and beta-carotene. Additionally, they contain polyphenols, which have been linked to reduced inflammation and protection against chronic diseases.
According to USDA and university-led research, kale microgreens are especially rich in:
- Vitamin K, which is vital for blood clotting and bone health
- Vitamin C is an immune-boosting antioxidant that also supports skin and tissue repair
- Lutein and zeaxanthin, which support eye health
- Sulforaphane, a compound known for its cancer-fighting properties
When kale is harvested at the microgreen stage, the plant has not yet expended energy into developing structural cell walls, allowing these nutrients to remain concentrated in the young shoots. For families looking to boost their nutrient intake without relying on supplements or large quantities of raw vegetables, incorporating kale microgreens can be a simple but powerful dietary upgrade.
Children also respond positively to the taste and texture. In a home setup where kids help with planting and harvesting, microgreens often become an easy way to get kids to eat their greens—sometimes directly from the tray.
🌿 Recommended Microgreens Supplies |
What You Need to Grow Kale Microgreens Indoors
A. Seeds
For kale microgreens, it’s essential to use untreated seeds labeled specifically for sprouting or microgreen use. These seeds are typically free from chemical coatings and selected for fast germination. The variety used in the home growing example was “sprouting kale,” known for its mild flavor and tender leaf texture. It’s also one of the few microgreens that can produce multiple harvests from the same planting if handled carefully.
B. Growing Medium
The medium you choose plays a critical role in both the health of the plants and the cleanliness of the environment. A highly recommended choice is coconut coir, which is a fibrous byproduct of coconut husks. This material is sterile, lightweight, and retains moisture effectively. One of its major advantages is its resistance to fungal contamination, making it ideal for indoor use where airflow may be limited.
To use coconut coir, it’s hydrated using warm water. Within minutes, it expands from a compact brick to a loose, soil-like texture. This transformation is not only efficient but also visually engaging, especially for children participating in the planting process.
Gardeners are advised not to use compost or outdoor soil indoors for microgreens due to the risk of introducing mold spores or pests. A seed-starting mix is also acceptable, provided it is sterile and fine-textured to support seedling development.
C. Trays & Containers
Durability and drainage are key when selecting trays for microgreens. The standard used in indoor setups is a 10×20 tray paired with smaller 10×10 slotted trays that have holes for drainage. The smaller tray nests inside the larger one, which holds water. This setup allows for bottom watering, reducing surface moisture that often leads to mold or fungus.
Some growers prefer using products from Bootstrap Farmer, a supplier known for producing heavy-duty growing trays. These trays do not crack easily and are more sustainable for repeated use compared to cheaper alternatives that often break after one or two cycles.
D. Lighting
Microgreens need adequate light to develop strong stems and vibrant green leaves. If a sunny south-facing window is unavailable, using grow lights becomes essential. A good example is the Burpee desktop grow light, which is compact and effective for small-scale growing.
Microgreens typically need 12 to 16 hours of light per day, mimicking a full day of sunlight. Adjusting the grow light to sit just above the microgreens helps prevent the seedlings from becoming leggy or pale due to insufficient light exposure. A timer can be used for consistency, but manual switching is also effective if done daily.
E. Watering Tools
Maintaining proper moisture is crucial, especially in the early stages. In the first few days before sprouting, a fine mist spray bottle should be used to keep the top layer of soil moist. Once the seeds germinate, watering should transition to bottom watering only. This method involves lifting the slotted tray and pouring water into the base tray, allowing the roots to wick up moisture.
An optional but recommended item is a small fan placed near the growing area. Air circulation helps prevent damping-off disease and other fungal problems by reducing humidity around the leaves and stems.
Step-by-Step Process
Step 1: Prepare Coconut Coir
Begin by placing a coir brick into a large bucket or bowl. Pour warm water over it to accelerate the breakdown process. Within two minutes, the brick will expand significantly and break into fluffy soil-like fibers. This transformation is not just functional but also adds an engaging, hands-on element to the process.
Step 2: Fill Trays
Once the coconut coir is hydrated, it should be spread evenly into the slotted 10×10 trays. The goal is to create a level, uniform surface to facilitate even seed distribution and ease of harvest later. Uneven surfaces can cause inconsistent growth and complicate the cutting process when it’s time to harvest.
Step 3: Sow the Seeds
The kale seeds should be sown densely, almost forming a solid layer on top of the soil. This density is key to producing a lush mat of greens suitable for cutting. Children can easily assist in this step by using a pinch-and-scatter motion. After seeding, a very light covering of coir is applied, just enough to press the seeds gently into the medium.
Step 4: Provide Light & Initial Mist
Once the seeds are covered, the tray is placed under a grow light. During the early stages, the seeds require consistent moisture but not soaking. Using a spray bottle, lightly mist the top surface once or twice a day until germination. This helps the seeds stay hydrated without encouraging rot.
Caring for Kale Microgreens
A. Watering Techniques
After germination, moisture should be maintained through bottom watering to keep the foliage dry. This reduces the risk of mold and mildew, especially in low-airflow indoor settings. Watering every 2–3 days is typically sufficient during early growth, though frequency may increase as the greens mature.
The top surface should remain dry after sprouting. A mist bottle is used only during germination. Once the microgreens are growing, continue watering from the base tray only. This method ensures that roots stay hydrated while the stems and leaves remain dry and firm.
B. Temperature & Humidity
Kale microgreens prefer a temperature range of 65–75°F (18–24°C) for optimal growth. Excessive humidity can encourage fungal growth, especially in still indoor air. Placing a small fan near the trays can improve air circulation and help regulate temperature and moisture.
Avoid placing trays in direct airflow from vents or near heaters, as this may dry out the medium too quickly or cause uneven growth.
C. Preventing Common Issues
Mold and damping-off disease are the most common threats to microgreens. To avoid these problems:
- Use sterile, clean soil media such as coconut coir
- Keep the growing environment clean
- Avoid overwatering
- Ensure good airflow around the trays
- Mist only during the pre-germination phase
- Level the soil properly to prevent uneven moisture accumulation
With these preventive measures, kale microgreens can thrive in almost any indoor environment with very low risk of disease.
Harvesting Kale Microgreens
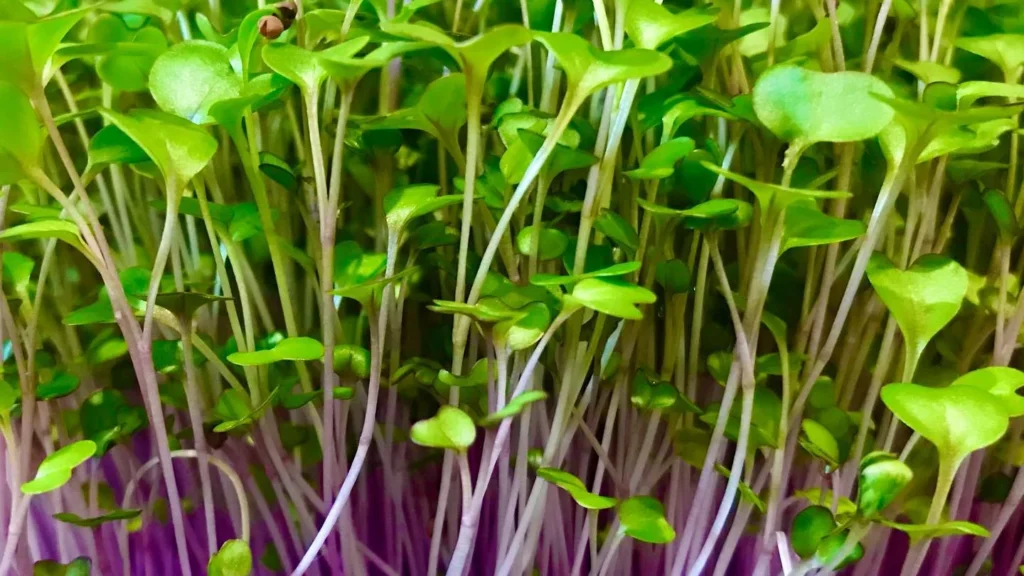
Kale microgreens are typically ready to harvest 10 to 14 days after sowing. The ideal time to harvest is just after the cotyledons (the first set of leaves) have fully opened and, in some cases, when the first set of true leaves is beginning to emerge. At this point, the plant contains maximum nutrients and has not yet developed fibrous stems or bitterness.
To determine readiness:
- Check for height: Kale microgreens usually reach 2 to 3 inches tall when ready.
- Look for fullness: A dense, vibrant green canopy indicates they are healthy and mature.
- Gently tug one shoot to ensure root development is strong but still easy to pull.
Use a sharp, sanitized knife or kitchen scissors to harvest. Cut just above the soil line, avoiding pulling up roots or soil, which can lead to contamination. Keeping the medium level during planting helps make this process smooth and efficient.
It’s best to harvest in the morning when the leaves are cool and hydrated, but if growing indoors, any time of day can work as long as the greens are not dry or wilted.
Storing Kale Microgreens
Freshness and shelf life are key when storing microgreens, especially given their delicate nature. Kale microgreens are best consumed within 5 to 7 days after harvest for peak flavor and nutrition, though with proper storage, they can last up to 10 days.
Here’s how to store them effectively:
1. Do not wash before storing:
Washing introduces moisture that accelerates spoilage. Instead, store them dry and only rinse right before using.
2. Use airtight containers:
A BPA-free plastic or glass container lined with a paper towel works well. The towel absorbs excess moisture, which helps preserve texture and prevents mold growth.
3. Refrigeration is essential:
Store the container in the vegetable crisper drawer of the refrigerator at about 35–40°F (1.5–4.5°C). This keeps the greens cool and prevents wilting.
If you notice any yellowing or moisture accumulation, replace the paper towel and remove any spoiled greens promptly to protect the rest of the batch.
Reusing Trays and Medium
While it might seem efficient to reuse your tray setup immediately, it’s important to clean and reset your growing system properly between harvests to ensure continued success and avoid disease buildup.
1. Reusing Coconut Coir:
Technically, coconut coir can be reused, but it’s not always advisable for microgreens. After one growth cycle, coir may have leftover organic matter and root debris that increases the risk of fungal growth. If you plan to reuse it:
- Sterilize the coir by baking it or using a hydrogen peroxide rinse.
- Remove all root matter thoroughly.
However, for the best results and to avoid microbial contamination, it’s recommended to start with fresh coir for each new tray.
2. Cleaning the Trays:
Trays should be thoroughly cleaned with hot, soapy water and then sanitized using a 1:10 bleach solution or food-safe hydrogen peroxide spray. Let them air-dry completely before adding new soil.
Reusing trays without cleaning is one of the primary causes of mold and poor germination in second or third batches, especially in an indoor setup where environmental conditions are tightly controlled.
Creative Ways to Use Kale Microgreens
Kale microgreens are remarkably versatile in the kitchen. Their tender texture and mild, slightly peppery flavor make them suitable for both raw and lightly cooked dishes. Here are several delicious and practical ways to enjoy them:
1. Omelets and Scrambled Eggs:
Add a handful of freshly harvested kale microgreens to eggs after cooking for a nutrient boost. This was one of the motivations behind the indoor setup in the home example—making it easier to grab fresh greens for breakfast without braving cold weather.
2. Smoothies:
Because kale microgreens are less bitter than mature kale, they blend seamlessly into fruit smoothies. They deliver the same chlorophyll and antioxidant content but with a milder flavor.
3. Sandwiches and Wraps:
Use them as a fresh, crunchy layer in wraps, sandwiches, or even burgers. They add both texture and a burst of vitamins.
4. Salads and Grain Bowls:
Toss them into salads as a topping or combine with other greens. They pair well with quinoa, lentils, and other hearty bases.
5. Garnish and Culinary Presentation:
Kale microgreens elevate the visual appeal of soups, roasted vegetables, and plated dishes, making them a favorite among home chefs and restaurants alike.
Notably, children often enjoy snacking on microgreens straight from the tray, especially when involved in the growing process. This makes them not only a health food but also an educational tool for encouraging plant-based eating in households.
Tips for Success and Troubleshooting Common Issues
While growing kale microgreens is a relatively simple process, there are several key practices that ensure consistent success, as well as common pitfalls to be aware of. These tips and troubleshooting techniques will help you produce healthy, lush greens in every batch.
A. Lighting Matters
Microgreens require a strong, consistent light source to grow upright and produce high chlorophyll content. Insufficient light causes leggy, pale shoots.
- Ideal Setup: Use a full-spectrum LED grow light, like the Burpee desktop grow light mentioned in the example. Keep the light just a few inches above the canopy and adjust it upward as the plants grow.
- Duration: Keep the lights on for 12–16 hours per day, mimicking a long summer day. A simple on/off routine each morning and night works fine, or you can automate with a timer.
B. Moisture Management
Proper watering is essential. Overwatering or watering from above can cause mold or rot, while underwatering leads to stunted growth.
- Watering Technique: After the seeds sprout, always water from below. Use a slotted tray over a solid one and pour water into the bottom tray so the roots wick it up.
- Initial Misting: Before germination, keep the surface moist using a gentle spray mister to maintain humidity without waterlogging.
- Frequency: Check daily, but you’ll typically only need to water every 2–3 days early on. As plants grow larger, their water needs increase.
C. Temperature and Air Circulation
- Ideal Temperature: Maintain indoor temperatures between 65–75°F (18–24°C). Kale tolerates cooler conditions but grows best with warmth.
- Airflow: Use a small fan near the grow area to improve air circulation. This helps prevent mold and encourages stronger stems.
D. Avoiding Mold and Fungal Issues
One of the most common concerns when growing microgreens indoors is mold. Here’s how to keep it at bay:
- Use clean seed-starting media such as coconut coir instead of compost or garden soil, which can introduce pathogens.
- Sterilize trays between uses to prevent disease carryover.
- Avoid overcrowding seeds to ensure airflow at the soil surface.
- Limit top watering after sprouting, as damp foliage increases fungal risk.
E. Dealing with Uneven Growth
If parts of your tray grow more slowly or appear thinner:
- Ensure the soil is level during setup. This allows seeds to germinate uniformly and makes harvesting easier.
- Distribute seeds evenly and densely. Kale microgreens should look almost like a green carpet once germinated.
✅ Quick Checklist for Growing Kale Microgreens:
- Use clean 10×20 trays with drainage slats.
- Rehydrate the coconut coir brick in warm water.
- Fill the tray with 1 inch of coir, level the surface.
- Broadcast seeds densely across the surface.
- Lightly cover with a thin layer of coir.
- Mist daily until germination, then water from below.
- Keep under 12–16 hours of grow light daily.
- Harvest in 10–14 days when greens are 2–3 inches tall.
📌 FAQs:
Q: Can I reuse the same soil for another batch?
It’s possible, but not recommended. Old soil may contain roots and microbes that encourage mold or stunted growth. Fresh coir is best.
Q: Do kale microgreens regrow after cutting?
Kale does not regrow like herbs. While some growers report small regrowth, yields are poor. For a fresh batch, reseed.
Q: Are microgreens safe for kids?
Absolutely. In fact, kids often enjoy helping grow and harvest them. Their small size and mild flavor make them kid-friendly.