
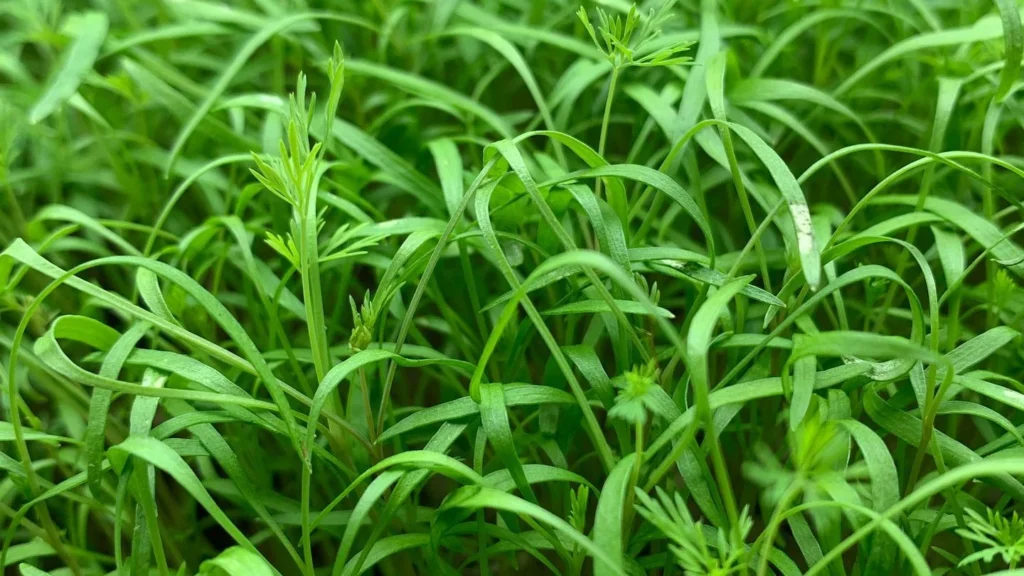
Dill is an aromatic herb known for its delicate, feathery leaves and refreshing flavor. Traditionally used in European and Asian cuisines, it adds a light, slightly tangy taste to fish, potatoes, sauces, and soups. While mature dill plants are commonly grown in gardens or hydroponic systems, dill microgreens offer a more concentrated flavor and a shorter growing time.
They are not only simple to cultivate at home but also highly nutritious, making them an excellent addition to a modern kitchen garden.
Why Grow Dill Microgreens
Dill microgreens are popular among home growers for several reasons. They require very little space compared to a full dill plant, which can reach up to three or four feet in height. Instead, microgreens can be ready for harvest in as little as two to three weeks. Growing them at home is cost-effective compared to purchasing small bundles of dill from stores. Beyond cost savings, there is the satisfaction of having a fresh, flavorful ingredient at arm’s length.
The flavor of dill microgreens is often described as stronger and more vibrant than that of the mature plant, yet it maintains a delicate texture that makes it easy to incorporate into recipes. Growing these greens at home also contributes to sustainable living, reducing reliance on long transportation chains and encouraging the concept of a “zero-mile diet” where food is harvested directly where it is consumed.
Nutritional and Health Benefits
Dill has long been valued for its therapeutic qualities. Ancient traditions used it for soothing digestive problems and calming the body. The name dill comes from the Old Norse word “dilla,” which means to lull, a nod to its traditional use in easing discomfort and helping with rest.
Like most microgreens, dill microgreens are not nutrient-dense. Studies on microgreens in general show they can contain four to forty times more vitamins and minerals compared to their mature counterparts. Dill is particularly rich in vitamin A, vitamin C, and several minerals such as calcium, magnesium, and iron. These nutrients are important for immune health, bone strength, and energy production. In addition, dill provides antioxidants that help reduce inflammation and support overall well-being.
Because dill microgreens are consumed fresh, their nutritional profile is preserved, offering an advantage over dried dill, which may lose potency over time. Regular consumption of dill microgreens can be a flavorful way to enhance the diet with vital nutrients while also supporting digestion and relaxation.
Methods of Growing Dill Microgreens
Tray-Based Method
One of the most accessible ways to grow dill microgreens is in trays using soil or coco coir. This method begins with preparing a shallow tray filled with about six cups of growing medium. Around two tablespoons of seeds, equal to roughly ten grams, are scattered across the surface. Seeds are lightly misted with water using a hand sprayer. Because dill seeds are lightweight, spraying from a distance first allows them to settle without being blown around.
To encourage germination, another tray is placed on top and weighted down with small bricks. This ensures even moisture and better root contact. Watering is done twice daily or as needed. Around the third day, small root tips, called radicles, start appearing. At this stage, dill seeds can sometimes develop mold if the medium is too wet, so some growers apply a diluted hydrogen peroxide spray as a preventative measure.
By the sixth day,y the seeds have germinated fully. Unlike many other microgreens, dill does not require a blackout period since it naturally grows tall and straight. Placing the tray directly under the grow lights is sufficient. Bottom watering begins at this point, often with nutrient-enriched water, though plain water is also effective. By the tenth day, the seedlings develop their first true leaves, and by the sixteenth day,y they are ready to harvest. A tray can yield around eighty-six to eighty-seven grams, which is considered a strong harvest for this light and feathery crop.
Automated Indoor Growing Method
For those who prefer less manual involvement, automated growing units make the process straightforward. The growing tray is half-filled with soil, and a tablespoon of dill seeds is evenly spread across the surface. A light cover of sifted soil is added and pressed gently to tuck the seeds in. The tray is then covered with a humidity dome with vents kept closed at first. After two days, the vents are slightly opened to allow fresh air circulation.
Inside the unit, watering is programmed to occur once every four days. An initial watering is given to start the process. Germination takes five to six days. Harvest can begin after three weeks, and the same crop can continue producing for up to six weeks. Because dill is feathery and light, some stems may droop over time. Removing the fallen stems encourages the rest of the plants to continue thriving. This method suits busy households since the system regulates watering and lighting automatically.
Hydroponic Kratky Method
For growers interested in hydroponics, dill can also be cultivated using the Kratky method. The process begins with sterilizing cocopeat, either by microwaving or pouring boiling water over it. The cocopeat is placed into a container with drainage holes, and dill seeds are sprinkled evenly and lightly covered. A weight is placed on to p, and the container is kept in darkness for germination.
By the seventh day, seedlings appear and are placed under grow lights. Bottom feeding with water starts immediately to maintain moisture. By day twelve, when true leaves develophalf-strengthth nutrient solution replaces water. At day seventeen, the second set of leaves emerges, allowing a switch to full-strength nutrients. The seedlings are transferred into net cups placed in jars covered with foil to prevent light from reaching the nutrient solution. As roots lengthen, the solution level is gradually lowered to create an air gap, ensuring proper oxygenation.
By day twenty-eight, the dill is moved into a larger six-liter container to support root growth. At this stage, the plants can also be exposed to direct sunlight. Mature hydroponic dill can reach three to four feet in height and provide continuous harvests by cutting leaves from the top and preventing flowers from forming. This method is more involved than tray growing,g but producefull-sizeded dill plants rather than microgreens alone.
🌿 Recommended Microgreens Supplies |
Growth Timeline Comparison
Tray-based microgreens are typically ready for harvest around sixteen days after sowing. Automated units take a little longer, with the first harvest possible at around three weeks, but the crop remains productive for several additional weeks. Hydroponic dill requires patience, with about one month needed to establish strong plants, but the system then supports continuous harvests for a much longer period.
Harvesting and Storing
Harvesting dill microgreens is simple. Use a sharp knife or scissors to cut close to the base of the stems. Keeping the cuttings aligned makes them easier to package or store neatly. Fresh dill microgreens can be stored in the refrigerator for up to a week. They can also be dried and ground into a spice, which extends their use beyond the fresh stage.
Culinary Uses and Recipe
Dill microgreens have a wide range of culinary uses. They pair exceptionally well with salmon, tuna, and potatoes. They can also be sprinkled over scrambled eggs, blended into sour cream for a dip, or added to soups and stews. Because dill has a delicate flavor, it should be added at the end of the cooking process to preserve its aroma.
Simple Dill Microgreen and Lemon Cream Sauce for Salmon
Ingredients:
• One cup fresh dill microgreens
• Two tablespoons lemon juice
• Half a cup of sour cream
• One small garlic clove, finely grated
• Salt and black pepper to taste
Method:
Mix sour cream, lemon juice, and garlic in a bowl until smooth. Fold in the dill microgreens and season with salt and pepper. Spoon over grilled salmon or roasted potatoes. The freshness of the dill and lemon enhances the dish while keeping the flavors light and aromatic.
Challenges and Tips
Dill is prone to mold during germination if the medium is kept too wet. Good air circulation and proper watering help reduce this risk. Overcrowding should also be avoided, as dense seed distribution can restrict growth. In hydroponic systems, containers must be shielded from light to prevent algae formation, which can hinder root development. Regular monitoring of moisture and nutrient levels ensures healthy growth throughout the cycle.