
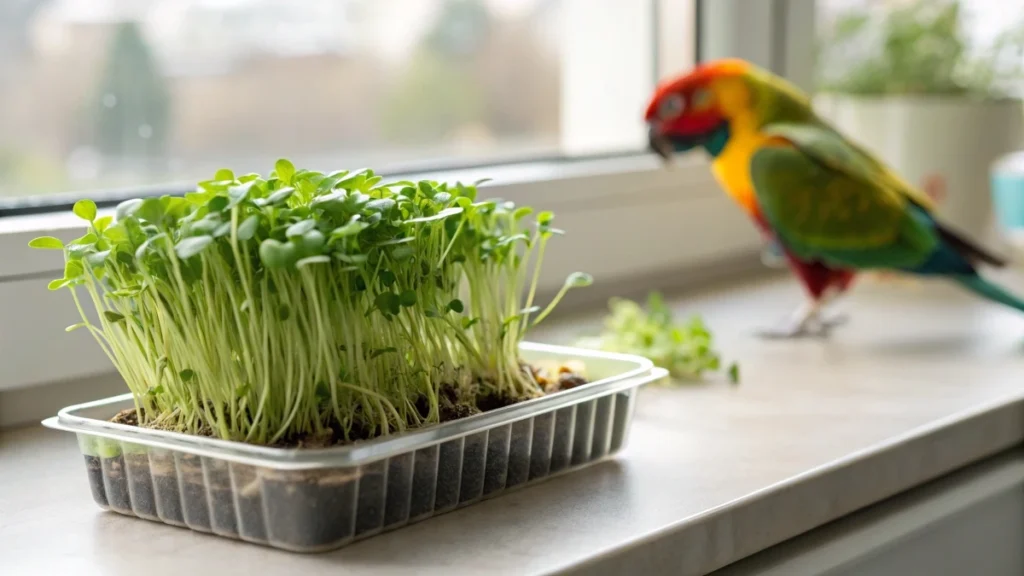
Microgreens are one of the easiest and healthiest foods you can add to your pet bird’s diet. These tiny greens are harvested just days after sprouting and are packed with nutrients, often containing up to 40 percent more vitamins and minerals than mature plants.
For birds, microgreens provide a fresh source of calcium, magnesium, potassium, and trace minerals that support strong bones, vibrant feathers, and overall health. Growing them at home is simple, inexpensive, and chemical-free, making it a safe alternative to store-bought produce.
Whether you choose chia, sunflower, or leafy greens, microgreens can be ready to harvest in just a week. In this guide, you’ll learn step-by-step how to grow nutritious microgreens for your pet birds.
Nutritional benefits of microgreens for pet birds
Microgreens sit at a sweet spot in the plant life cycle where nutrients are concentrated in tender stems and first leaves. Growers commonly report that microgreens can be about 40 percent more nutrient-dense than the mature versions of the same plants. That higher density matters for small animals where every bite counts.
Chia microgreens stand out for calcium. Calcium supports bone strength, egg shell quality, nerve function, and feather growth. Offering a living source of calcium alongside a balanced diet is a simple way to cover an essential need for parrots and other companion birds.
Sunflower microgreens bring a different mineral profile. Home growers who regularly raise black oil sunflower shoots highlight meaningful amounts of magnesium, potassium, zinc, and copper. Those minerals support muscle function, fluid balance, enzyme systems, and immune health. Because these shoots are harvested fresh, the minerals have not sat for weeks in storage.
Freshness is not just about taste. Produce grown for stores can be harvested long before you buy it and may be treated during distribution, even when labeled organic. Raising greens on a windowsill removes that uncertainty and lets you serve living plants at peak vitality. Harvest timing also matters. Many keepers find day seven to be a sweet spot for nutrition and texture, since the seedlings have pushed energy into the first leaves but have not become fibrous.
Best microgreens for pet birds
Chia is one of the easiest choices for beginners. It does not require soil, and the seeds gel when misted, which helps them anchor on a paper towel liner. The flavor is mild, and most birds accept it quickly.
Black oil sunflower is another favorite. It is inexpensive in bulk and produces sturdy shoots with a nutty and buttery taste. These are satisfying to chew and easy to handle during harvest.
You can broaden variety with brassica greens such as broccoli, cauliflower, and arugula. Bird keepers also use leafy staples like collards, mustard, and turnip greens in seed blends. Variety prevents boredom and spreads nutrient coverage over the week.
Use common sense safety. If a plant is not appropriate in its mature form, do not feed it as a microgreen. Avoid nightshade crops such as peppers and potatoes because their stems are not suitable for eating. When possible, choose seeds that are tested for pathogens, especially if you plan to grow frequently. That extra step reduces the risk of issues like Salmonella or E. coli in warm, moist trays.
Step-by-step growing guide
Materials needed
A shallow tray with drainage holes and a matching solid base tray
A loose-fitting cover, such as a second tray or a tea towel, that still allows a bit of airflow
Plain white kitchen paper for tiny seeds like chia
Seed starting mix for larger seeds like black oil sunflower
A clean spray bottle for gentle misting
Seeds suited to microgreen use. Chia and black oil sunflower work very well. Many growers choose organic human-grade seed and look for pathogen-tested lots when available.
Planting process
For chia
- Fit a sheet of plain kitchen paper inside the perforated tray so seeds cannot fall through.
- Mist the paper until it is evenly damp.
- Sprinkle chia seeds in a thin, even layer. Use a spoon to spread any clumps.
- Mist again, so the seeds swell slightly and adhere to the paper. Chia absorbs a lot of water and does not need pre-soaking.
For black oil sunflower
- Fill a tray with seed starting mix and level the surface.
- Sow the seeds generously for a dense mat.
- Cover with a very light layer of mix and mist until the surface is evenly damp.
Blackout stage
Keep newly sown trays in the dark for about five days. A lid or inverted tray works as long as there is some ventilation. Darkness encourages the seedlings to grow upward in search of light, which gives you taller shoots that are easier to harvest. During this stage, mist twice daily so the surface stays moist but not waterlogged. With chia, you will see roots thread down through the holes. With sunflower you will see pale stems lift the seed hulls.
Light stage
Around day five, move the trays to a bright windowsill and remove the cover. Seedlings will shift from yellow to a healthy green within a day or two. Once roots are visible through the drainage holes, stop misting from above and switch to bottom watering. Pour a thin layer of water into the base tray so roots can draw moisture upward. Replace that water regularly so it stays fresh.
Harvesting
Chia microgreens are usually ready around day seven when the cotyledon leaves are open and green. Sunflower shoots typically reach harvest in seven to ten days and stand about one to three inches tall. Use clean scissors to cut just above the paper or soil surface. For sunflowers, remove any stubborn hulls before serving. If you need to store a portion, place the dry cut greens in a zip-top bag and refrigerate. Freshly cut portions offer the best texture and nutrient retention.
🌿 Recommended Microgreens Supplies |
Serving microgreens to birds
Start by mixing a small handful of chopped microgreens into the fresh chop you already serve. Many keepers add them to the morning mix, so birds encounter them when their appetite is highest. Chia’s mild taste makes it an easy first choice. Sunflower shoots bring a pleasant crunch that encourages foraging behavior. You can rotate greens through the week, so your bird meets different flavors and nutrients without overwhelming the bowl on any single day.
Microgreens are a supplement to a complete diet rather than a replacement for balanced pellets and appropriate seeds. They shine as a fresh component that boosts calcium, minerals, and phytonutrients. They also add enrichment. Let your bird pick directly from a small tray during supervised time for natural grazing, then switch back to cut portions for routine feeding. Many keepers enjoy eating a portion themselves, which is a simple way to model acceptance and reduce neophobia in cautious birds.
Cost and convenience
Store packages of microgreens often sell for about five dollars for three to five ounces. Growing at home brings that cost down dramatically. One example is a forty to fifty-pound bag of black oil sunflower seed at a hardware store that can run about twenty-five dollars. That single bag can supply trays for weeks and even months, especially when you harvest at the microgreen stage rather than growing to maturity.
Time investment stays low. Soil-grown mixes usually need one quick watering per day. Chia on a paper liner only needs misting during the first days, then bottom watering after roots drop. Most trays reach harvest in about seven days. You do not need a garden or special lights. A bright kitchen windowsill is enough, and the process is clean and simple indoors. The result is a steady supply of living greens that are fresh at the moment you serve them, without the uncertainty of produce that has traveled and sat in storage.
Common mistakes and tips
Overwatering
One of the most frequent problems new growers face is adding too much water. Microgreen trays need to stay moist, but they should not be soggy. Excess water creates a warm and damp environment where mold thrives. In the blackout stage, this risk is higher because there is less air circulation. A good rule is to mist so the surface feels damp, not dripping, and to switch to bottom watering once roots are established. This keeps the shoots hydrated while keeping the stems and leaves dry.
Using the wrong liners
When using kitchen paper as a liner for tiny seeds like chia, stick with plain white paper without dyes, prints, or scents. Decorative patterns or colored papers often contain additives that can leach into the growing surface. Birds are very sensitive to chemicals, and even small amounts of dye or fragrance could cause issues. A simple, unbleached sheet is the safest choice.
Ventilation during blackout
The blackout stage is important to stretch the stems, but complete closure without airflow can cause mold growth. If you are using a second tray as a lid, prop it slightly so air can move. Some growers use trays with small vent holes on the sides. The balance to aim for is darkness to encourage upward growth, but enough fresh air that moisture does not stagnate.
Safe seeds only
Using untreated and pathogen-tested seed is a precaution worth taking. Seeds sold for animal feed or bird seed mixes are often not cleaned for sprouting and can carry contaminants. Black oil sunflower sold as plain bird feed is a popular budget choice, but check the label carefully and avoid seeds that are treated or coated. For small seeds like chia, many bird keepers prefer to buy organic human-grade seed. These options reduce the chance of introducing bacteria such as Salmonella into your grow trays.
Harvest timing
Microgreens reach a peak window where they are most nutritious and tender. For most varieties, this is around day seven. Harvesting too early means the leaves may not have opened, and waiting too long makes the stems fibrous and less appealing. Consistency matters as well. Cutting and serving straight from the tray preserves vitamins and minerals that can degrade quickly once stored. If you must refrigerate, keep portions dry in a sealed bag and use within a few days.
Mold and troubleshooting
If you notice fuzzy growth, first check whether it is root hairs or mold. Root hairs cluster along the base of stems and look uniform, while mold grows irregularly and may smell. If mold appears, it often means the tray was too wet or lacked airflow. Improving ventilation, reducing misting, and sanitizing trays between plantings usually solves the issue for future batches.
General care
Keep trays in a spot with good light but not in direct, harsh sun that can dry them too quickly. Rotate trays if seedlings lean toward the light source. Replace the water in the base tray daily when bottom watering, so it stays fresh and does not develop algae. Wash scissors before harvesting to keep the cut portions clean. With these small habits, you reduce waste and ensure each tray produces healthy, safe greens for your bird.