
Learn how to grow sesame microgreens at home for fresh flavor and quick harvests. Start with raw, untoasted black or white seeds, rinse well, then sanitize with one tablespoon of vinegar.
Use three tablespoons per shallow tray or two tablespoons in a pint jar. Keep them dark at first, water every twelve hours, then green them near a bright window.
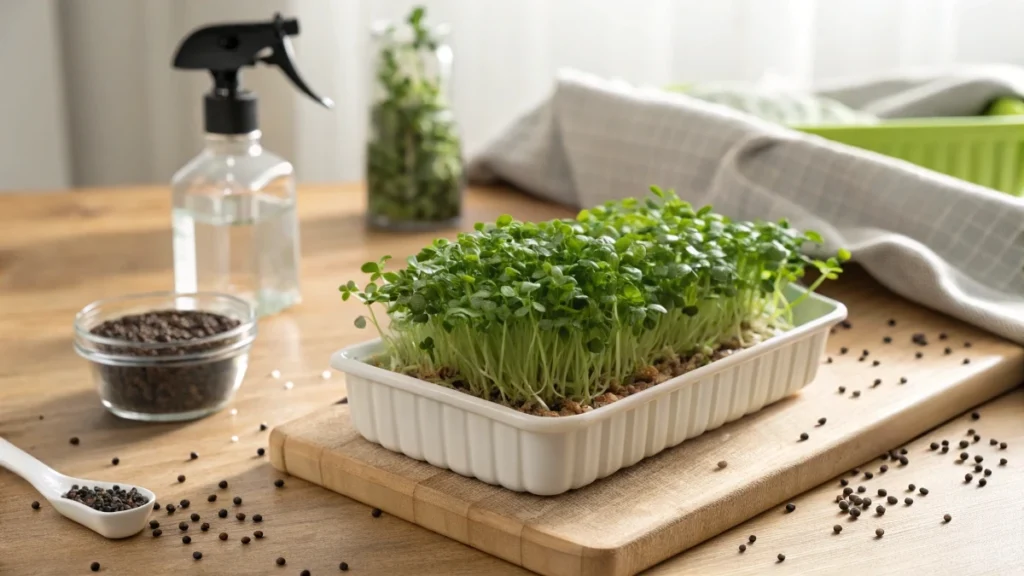
Sprouts are ready around day three at two and a half inches, while microgreens shine on days six to seven. Sesame greens offer a nutty taste and provide protein, calcium, potassium, and antioxidants. Black types taste bolder, white types milder.
Store harvest in an airtight container for one week. Explore easy recipes from salads to toast toppers and noodle bowls.
What sesame microgreens are and why grow them
Sesame microgreens are the tender green shoots that grow from raw sesame seeds during the first week of growth. They begin as pale sprouts while kept in the dark and then turn green when moved near a window with indirect sunlight. The flavor is gently nutty with a sweet edge when harvested on time. If you let them sit too long,g they can drift toward slight bitterness, which is why a clear timeline matters.
Freshness and variety at home
Raising your own sesame microgreens means you are not limited to a single store option. You can choose black or white sesame and harvest right when the flavor is at its best. Home growing also solves the winter gap. Even when the garden rests, a tray or a jar on the counter gives you a fresh harvest in about one week. The routine is simple. Rinse, keep moist with plenty of airflow, and follow a twice-daily rhythm so the seeds never dry out.
Safer handling and winter-friendly routine
Clean handling starts on day one. Rinse the seeds, then sanitize the batch by adding one tablespoon of vinegar to the rinse water. Give it about two minutes of contact time and then rinse again. This step helps you start with a clean seed surface while avoiding strong chemicals. From there, the routine is steady and predictable. Keep the seeds dark while they sprout, water every twelve hours, and move the tray to indirect light to green them up. You can repeat this cycle all winter without special equipment.
What you will learn in this guide
You will learn exactly which seeds to choose, how much to use for a jar or a tray, and how to set up the growing area so moisture, air, and light work in your favor. The steps include precise quantities such as three tablespoons per tray or two tablespoons in a pint jar, the sanitation rinse with one tablespoon of vinegar for about two minutes, and a timeline that shows when to expect germination and when to switch from darkness to indirect light.
🌿 Recommended Microgreens Supplies |
Seed choice and safety steps
Choose raw sesame seeds. Toasted seeds will not grow. Both black and white types work well. Black sesame tends to deliver a stronger, deeper taste, while white sesame is milder. If you want the most consistent results, start with seeds sold for planting or sprouting. Pantry seeds can work, yet quality can vary.
Raw, untoasted black or white sesame only
Look for raw seeds without any roasting. Heat destroys the ability to grow. Black and white seeds both produce healthy greens. If you enjoy a bolder sesame note, black seeds are a good choice. If you prefer a softer flavor, white seeds are a better fit.
Black has a stronger taste, and white is milder.
Flavor strength matters because it guides your recipe choices later. Black sesame greens pair well with richer dishes like noodle bowls and hearty grains. White sesame greens shine in light salads, sandwiches, and garnishes.
Rinse and sanitize with one tablespoon of vinegar for about two minutes, and rinse again.
Begin every batch with a cleaning workflow. First, rinse the seeds and stir them briefly to loosen any dust. For the second rinse, add one tablespoon of vinegar to the water and let the seeds sit in that solution for about two minutes. Drain the liquid and rinse once more. This quick routine helps you start clean while staying gentle on the seeds.
When a twelve-hour soak helps and when it is not needed
Sesame seed coats are thin. With a thorough cleaning rinse, they hold enough moisture to begin growing, so a long soak is not required. If your home is very dry or your seeds are older, a single twelve-hour soak can help even out moisture before you begin the twice-daily rinse and drain rhythm. If you choose to soak, drain completely after the twelve hours and proceed with the regular schedule.
Gear that actually works
You can grow sesame in a shallow tray or in a jar. Both paths work, and each has strengths. The tray makes it easy to turn sprouts into microgreens with even greening and tidy watering. The jar makes rinsing and draining quick and keeps the process compact.
Tray path shallow tray without drain, plus spray bottle, plus light cover
A shallow tray without drainage holes is enough for sesame as long as you avoid standing water. Use a spray bottle during the sprout phase to keep the surface evenly moist and prevent puddles. Add a simple cover that blocks light for the first few days. A cloth or any cover that excludes light will do. Once you move to the greening stage, place the tray near a window with indirect sunlight.
Jar path pint jar or one liter jar with mesh lid or mesh and rubber band
For sprouts, a jar is convenient. A pint-sized jar suits a small batch. A one-liter jar, which holds four cups to the rim, suits a larger batch. Fit the jar with a mesh or screen lid so you can fill it with water, swirl to hydrate every seed, and drain completely. If you do not have a screen lid, a piece of mesh secured with a rubber band works the same way. Rest the jar on its side between rinses so the seeds spread out and air can reach the entire surface.
Cool, ventilated spot for sprouting, then indirect window light for greening
During the first days, keep the setup in a cool area with good airflow and no direct light. Darkness supports quick sprouting and keeps the shoots pale. When you want microgreens, move the tray to a bright window with indirect light so chlorophyll develops and the greens take on a fresh color.
🌿 Recommended Microgreens Supplies |
Exact seed amounts and setup
Getting the quantities right keeps the canopy even and prevents clumping. Even coverage improves airflow and reduces the chance of soggy spots.
Tray uses about three tablespoons spread in one even layer
Measure about three tablespoons of sesame seeds for a standard shallow tray. After the sanitation rinse, spread the seeds so they form one even layer. Gaps lead to uneven moisture while piles trap water, so aim for a level blanket.
A pint jar uses two tablespoons of black sesame.
A pint jar holds about two tablespoons of black sesame comfortably. This amount allows room for expansion while maintaining good airflow. If you prefer white sesame, the same amount applies.
One liter jar uses three tablespoons.
A one-liter jar that fills to four cups at the rim can handle three tablespoons of sesame seeds. This is the upper end for good drainage and airflow. More seed than this can slow drying after each rinse.
Final prep rinse, sanitize for about two minutes with one tablespoon of vinegar, rinse again, then drain fully and cover to keep dark.
Follow the cleaning sequence before you begin. Rinse once and stir gently. Add one tablespoon of vinegar to the water for a two-minute sanitation step. Rinse once more. For the tray, spread the seeds evenly. For the jar, invert to drain until no water drips, then lay the jar on its side so the seeds are not stacked in a tight clump. Cover to keep out light and place the tray or jar in a cool spot with airflow. Start the twelve-hour rhythm of watering for the sprout phase, and you are on track for a harvest within the week.
Day-by-day growth timeline
Days zero to one in the dark
Right after the final rinse and setup, the clock starts. Keep the tray or jar covered to block light and place it in a cool area with steady airflow. Water every twelve hours. In a tray, that means a light mist to keep the surface evenly moist without puddles. In a jar, that means filling with clean water, swirling to wet every seed, and draining completely. By the end of day one, tiny white tails are usually visible. This is the first checkpoint that tells you moisture and airflow are in balance.
Day two momentum
Growth accelerates on the second day. In a jar, the mass often expands to about half the jar by the end of day two. On a tray, the carpet thickens, and roots begin to knit into a light mat. Maintain the same twelve-hour rhythm. Seeds should feel moist but not waterlogged. If you gently shake a jar and see beads of water clinging everywhere, give it a longer drain before setting it back on its side so the seeds spread and breathe.
Day three harvest is ready as sprouts.
By the end of day three, sesame sprouts typically reach about two and a half inches in length. Most seed coats have slipped off by now. They remain pale yellow because they have been kept away from light. Taste is at its sweetest and most delicate on this day. You can harvest now as sprouts or continue toward microgreens if you want green leaves and a slightly deeper flavor.
Days four through seven, the microgreens stage
Move the tray to a bright window with indirect sunlight. Light triggers chlorophyll, and the shoots begin to green within hours. Switch the watering pattern to once daily. Pour about four tablespoons of water into the tray from the side so that only the very tips of the roots are wet. The goal is a thin film of moisture at the base rather than a pool. Continue to avoid standing water. The best harvest window for sesame microgreens is day six to day seven. After day seven, the taste can lean slightly bitter, which is why a timely harvest matters for consistent flavor.
Visual and flavor cues to guide timing
Color shifts from pale to a fresh green once exposed to indirect light. Texture stays crisp when the moisture is correct. Aroma turns gently nutty as leaves open. If leaves look glossy or feel slippery, reduce water at the next cycle and improve drainage. If tips look dry before the next scheduled watering, increase the volume slightly or shorten the interval by a couple of hours in very dry homes.
Watering, drainage, and airflow that prevent problems
Sprout phase rhythm every ten to twelve hours
During the first three days, the routine is rinse and drain twice daily. For trays, use a fine mist to keep the surface evenly moist. For jars filled with water, swirl so every seed is hydrated, then drain until no more water drips. Rest the jar on its side between cycles so the seeds form a thin layer and air can move through the mass. Sesame naturally holds more surface water than larger beans, so thorough draining is essential. This rhythm prevents both dryness that stalls growth and excess moisture that encourages off smells.
Microgreens phase: precise watering once daily.
Once you shift to greening, switch from misting to a measured pour. About four tablespoons of water delivered from the side of the tray is enough to touch root tips without flooding the base. Aim for a barely damp zone at the bottom. If any water collects, tilt the tray and wick away the excess with a clean cloth or paper towel. Consistent light and a single daily watering are what build sturdy greens with clean flavor.
How to read the tray and jar
Look under the tray or at the bottom surface. You should not see puddles. Lift a corner and feel for cool dampness rather than wetness. In a jar, listen and look during the drain. Water should run freely at first, then slow to occasional drops, then stop. If drops continue beyond a minute, reduce the seed quantity next time or increase the tilt to allow water to leave more quickly. Seeds sticking to the glass create wet pockets. Tap or scrape them down gently after each rinse so they rejoin the main layer.
Airflow and temperature management
Keep the setup in a cool part of the kitchen away from direct sunlight during the sprout phase. Use a cover to block light, but do not seal the system. Air must move in and out through the mesh lid or across the tray surface. When you transition to the microgreens stage, select a window with bright, but indirect, light. Direct midday sun can overheat the tray and speed drying unevenly. If the top dries faster than the base, increase airflow around the tray and use a finer mist in the evening to even out moisture without raising the water level.
Quick corrections if something is off
If you notice a damp smell, reset your drainage. Rinse, drain longer, and spread seeds thinner by shaking the jar gently while it rests on its side. If growth looks slow by the end of day one, confirm that the twelve-hour rhythm is consistent and that the environment is cool rather than warm and stagnant. If tips look wilted before the next cycle, shorten the interval slightly or add a small midday mist on very dry days. With these small corrections, your sesame will track the timeline reliably, reaching about two and a half inches by day three and greening beautifully by day six.