
Looking for a fast crop with rich flavor and reliable results. Black gram microgreens deliver a nutty taste, tender bite, and a seven-to-nine-day turnaround that suits home kitchens and small farms. These greens come from Vigna mungo, a staple legume across South Asia, and they shine as a fresh topper for chaats, raita, rice bowls, eggs, and warm oil drizzles. The method is simple.
Start with clean seed, sow an even layer, use steady airflow, and water from the bottom. Do that, and you harvest crisp shoots that store well and lift everyday meals. This guide explains how to grow black gram microgreens step by step, with clear targets for light, moisture, and temperature so you get consistent trays and solid shelf life.
Understanding Black Gram Microgreens
Black gram microgreens are the juvenile greens of Vigna mungo. They behave like a warm-season legume and develop sturdy white stems with fleshy cotyledons. Expect a mild beany aroma that becomes fresher and greener once the canopy meets proper light. Typical harvest falls between day 7 and day 9 at room temperatures near 22 to 24 degrees Celsius. Flavor lands in the nutty and earthy range with a gentle crunch that pairs well with cucumber, tomato, scallions, yogurt, and citrus.
Because these greens come from a legume, introduce them slowly for anyone with legume sensitivities. From a nutrition lens, early legume greens often show higher vitamin C and total phenolics compared with the dry seed baseline. Gentle cooking in recipes can reduce antinutrients common to legumes, while raw use keeps texture and brightness. Think of black gram microgreens as a compact way to add plant protein signals, micronutrients, and color without adding many calories.
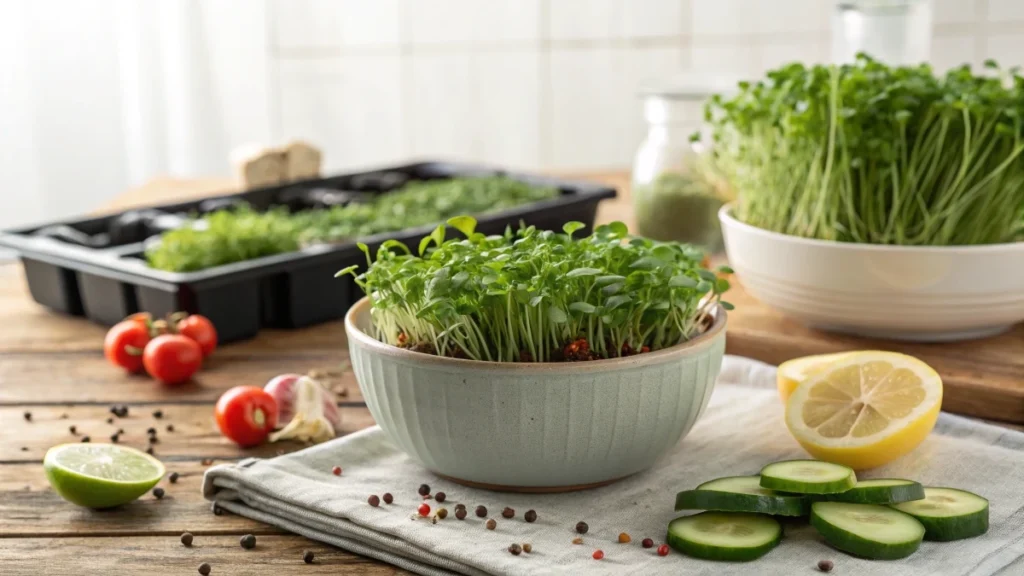
🌿 Recommended Microgreens Supplies |
Preparing Seeds and Growing Medium
Choosing the Right Seeds
Quality seed drives uniform trays. Pick untreated seed intended for food use with a recent lot date and a listed germination rate near or above 90 percent. Fresh seed shortens the blackout window and reduces patchy emergence. Label each tray with the lot number to track performance over time. Store seed in a cool and dry place and reseal immediately after measuring the sowing rate to protect against humidity.
Pre Soaking the Seeds
A short soak creates even starts. Rinse the dry seed in clean water to remove dust. Soak in cool water for 6 to 8 hours. Longer times can limit oxygen and lead to off smells. Drain fully, rinse once more, and let the seed sit in a colander for about 10 minutes so surface water drips away. You want plump seed without standing water. This routine reduces early dry spots, lowers hull cling, and supports straight, sturdy shoots.
Selecting the Growing Medium
Black gram microgreens thrive in coco coir or a fine soil-free blend. Fill the tray with 1.5 to 2 centimeters of pre-moistened medium. Aim for the feel of a wrung-out sponge. Too dry and roots fail to anchor. Too wet and oxygen drops at the surface. Level the medium so the seed layer sits evenly across the tray. Clean and dry trays between cycles to lower disease pressure.
Sowing and Germination Process
Measure the seed for a standard 10 by 20 tray. A practical range is 180 to 220 grams of dry seed. Spread the seed evenly for a single tight layer rather than a pile. Press gently with a clean tray or flat board to improve contact with the medium. Cover with a breathable lid or blackout dome. Many growers add a total weight of about 4 to 6 kilograms across the tray for the first few days.
The weight helps create straight stems and even height. Keep trays in a dark or low-light space at 20 to 24 degrees Celsius with relative humidity close to 50 to 60 percent. Check the surface once or twice a day. If it looks dry, mist the underside of the dome rather than the seed surface. By day 2 or day 3, shoots reach 2 to 3 centimeters and are ready for light.
Light, Watering, and Growth Conditions
Move trays under consistent light once shoots have anchored. Provide 12 to 16 hours of light each day. A practical canopy target is a PPFD near 150 to 250 micromoles per square meter per second. If you do not measure PPFD, keep fixtures close enough to prevent stretching yet far enough to avoid heat buildup. Water from the bottom to keep foliage dry.
Pour clean water into the bottom tray, allow the medium to wick for a few minutes, then drain any excess. Avoid overhead sprays after leaves open because wet canopies and still air invite damping off. Keep a small fan running to move air across the room without blasting the trays. Maintain room temperature near 22 to 24 degrees Celsius and relative humidity around 50 percent.
Warmer rooms speed growth and shorten the harvest window. Cooler rooms slow growth and can deepen color. Watch the canopy and adjust. Pale leaves call for more light or a slightly lower fixture. Floppy stems point to a sowing rate that is too dense or a blackout period that needs more time and weight. With steady light and clean bottom watering, black gram microgreens reach 6 to 9 centimeters and are ready to cut around day 7 to day 9.
Harvesting and Storage
Black gram microgreens are ready when the canopy stands 6 to 9 centimeters tall, and the first tiny true leaves begin to peek. Cut in the cool part of the day for better texture. Use a clean and sharp knife or scissors, and keep blades dry so the cut faces stay crisp. Gather the greens in loose handfuls and lay them in a single layer on a chilled tray. This quick pre-cool pulls heat from the stems and slows respiration.
For storage, keep the harvest dry. Do not wash unless you must. If you rinse, spin dry gently, and spread the greens on a towel for a few minutes before packing. Place in vented clamshells or produce bags with pin holes. Set your refrigerator to 2 to 4 degrees Celsius and avoid the coldest back wall, where frost can damage the canopy. Properly handled black gram microgreens hold 3 to 5 days with minimal color loss. Add a small square of paper towel in each container if your local humidity is high. That simple step captures stray moisture and extends shelf life.
Nutritional Value and Health Benefits
Legume microgreens, including black gram, are valued for concentrated freshness with modest calories. Dry black gram seed contains 24 to 25 percent protein along with meaningful iron and potassium. During germination, enzymes mobilize stored nutrients and often raise vitamin C and total phenolics compared with the dry seed baseline. That shift supports antioxidant capacity in the young greens and brightens flavor.
For practical meal planning, a small handful adds plant-forward texture and micronutrients without heaviness. Use black gram microgreens to balance richer dishes like eggs and rice bowls or to lift chilled sides like raita and salads. Gentle heat can reduce antinutrients common to legumes while keeping bite and color. People with legume sensitivities should start with a small serving. Present these benefits as part of an overall balanced diet, and you set honest expectations for readers who care about wellness and taste.
Target keywords to weave naturally in this section include black gram microgreens benefits and the nutrition of black gram microgreens.
Common Problems and Fixes
Yellow or pale leaves
Insufficient light or lamps set too high are the usual cause. Provide 12 to 16 hours of light and keep fixtures close enough to prevent stretching while avoiding heat buildup. Aim for a practical canopy target near 150 to 250 micromoles per square meter per second.
Musty smell or slimy patches
This points to excess surface moisture and still air. Switch to bottom watering and keep a small fan moving room air across the trays. Remove any affected clumps and clean the tray edges between cycles.
Hulls that cling at harvest
The sowing rate is commonly a bit heavy. Reduce the seed by around 10 percent on the next run. A light mist an hour before cutting can help hulls relax so the cut product looks clean.
Uneven height across the tray
The medium may be unlevel or the seed older than one year. Level the surface before sowing and track lot numbers so you can replace tired seed in time.
Work the phrase how to grow black gram microgreens into this section to support search intent around troubleshooting the grow.
Profit and Yield Insights
A standard 10 by 20 tray seeded at 180 to 220 grams typically returns a fresh yield of 1 to 2.5 or 1 to 3 by weight. For example, 200 grams of seed often produces 500 to 600 grams of harvest when light, airflow, and moisture are on target. Plan labor in short blocks. You spend a few minutes soaking and sow on day 0. You check once or twice daily during a blackout for two to three days. You water from the bottom for four to six days. You harvest and pack in one focused session.
For local sales, many growers portion 40 to 60 gram packs for home cooks and 100 to 150 gram packs for restaurants. Price varies by city. A practical frame in many markets sits near 3 to 5 dollars per 100 grams. Keep your cost of goods in view. Seed cost, media, packaging, and utilities are the main drivers. Light consistency and airflow are the main protectors of margin because they prevent crop loss and reseeding. Use this section to include the keyword black gram microgreens yield so readers and search engines find the planning details they need.
🌿 Recommended Microgreens Supplies |
🥗 Recipes with Black Gram Microgreens
🥒 Refreshing Black Gram Microgreen Chaat
Prep Time: 5 minutes
Servings: 2
Ingredients:
- 2 cups black gram microgreens
- 1 small cucumber, diced
- 1 tomato, chopped
- 1 small red onion, finely diced
- 1 tablespoon lemon juice
- 1 teaspoon chaat masala
- 2 tablespoons roasted peanuts
- A drizzle of tamarind or mint chutney
Instructions:
- In a large bowl, mix the cucumber, tomato, and onion.
- Add the microgreens and toss gently.
- Sprinkle chaat masala and drizzle lemon juice on top.
- Add roasted peanuts for crunch.
- Serve fresh with tamarind chutney.
Tip: Keep the microgreens dry before mixing for better texture.
🥥 Coconut Lime Raita with Microgreens
Prep Time: 10 minutes
Servings: 2–3
Ingredients:
- 1 cup plain yogurt
- ½ cucumber, grated
- 1 cup chopped black gram microgreens
- 1 teaspoon lime zest
- Salt to taste
- A pinch of roasted cumin powder
Instructions:
- Whisk yogurt in a bowl until smooth.
- Add grated cucumber and salt.
- Fold in microgreens and lime zest.
- Sprinkle cumin powder and chill for 10 minutes before serving.
Serving Suggestion: Pairs beautifully with biryani, parathas, or grilled vegetables.
🍚 Garlic-Tempered Rice Bowl with Microgreens
Prep Time: 10 minutes
Servings: 2
Ingredients:
- 2 cups cooked basmati rice
- 1 cup black gram microgreens
- 2 tablespoons oil or ghee
- 4 garlic cloves, sliced thin
- ½ teaspoon mustard seeds
- 1 dried red chili
- Salt to taste
Instructions:
- Heat oil or ghee in a small pan.
- Add mustard seeds, garlic, and chili; cook until golden.
- Pour this hot tempering over the rice.
- Add black gram microgreens and toss gently.
- Serve warm with a squeeze of lime.
Flavor Boost: Add toasted sesame or chopped scallions for extra aroma.
🍳 Soft Scrambled Eggs with Black Gram Microgreens
Prep Time: 8 minutes
Servings: 2
Ingredients:
- 3 large eggs
- 1 tablespoon ghee or butter
- 1 cup black gram microgreens
- Salt and pepper to taste
Instructions:
- Whisk eggs with a pinch of salt.
- Melt ghee in a nonstick pan on low heat.
- Pour in the eggs and stir slowly until softly set.
- Remove from heat and fold in microgreens.
- Finish with black pepper and serve immediately.
Tip: The residual heat will gently soften the microgreens while keeping their freshness.
🫓 Black Gram Microgreen Paratha Pocket
Prep Time: 15 minutes
Servings: 2
Ingredients:
- 2 cooked parathas
- ½ cup yogurt
- 1 cup black gram microgreens
- ½ teaspoon chaat masala
- ½ teaspoon mint chutney
Instructions:
- Spread yogurt and mint chutney inside a warm paratha.
- Add black gram microgreens.
- Sprinkle chaat masala and fold into a pocket.
- Slice and serve as a light, flavorful snack.
Perfect For: Lunch boxes or healthy on-the-go meals.