
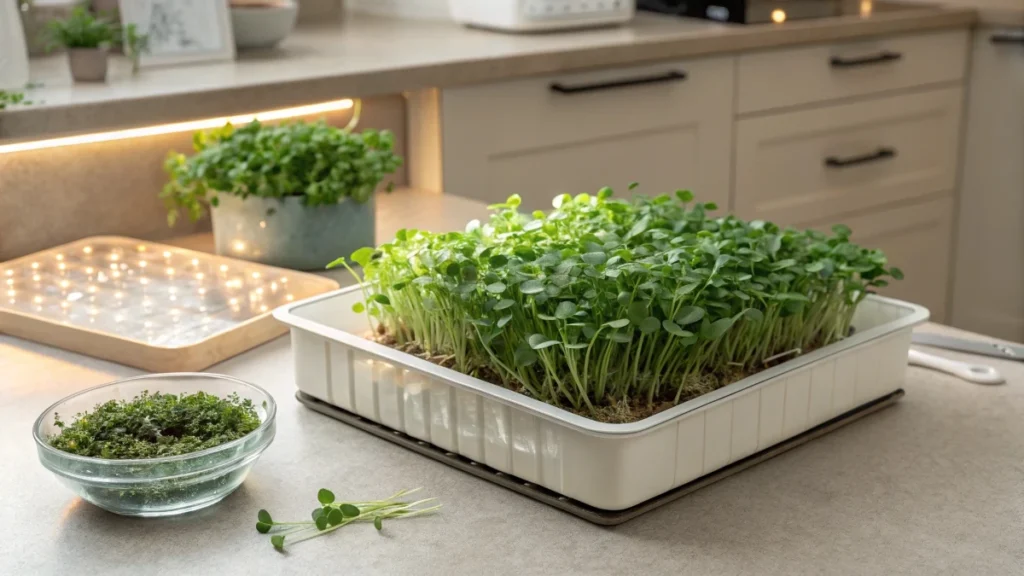
Grow fresh cauliflower microgreens at home with a simple tray, a thin layer of medium, and steady light. In about two weeks, you harvest crisp, pale green shoots with a mild brassica flavor that upgrades soups, sandwiches, bowls, and breakfast eggs.
This guide shows an easy step-by-step method with exact seeding amounts, moisture tips, and lighting distance so your trays stay dense and clean.
You will also learn the real benefits of cauliflower microgreens, including vitamin C, vitamin K, potassium, folate, and antioxidant activity common to brassicas.
Finish with two quick recipes that keep texture bright and flavor balanced for everyday meals.
Why Grow Cauliflower Microgreens
Cauliflower microgreens are one of the easiest and most rewarding crops to grow indoors. They reach harvest in about two weeks and bring a fresh, mild flavor that fits easily into everyday meals. These delicate greens have a faint nutty and mustard-like note that pairs beautifully with soups, sandwiches, omelets, and grain bowls. Because they grow fast and take little space, they’re a great option for people living in apartments or those who want fresh greens year-round.
Nutritionally, cauliflower microgreens pack impressive value for their size. Mature cauliflower is already known for its high levels of vitamin C, vitamin K, potassium, and folate. Studies show that microgreens often contain four to six times more nutrients than their mature counterparts. This makes cauliflower microgreens a smart, compact way to boost daily vitamin and antioxidant intake without long growing cycles.
Growing them at home also gives full control over cleanliness, water quality, and freshness. You harvest only what you need, which reduces waste and cuts down on store packaging.
Flavor and Texture
Cauliflower microgreens have soft, pale-green stems and small, tender leaves. The flavor is light but distinct, adding a crisp, fresh bite that enhances almost any dish. Their neutral taste allows them to blend into both savory and slightly sweet combinations.
Ideal Growing Conditions
Cauliflower microgreens thrive in cool and stable conditions. A room temperature between 60 °F and 70 °F (15 °C to 21 °C) is ideal. This range encourages compact stems and uniform color. Warmer rooms can still produce a crop, but growth may become stretched,d and leaves may pale slightly, so consistent moisture and lighting help keep them sturdy.
Light Requirements
For light, a simple LED setup is more than enough. Daylight-balanced bulbs near 5,000 K placed about 4 to 6 inches above the tray give the right intensity for dense growth. Even an ordinary 16-watt LED bulb producing around 2,500 lumens can support a small tray. Natural sunlight works too, but consistency matters more than brightness—steady light each day gives uniform color and thickness.
Moisture and Airflow
Moisture balance is essential. The growing medium should stay evenly damp, never soggy. Shallow trays dry faster than deep ones, so checking moisture daily is important. Press a finger into the surface; if it feels barely moist, it’s ready for another light watering from below. Good airflow helps the leaves stay dry after misting, which reduces the chance of mold and keeps stems firm.
What You’ll Need
You can grow cauliflower microgreens with simple materials found at home. A two-tray system works best—one perforated tray for growing and another solid tray underneath for holding water. This setup allows for clean bottom watering and prevents soil disturbance. If you don’t have one, any shallow container that drains well can be used.
For the growing medium, use seed-starting mix or coco coir, both of which hold moisture well without becoming compacted. You’ll only need about 1–2 cm (½ inch) of medium spread evenly across the tray. Press it gently so the surface is level before sowing the seeds.
10×10-inchch tray needs roughly 12–13 grams of cauliflower seeds, which is about half of a 25-gram seed pack. This gives an even, dense layer that grows into a full canopy without crowding. Keep a pair of clean scissors ready for harvesting and a salad spinner or paper towel for drying.
Helpful Extras
A few layers of paper towels or napkins act as a humidity cover during the early germination phase. A spray bottle or mister helps maintain gentle moisture without flooding. If using a water reservoir, wrap it with aluminum foil or dark paper to block light and prevent algae growth.
🌿 Recommended Microgreens Supplies |
Preparing the Medium and Water
Starting clean gives you healthy, mold-free microgreens. If you’re using coco coir, sterilize it first to remove potential pathogens. You can do this by microwaving the moist coir for three to five minutes or pouring boiling water over it, then letting it cool completely. Once cooled, squeeze out extra water until it feels evenly moist but not dripping.
Spread a thin layer of the prepared medium in your tray and smooth it out. For watering, use dechlorinated or rested tap water. Leaving tap water uncovered for a full day lets chlorine naturally evaporate. Cauliflower microgreens prefer a neutral pH, ideally between 6 and 7, for balanced nutrient absorption.
Clean trays, tools, and hands before planting to prevent mold and bacteria. A tidy start leads to an even, healthy tray with fewer issues later.
Sowing and Covering
Once the medium is ready, scatter the seeds evenly across the surface. The goal is full coverage without piling seeds on top of one another. After sowing, gently press them into the medium so they make contact with moisture, but don’t cover them with soil. These seeds germinate best when exposed to air, light, and moisture.
Lay two to three layers of damp paper towel or napkin directly over the seeds. This creates a moist environment that speeds germination and prevents the surface from drying out. Mist the cover until it’s evenly moist, then set the tray in a warm, dark place at room temperature. Check once a day and re-moisten if the paper feels dry.
After about three to four days, you’ll notice the cover starting to lift as the seedlings push upward. At this point, remove the paper gently and move the tray under your lights. Keep lights about four to six inches above the canopy and begin bottom watering to maintain consistent moisture without splashing the stems.
From here, the microgreens will grow rapidly, producing bright stems and small leaves. By day ten to sixteen, they’ll be ready for harvest with a mild, fresh cauliflower flavor.
Germination tothe growth stage
Cauliflower microgreens follow a simple rhythm once the tray is set up well. Keep the paper cover evenly damp during the first days so the surface never dries out. By day three to day four, you will spot signs of sprouting at the corners when you lift the edge slightly. Place the cover back down and keep it moist. Around day five, the seedlings begin to push the cover up on their own. Peel it away slowly so you do not lift tender stems.
Move the tray under the lights right after removing the cover. Keep the bulbs about four to six inches above the canopy and adjust as plants rise. A daylight style LED near five thousand Kelvin works nicely. A small room lamp in this range can be enough for a single tray. Maintain room temperature near sixty to seventy degrees Fahrenheit, which encourages compact stems and even color. The first true leaves usually appear between day ten and day sixteen, depending on room warmth and light intensity.
Moisture and bottom watering in this phase
Begin bottom watering as soon as the cover comes off. Pour a little water into the solid tray and let the medium wick it up for a few minutes. Drain any extra so the roots can breathe. Shallow trays dry quickly, so check once a day. The surface should feel damp to the touch without leaving water on your finger.
Daily care
A steady routine keeps quality high. Check moisture with a fingertip each morning. If the surface feels barely moist, add a short bottom watering. Keep the light close enough to prevent stretching but not so close thatit leaves warm up. Four to six inches above the canopy is a reliable starting point, and you can lift the fixture a little as the tray fills.
Airflow matters. Give the tray a little space on all sides and avoid crowding it between objects. If you use any kind of reservoir or clear container beneath the grow tray, block light with a wrap so the water stays clean. Wipe the work area, rinse the bottom tray between waterings, and keep tools clean.
Spotting issues early
Leggy or pale growth points to weak light or a light that is too far away. Bring the bulb closer and keep temperatures on the cool side of the target range. If you see white fuzz hugging the stems right at the medium line, look closely. Fine, uniform root hairs that cling to the stem are normal. Patchy growth on the medium surface with a musty smell suggests mold. Improve airflow, reduce surface splashing, and switch to bottom watering only. If a small area looks off, remove that patch and let the tray dry slightly before the next watering.
Harvest and storage
Harvest when the canopy stands two to three inches tall and the first true leaves have opened. This window typically falls at day ten to day sixteen. Use clean scissors and cut just above the medium so there is no grit in the harvest bowl. Work in small handfuls so the cut ends stay tidy.
Rinse the harvest in cool water, then spin dry or pat dry gently. Store in a breathable container or a clamshell lined with a paper towel. Cauliflower microgreens keep well for five to seven days when dry and chilled. If they soften a little, a brief rinse in cold water revives the texture. Always handle with clean hands and tools,s and return unused greens to the fridge promptly.
Food safety habits that help
Start with clean trays and a clean work surface. Use rested tap water if your local supply contains chlorine, and aim for a near-neutral reaction between pH six and pH seven. Let the canopy dry after rinsing before closing the lid for storage, so condensation does not build up.
Benefits and nutrition snapshot
Cauliflower is valued for vitamin C and vitamin K, along with potassium, folate, and fiber. Cauliflower microgreens bring these same nutrients in a tender form that is easy to add at the end of cooking. Brassica greens are known for antioxidant activity and for glucosinolate compounds that give their gentle mustard-like note. Research on microgreens in general shows that young greens often hold higher concentrations of certain vitamins and phytonutrients compared to mature plants. This makes a small serving a practical way to raise the nutrient profile of everyday meals.
On the practical side, trays finish fast, which means fresh harvests every week or two with little waste. Growing indoors through cool months keeps greens on the menu when outdoor beds rest. Because you cut only what you need, you reduce packaging and store trips while keeping flavor and texture at their peak.
Simple ways to eat them and two fast recipes
Every day uses that always work
A generous handful of creamy soup brings color and a fresh finish. Fold into omelets just before serving for brightness without wilting. Pile on sandwiches, avocado toast, grain bowls, or salmon plates where a light brassica lift balances richer flavors. Because the taste is mild, cauliflower microgreens also work with citrus dressings and yogurt sauces.
Recipe 1. Lemon tahini bowl with cauliflower microgreens
Serves two
Base
One cup of cooked quinoa, warm or room temperature
One cupof chickpeas, rinsed and drained
One cup of cherry tomatoes, halved
Half a cucumber chopped
Dressing
Two tablespoonsof tahini
Two tablespoons of lemon juice
One tablespoon of olive oil
One teaspoon of maple syrup
Two tablespoons of water
Pinch of salt
Finish
Two cups of cauliflower microgreens loosely packed
One tablespoon toasted sesame seeds
Whisk the dressing until smooth and thin with water to a drizzle. Build bowls with quinoa, chickpeas, tomatoes, and cucumber. Add a full cup of cauliflower microgreens to each bowl. Drizzle the dressing and sprinkle sesame seeds. Serve at room temperature so the greens stay crisp and aromatic.
Recipe 2. Warm fried rice with cauliflower microgreens at plating
Serves two
Two cups of cold cooked rice
One cup of mixed vegetables, peas, and carrots works well
Two eggs lightly beaten
One tablespoon neutral oil plus more as needed
One tablespoon soy sauce or tamari
One teaspoon of rice vinegar
One teaspoon of grated garlic
One teaspoon of grated ginger
Two cups of cauliflower microgreens loosely packed
Heat a pan over medium heat with oil. Scramble the eggs and set aside. Add a little more oil, then garlic and ginger for a short sauté. Stir in rice and mixed vegetables. Cook until hot and lightly toasted in spots. Return eggs to the pan, add soy sauce and vinegar, and toss to coat. Take the pan off the heat. Fold in the cauliflower microgreens right at the end so they stay bright and crisp. Serve immediately.
Sandwich and soup topper formula
For a hearty sandwich, layer two to three ounces of protein, sliced tomato, and a small handful of about half a cup of cauliflower microgreens. For soup, add a quarter cup per bowl just before serving so the heat releases aroma without wilting the leaves.
Quick cost and yield notes
A ten-by-ten-inch tray seeded with about twelve to thirteen grams, which is half of a twenty-five-gram packet, produces a dense harvest suitable for several meals. Many home growers see roughly one hundred fifty to two hundred grams of cut greens per tray, depending on seeding rate, light, and room temperature. With a two-week cycle, you can start a second tray one week after the first. This simple stagger keeps fresh greens ready every few days without overloading the fridge.
If you enjoy a steady supply, set a reminder to sow a small tray each week. Keep notes on your preferred seeding rate, the room you grow in, and light height. Small adjustments in these three areas make the biggest improvements in yield and texture over time.