
Starting a microgreens business from home is one of those rare side hustles that can scale without needing a storefront, a huge investment, or a big team. If you can follow a simple growing routine and you’re willing to sell consistently, you can turn a small rack in a spare room (or basement) into real weekly income.
This guide walks you through exactly what you need to set up, how much it costs, and how the profit math works—so you can start smart, not blindly.
Why a Microgreens Business Works From Home
Microgreens are fast. Most varieties are ready in 7–14 days, so you’re not waiting months to see results like traditional farming.
A home microgreens setup also has three big advantages:
- Small space, high output (vertical racks are the cheat code)
- Weekly harvest cycles (steady cash flow if you sell weekly)
- Local demand from health-conscious buyers, home cooks, cafés, and restaurants
The biggest “secret” isn’t growing. It’s consistent selling and keeping your production organized.
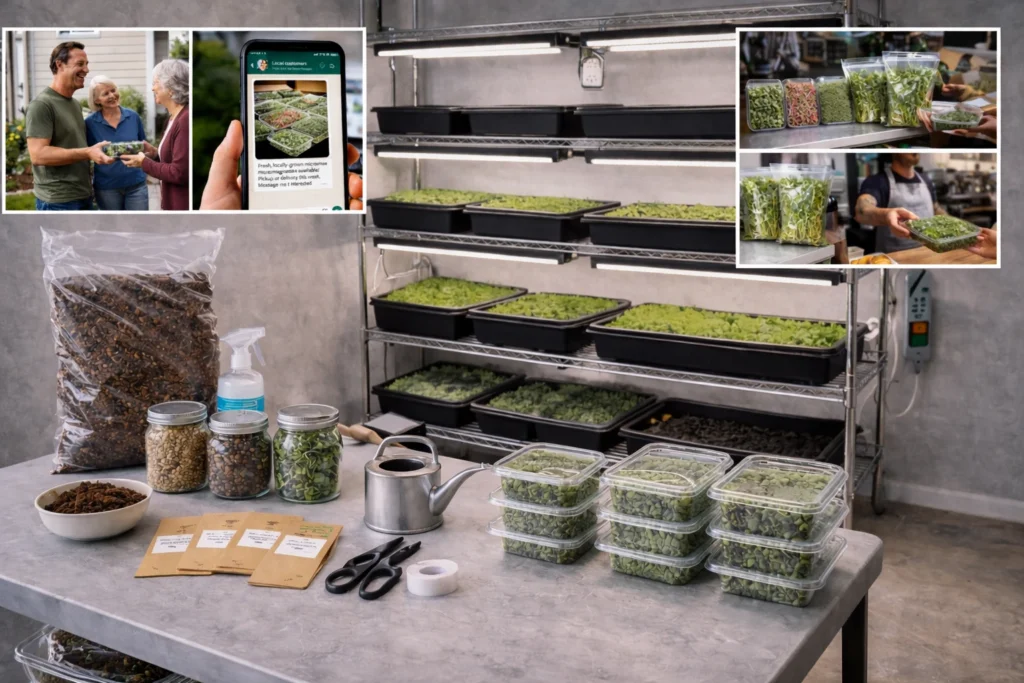
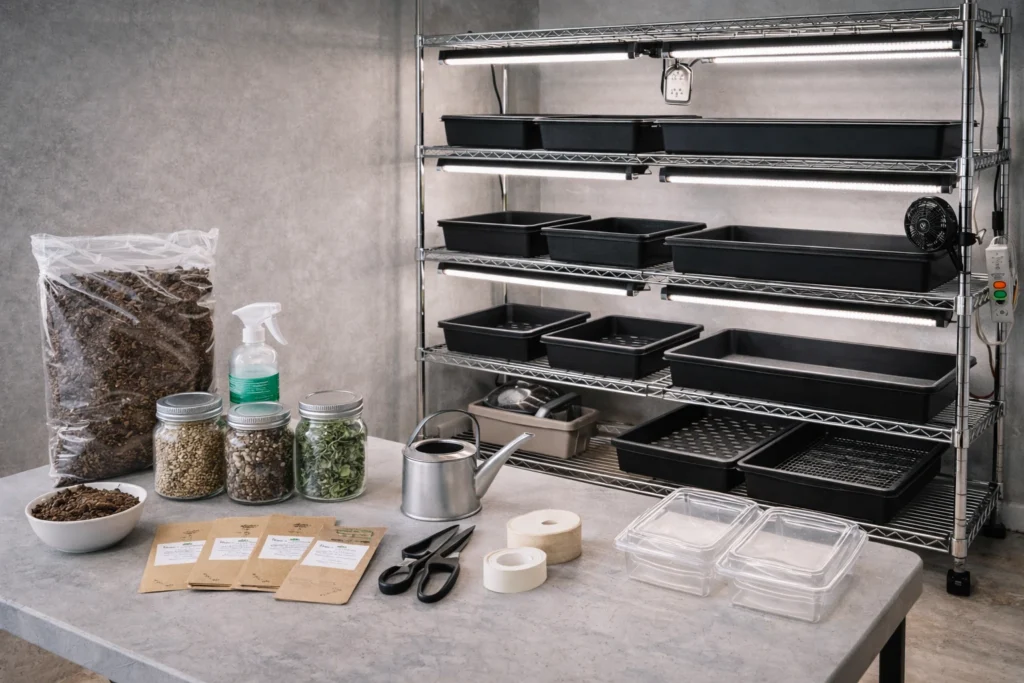
Step 1: Pick a Simple Home Setup (The “One Rack” Model)
If you want the easiest starting point, build your setup around a single rack. You can run a profitable microgreens business with one rack if you sell weekly and grow the right varieties.
Recommended starter rack
- 4–5 shelves
- 2–4 trays per shelf (depending on rack width)
- Total: 8–20 trays capacity (this range is perfect for beginners)
Where to place it:
A spare room, storage room, laundry area, or basement corner is fine—just keep it clean, ventilated, and away from pests/pets.
Step 2: What You Need (Complete Equipment List)
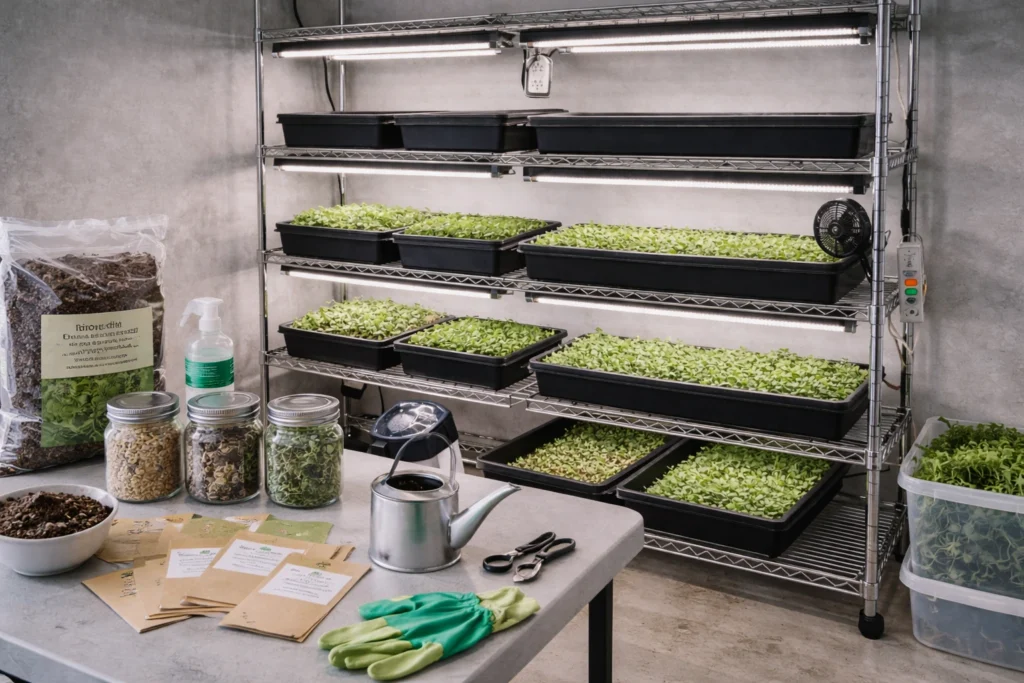
Here’s the simple equipment list for a home microgreens business:
Growing Essentials
- Metal rack (4–5 shelves)
- 10×20 trays (no holes + with holes)
- LED grow lights (shop-style or grow bars)
- Timer (for lights)
- Fan (airflow prevents mold)
- Sprayer or watering can
- pH-neutral water source (regular clean water is fine for most beginners)
Growing Medium Options (Choose 1)
- Coco coir (popular + consistent)
- Soil mix (heavier, can be messier)
- Hemp mats (cleaner, often more expensive)
- Jute/fiber mats (varies by supplier)
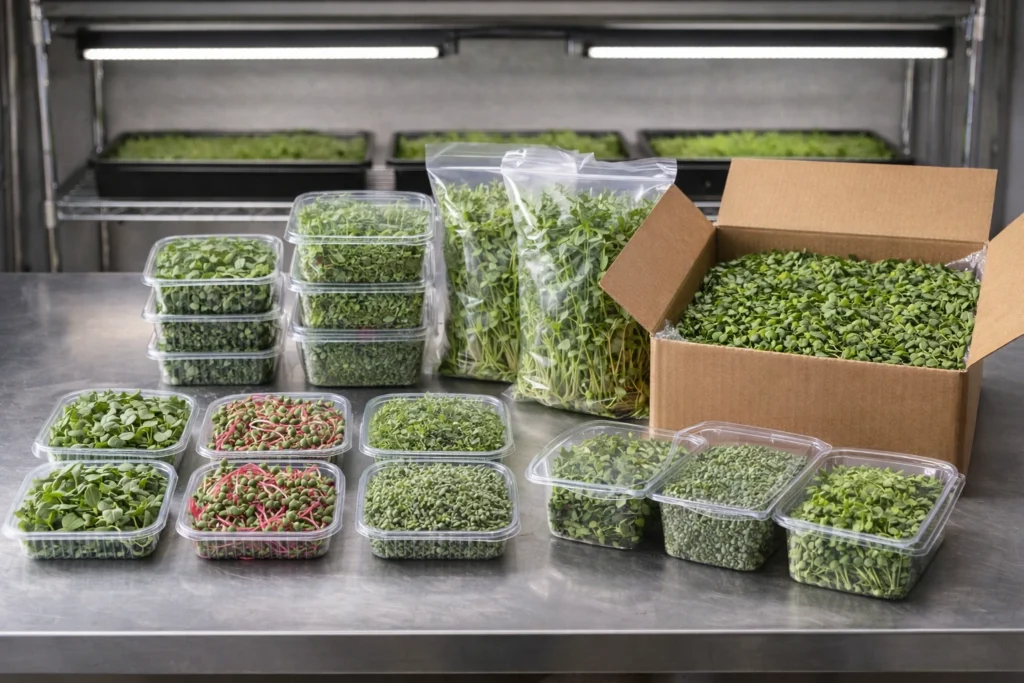
Post-Harvest & Selling
- Scale (for consistent portion sizes)
- Clamshells or food-safe containers
- Labels (simple brand + harvest date)
- Sharp scissors/knife
- Food-safe sanitizer (for cleaning surfaces/tools)
- Cooler bag or small cooler (for deliveries)
If you want to look “professional” fast, focus on clean packaging + consistent weight + fresh harvest date.
🌿 Recommended Microgreens Supplies |
Step 3: Home Microgreens Business Startup Costs (Realistic Ranges)
Costs depend on your country and whether you buy premium gear. Here’s a realistic starter range for a one-rack setup:
Low-budget starter (basic but functional)
- Rack: $30–$80
- Lights: $60–$150
- Trays (10–20 trays): $30–$80
- Timer + fan: $20–$50
- Seeds + medium (first month): $40–$120
- Packaging + labels: $20–$60
✅ Total estimate: $200–$500
Better starter (cleaner, easier scaling)
- Rack: $60–$120
- Lights (better coverage): $150–$300
- Trays (20–40 trays): $60–$140
- Timer + fan (strong airflow): $40–$80
- Seeds + medium (first month): $80–$180
- Packaging + labels: $40–$100
✅ Total estimate: $430–$920
Tip: Don’t over-invest before you validate sales. Start with one rack, get customers, then expand.
Step 4: Choose 5 “Seller” Varieties (Not Random Seeds)
For a microgreens business, you want varieties that:
- grow reliably
- look great in photos
- taste strong
- sell fast
Here are solid best-sellers:
Top beginner-friendly sellers
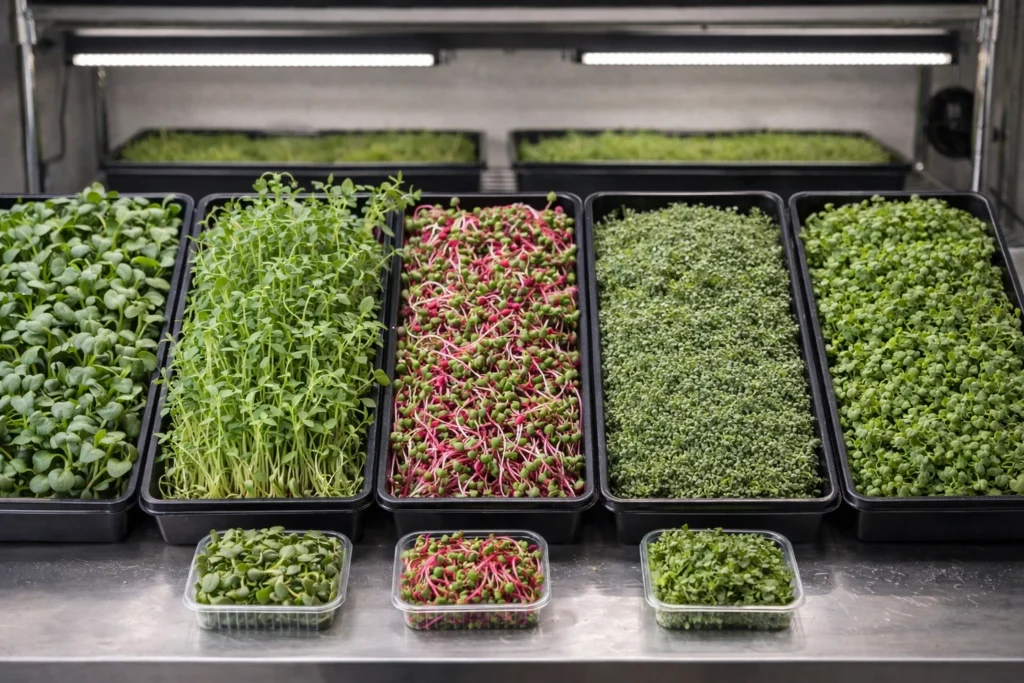
- Sunflower (big yield, crunchy)
- Pea shoots (sweet, popular)
- Radish (fast, spicy, colorful stems)
- Broccoli (health halo, steady seller)
- Mustard (flavor punch, great mix)
Once you’re comfortable, add premium options:
- Purple kohlrabi
- Red cabbage
- Amaranth
- Basil (harder but profitable when mastered)
Step 5: A Simple Growing Workflow (So You Don’t Get Overwhelmed)
Consistency matters more than perfection. Here’s a beginner-friendly weekly system:
The weekly production rhythm
Day 1–2: Sow trays (plant seeds)
Day 2–5: Blackout period (optional, depends on variety)
Day 5–12: Lights + airflow + watering
Day 7–14: Harvest, pack, deliver
If you want a steady weekly income, you’ll sow on set days every week, like:
- Sunday + Wednesday sowing
- Friday harvest + delivery
This turns your microgreens business into a predictable routine instead of chaos.
Step 6: Pricing & Packaging That Actually Sells
Common selling formats
- Small clamshell (perfect for retail/home buyers)
- Larger clamshell/bag (for families and meal preppers)
- Bulk boxes (for restaurants)
How to price (simple method)
Your price should cover:
- seeds + medium + packaging
- utilities + waste
- your time
- profit margin
A strong beginner goal is:
- 3× to 5× your direct cost per container
Example: If one packed container costs you $0.70 in materials, pricing at $2.50–$4.00 is common in many markets (but local demand and competition decide the final number).
Packaging rule:
Clean, dry greens + label + harvest date = buyers trust you.
Step 7: Where to Sell (Best Channels for Beginners)
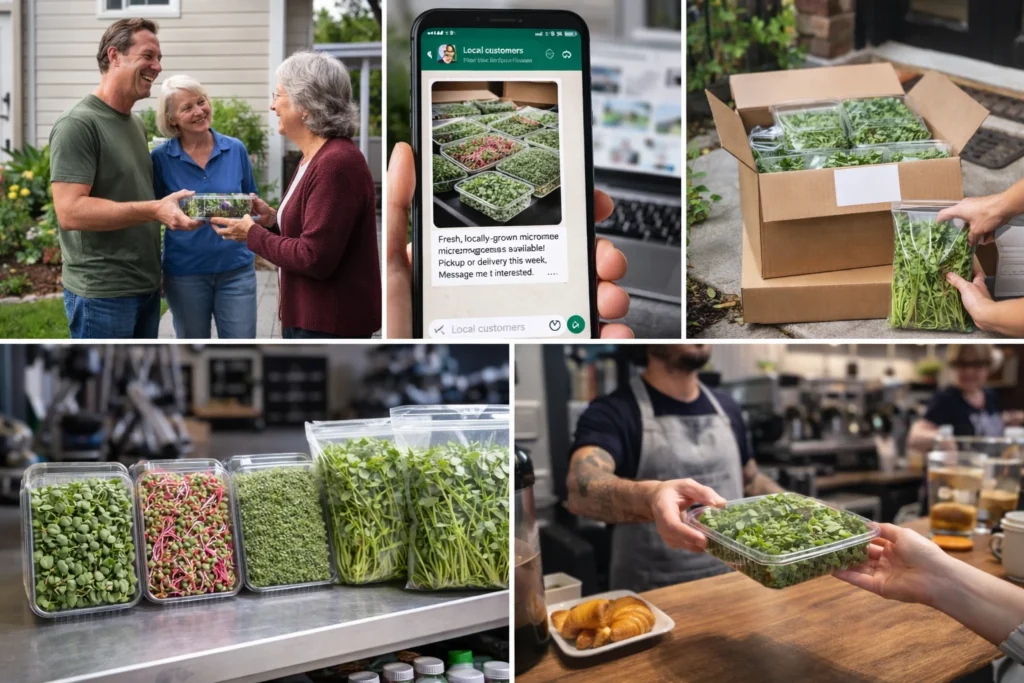
You can grow perfect microgreens and still fail if you don’t sell. Pick 1–2 channels and go deep.
The easiest sales channels to start
- Friends + family + neighbors (fast validation)
- WhatsApp groups / local Facebook groups
- Home delivery subscriptions (weekly box)
- Gym/health food store partnerships
- Cafés and small restaurants (after you’re consistent)
The simplest offer that works
A weekly “Fresh Harvest Box” is powerful:
- “2 clamshells per week”
- “4 clamshells per week”
- “Family pack” + “fitness pack”
Subscriptions make your income predictable.
Step 8: Profit Math (What a One-Rack Microgreens Business Can Make)
Profit depends on:
- How many trays do you grow weekly
- Your yield per tray
- Your selling price
- How much do you waste
- How consistent are your customers are
Here’s a realistic example using assumptions (your numbers will vary by variety and market):
Example: 12 trays per week
- Average output: 8–12 clamshells per tray (depends on portion size)
- Weekly clamshells: 96–144
- Selling price (example): $3 each
- Weekly revenue: $288–$432
Estimated weekly costs (rough)
- Seeds + medium: $50–$120
- Packaging/labels: $20–$50
- Utilities/misc: $10–$25
✅ Weekly cost estimate: $80–$195
Estimated weekly profit (rough)
- $93–$352/week
That’s $372–$1,408/month depending on pricing, waste, and sales consistency.
Reality check:
The biggest reason beginners don’t hit these numbers is not growth problems—it’s not having consistent buyers every week.
Step 9: Food Safety Basics (Don’t Skip This)
Even if you’re small, treat your setup like a mini food business.
Simple rules:
- Keep the grow area clean and dry
- Use a fan for airflow (mold prevention)
- Wash your hands and sanitize tools before harvesting
- Don’t harvest wet greens (shortens shelf life)
- Store finished packs cold if possible
- Label harvest date
You don’t need to be fancy—you need to be consistent and clean.
Step 10: Make It Look Like a Real Brand (Fast)
Your microgreens business will feel “premium” if you do these 3 things:
- Simple brand name + clean label
- Consistent container size and weight
- Freshness promise (“Harvested within 24 hours” if you can)
Bonus: Take bright photos. Microgreens sell visually.
A Beginner’s 14-Day Launch Plan
If you want a clear start, follow this:
Week 1
- Set up rack, lights, fan, trays
- Choose 4–5 varieties
- Sow 6–10 trays
- Offer free samples to 10–20 people nearby
Week 2
- Collect feedback (“Which did you like most?”)
- Start taking pre-orders for the next harvest
- Create a simple weekly harvest schedule
- Print basic labels + price list
- Deliver your first paid orders
The goal is momentum, not perfection.
FAQs
How many trays should I start with?
Start with 6–12 trays. Enough to learn, not enough to overwhelm you.
Do I need a license to start a microgreens business?
It depends on your city/country and whether you sell to stores/restaurants. Start small with direct customers, then learn local requirements as you grow.
Which microgreens are most profitable?
Often: sunflower, pea, radish mixes, and specialty colors (kohlrabi, amaranth). Profit comes from low waste + steady buyers, not just “expensive varieties.”
How do I stop mold?
Airflow + not overwatering + clean trays. Mold usually shows up when conditions stay damp and still.
How long do microgreens stay fresh?
Typically 5–10 days, depending on variety, how dry they’re packed, and storage temperature.