
Growing aeroponic microgreens at home is simple, clean, and fast when you follow a proven routine. This guide shows you how to set up trays with subtray misters, soak seeds for 8 to 9 hours, use a smart blackout, and run short, frequent mist cycles that keep roots happy.
You will learn practical targets like pH about 5.9, EC near 2.0 for established leafy crops, and a reliable light rhythm of 16 hours on and 8 hours off.
We will also cover sanitation with food-safe mats, placement of center nozzles for even coverage, and fixes for wilt, pale color, or patchy growth.
Expect clear steps, measurable settings, and realistic timelines so you can harvest crisp microgreens on repeat easily.
Aeroponics 101
Aeroponics delivers water and nutrients as a fine mist to bare roots that hang in the air. The roots are never sitting in a pool. A pump feeds misters, the droplets coat the roots, and whatever is not taken up drains back to a central tank and is reused. The open root zone has constant access to oxygen while still receiving frequent moisture. Because the mist and air space act as the main medium, you only need a very small amount of physical support. In herb systems, support can be a tiny plug. For microgreens, it can be a thin, food-safe mat that roots can grow through.
Mist scheduling matters. In one herb setup, the goal was to give the roots access to the solution roughly once per minute, which kept plants responsive while avoiding standing water. Microgreens are more sensitive during germination and early stand, so the theme is the same, but the pulses must be shorter and more frequent rather than long and infrequent. The whole loop is a recirculating system. Tank to pump to misters to drain back to tank. This makes the approach practical in small spaces where you want to minimize substrate and water use. It is also why cleanliness is important, since the same loop runs all day.
Real World Settings Used Here
Propagation for soft herbs can be several weeks before moving into the aeroponic unit. Parsley and basil were held in propagation for around five to six weeks until roots were showing well, then transplanted into the aero unit. In that unit, the nutrient solution ran near two point zero EC and about five point nine pH with lights on for sixteen hours and off for eight hours. Basil responded well to pinching at the top, so it grew wider rather than tall.
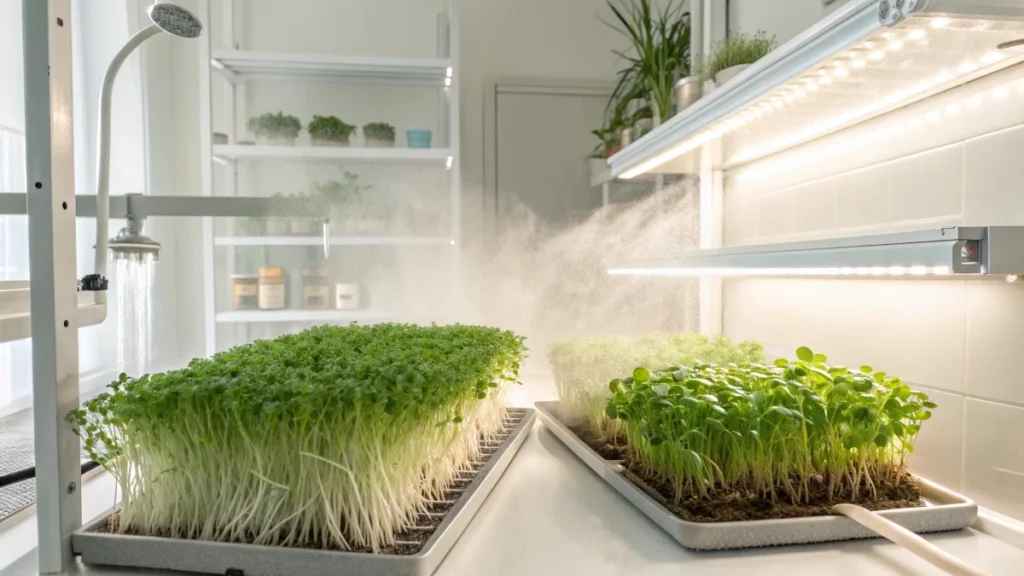
A microgreen grow of sunflowers used subtray misters beneath food-safe mats. Seeds were soaked for about eight to nine hours, rinsed, spread evenly, and then covered for blackout. Surfaces and parts were sanitized with a bleach solution, and hydrogen peroxide spray was used cautiously during the early days to keep mildew down. The first irrigation program used long and infrequent watering, which caused wilt as biomass increased. The fix was to change to every five minutes for about thirty seconds. Mister placement also mattered. Nozzles only at the tray edges left the center too dry, so adding coverage toward the middle produced a more even canopy. Mixed lighting over the same shelf produced different colors and vigor.
The stronger LED side gave a darker green while the other side stayed paler. Harvest happened around day twenty-nine, which was longer than expected because of the early watering mistake and the uneven nozzle layout. Roots formed long curtains under the mats, in some cases several inches, which is a sign that the mist zone was accessible after the program was corrected.
For perspective on density and cadence, two high-density towers planted with spinach held close to three hundred plants and produced roughly four to six pounds every fourteen to twenty-one days. While this is not microgreens, it shows what frequent harvest cycles can look like when the system is tuned and helps you plan space and timing at home.
What You Need
A sturdy rack works well to hold multiple trays. One example used a five-tier rack from a warehouse club. Trays that accept subtray misters make life easier. In one build, those trays were about ninety-eight dollars each. Each tray needs a drain that returns to a central tank. Inside the tank, you will want a pump, a simple filter or screen, and plumbing that feeds misters under the mats. Include nozzles near the center of the tray as well as the edges, so the middle does not dry out. A reliable timer or controller is essential for short, frequent cycles.
Use food-safe grow mats. This matters because non-food-safe materials can leach into the crop. Keep a sanitation kit on hand. A mild bleach wash for hardware before each cycle helps prevent mold. A small spray bottle of hydrogen peroxide can help during early germination when humidity is high under covers. You will also need a pH and EC meter if you plan to feed. For lights, choose fixtures that can deliver even coverage across the tray. Keep the same model per shelf so color and intensity are uniform.
🌿 Recommended Microgreens Supplies |
Seed Prep and Sanitation
Start clean. Rinse and sanitize trays, lids, or blackout covers, and spray lines with a bleach solution, then rinse well. Inspect each mister to confirm an even pattern. Place food-safe mats in the trays.
Soak seeds in clean water for eight to nine hours. Sunflower seeds responded well to this window. After soaking, rinse thoroughly and spread the seeds in a single layer on the mats. Avoid piles since they trap moisture and encourage mold. Cover for blackout to mimic the pressure and darkness of soil. Under a blackout, you can expect to see cracking very quickly. In one run, the first cracks were visible by the end of day one. By day five, most seeds had sprouted and were pushing roots down toward the mist.
If humidity is very high and you notice any fuzzy growth, improve airflow and consider a light hydrogen peroxide mist on the surface. Keep all sprays away from direct contact with the pump intake and electronics. The goal is a clean start, so the recirculating loop stays clear.
Irrigation Programming That Works
Short and frequent beats long and infrequent. Long pulses early in the cycle led to wilted seedlings about two weeks in. The correction that brought the tray back on track was to water every five minutes for about thirty seconds. This change kept the mats moist without oversaturating and allowed oxygen to fill the root zone between pulses.
Think of irrigation as a moving target. As seedlings crack and stand, the canopy thickens, and the mat holds more water. You will usually need to adjust both duration and interval as biomass increases. Lift the mat edge and feel it. It should be moist and cool, not dripping. Watch the seedlings. If they flop or look waterlogged, shorten duration and increase frequency. If the center lags behind the edges, add or reposition nozzles to cover the middle and check for clogs. In herb systems that are not microgreens, a rhythm close to once per minute can keep established roots happy. For microgreens, stay with brief bursts and let the air space reset between them.
Lighting and Environment
A simple rhythm of sixteen hours on and eight hours off works well. That schedule was used with basil and parsley, and it translates cleanly to microgreens. Keep one light type per shelf. Inconsistent fixtures over a single tray produced uneven color in practice. The LED side delivered thicker growth and a deeper green, while the other lamp left plants lighter. Mount lights so coverage is even from edge to edge, and raise them as the canopy approaches.
Gentle airflow across the shelves helps prevent damping off and reduces surface moisture on leaves. Remove the blackout once the stand is strong, and the cotyledons are pushing up with energy. If you choose to feed, the herb rig numbers are a practical reference. Around two point zero EC and roughly five point nine pH supported fast growth in that unit. Many growers keep early microgreen stages on clean water and only add feed later, but if you do introduce nutrients, these values are a proven starting point. Keep an eye on leaf color. If leaves pale under otherwise good light, confirm pH near five point nine and consider a small bump in nutrition.
Water and Nutrition
Early sprouting does not require a heavy recipe. Clean water is enough to carry seeds through cracking and into the first lift. Keep pH near five point nine during this stage so enzymes and early roots are comfortable. Once cotyledons open and the stand begins to green, introduce a light feed. An herb rig that supported fast growth ran close to two point zero EC with a pH of about five point nine and a sixteen-hour light window. Use those numbers as an upper guide for established leafy crops. For microgreens, begin much lower and increase only if the color fades. Check mats by touch. They should feel cool and moist rather than soggy. If the mat drips after a pulse, shorten the duration or increase the time between pulses. Aerated roots can drink more efficiently, and that reduces the need for high feed levels. If you see pale leaves under good light, confirm pH first, then lift EC in small steps until color deepens.
Keep the reservoir clean. Circulation sends the same solution through misters all day, so any debris quickly becomes a clog. A simple mesh screen before the pump helps. If you add nutrients, mix outside the tank, and add slowly while monitoring EC. Always calibrate meters before a new cycle.
Blackout to First Light
After soaking for eight to nine hours, spread seeds on food-safe mats and cover for a blackout. The first signs of cracking can appear by the end of day one. By day five, most seeds should show visible radicles, and many will begin probing through the mat to reach the mist. Around day eight, the stand often begins to lift as a sheet. Remove blackout when the canopy pushes firmly, and light becomes the next limiting factor. In one run, the cover stayed on until day twelve, which delayed coloring and slowed momentum. Use the cover to kick off germination rather than a crutch to stretch it. The ideal moment to remove it is when the stand is strong enough to hold itself, and the roots are clearly in the mist zone.
Common Pitfalls and Quick Fixes
Long and infrequent watering harms young plants. A schedule that soaked for minutes at a time led to wilt around day fourteen. The fix was simple and measurable. Shift to every five minutes for about thirty seconds. This single change kept oxygen in the root zone between pulses and stopped the slump.
Nozzle layout can quietly reduce yield. When misters sit only at the tray perimeter, the center dries faster, and germination becomes patchy. Add a spray point beneath the middle and confirm a uniform pattern across the entire tray before seeding. Mixed lighting over one tray can also mislead your eye. One side under a stronger LED produced thicker, darker growth, while the other lamp left leaves lighter. Keep the same fixture type per shelf so intensity and spectrum do not vary across a single crop.
Sanitation matters more than it seems. Rinse hard parts in a mild bleach wash before each cycle. If humidity runs high under blackout and you notice fuzzy patches, improve airflow and use a light hydrogen peroxide mist on the surface. Finally, watch the plant structure. Red tinges on stems can indicate stress from inconsistent water or temperature. Stabilize irrigation intervals and keep air movement gentle and steady.
When to Harvest and What to Expect
A well-tuned aeroponic tray can be ready far sooner than a month. A first attempt that began with long watering cycles reached harvest around day twenty-nine because early stress slowed the stand. With short, frequent pulses from the start, most sunflower trays can finish in the second week. Readiness is about more than days on the calendar. Look for a dense, upright stand with fully opened cotyledons and a crisp snap when you pinch a stem. Color should be even across the tray. Lift a corner of the mat and check the root curtain. Healthy roots hang in clean strands with no sour smell. If the flavor tastes weak or the stems look translucent, keep light and airflow steady for another day or two rather than rushing the cut.
Post-Harvest Turnover
Treat harvest as the start of your next cycle. Remove the mat and roots, then rinse trays, lids, and plumbing. Wash with a mild bleach solution, rinse thoroughly, and let parts dry. Open the misters for a quick inspection and verify a clean spray pattern. Refill the tank with fresh water and confirm the pH near five point nine. Reseed immediately so you can hold a weekly cadence. Keeping a small stock of pre-soaked seed ready to spread helps avoid empty shelves. Record your last irrigation settings and any observations about canopy color or density so you can adjust the next run without guesswork.
Scaling Notes
Once the single-tray routine feels automatic, scaling is straightforward. Keep irrigation logic identical from shelf to shelf and use the same light model on each level to avoid uneven growth. For context on output when systems are dialed, two high-density towers planted with spinach supported about three hundred plants and produced roughly four to six pounds every fourteen to twenty-one days. That benchmark shows what a consistent harvest rhythm can look like. In herb-focused rigs, parsley proved highly efficient, and basil responded well to a sixteen-hour light cycle and near two point zero EC with pH around five point nine. Those figures guide you when you broaden beyond microgreens or want to produce specialty herbs alongside trays.
Quick Troubleshooting Guide
Wilted or floppy seedlings
The likely cause is pulses that are too long with not enough airtime. Change to every five minutes for around thirty seconds and observe recovery within a day.
Patchy growth with a weak center
The likely cause is poor nozzle placement or a partial clog. Add a mister beneath the center and verify an even pattern across the whole tray.
Pale leaves under adequate time on light
The likely cause is low nutrition or pH drift. Confirm pH near five point nine. If pH is stable, increase EC gradually from very low toward a level that restores color.
Mildew smell or fuzzy patches during the early days
The likely cause is stagnant air and excessive humidity under the cover. Improve airflow, shorten pulse duration, and use a cautious hydrogen peroxide mist on the surface.
Uneven color across one tray
The likely cause is mixed fixtures on the same shelf. Standardize lighting so all plants receive the same intensity and spectrum.
Slow finish beyond the second week
The likely cause is early stress from overwatering or delayed removal of the cover. Adopt short, frequent pulses from day one and remove blackout as soon as the stand lifts strongly.
If you want, I can now expand this into the full remaining sections with a printable one-page checklist and a day-by-day programming card that includes soak time, blackout timing, irrigation intervals, and quick color checks.
🌿 Recommended Microgreens Supplies |