
Growing your own alfalfa microgreens is one of those small habits that packs a big punch. These tiny greens are loaded with nutrients like vitamin K and C and contain powerful antioxidants that support immune health.
In fact, studies have shown that microgreens can contain up to 40 times more nutrients than their mature counterparts, according to the USDA. And the best part? You don’t need a backyard, expensive tools, or tons of time.
A simple jar, a handful of seeds, and a few minutes a day is all it takes. Within just 4 to 5 days, you’ll have a fresh, crunchy batch of greens ready to toss into your sandwiches, salads, or wraps 🌱🥪💚
Seeds: The Foundation of Your Grow
Seed quality is one of the most critical components of successful microgreens cultivation. Not all seeds are created equal, especially when growing them as microgreens or sprouts. Seeds intended for microgreens are often labeled for sprouting, which means they are untreated and tested for pathogens like E. coli and Salmonella — a necessary precaution since they are grown and consumed raw.
There are two primary categories of seeds: conventional and organic. While conventional seeds may be cheaper, they often come with the risk of chemical treatments or lower germination rates. Organic microgreen seeds, on the other hand, are certified to be free from synthetic fertilizers, pesticides, and genetic modification. The cost difference is evident when comparing real seed vendors:
- Todd’s Seeds offers alfalfa at approximately $7.86 per pound
- Handy Pantry provides organic alfalfa seeds for about $13.48 per pound
- Nature Jim’s sells USDA-certified organic seeds at a premium price of $18 per pound
Although organic seeds are more expensive, they are often worth the investment due to better germination consistency, safety, and flavor.
When it comes to quantity, a surprisingly small amount of seed goes a long way. For instance, just one tablespoon of alfalfa seeds is sufficient to fully cover a 10-inch by 10-inch tray. This means a single pound of seeds can last multiple growth cycles, making the investment both practical and cost-effective.
Another critical detail is seed size. Alfalfa seeds are especially small — even smaller than sesame seeds — which affects how they are sown. Their size allows for dense planting without risk of overcrowding in the early stages. Still, good air circulation and proper drainage are vital to avoid mold or bacterial growth during germination.
Growing Medium: Soil, Coconut Coir, or Alternatives
The growing medium provides structure and, in some cases, nutrients for the developing roots of microgreens. The choice of medium can greatly influence the ease of cultivation, the cleanliness of harvest, and even the nutritional value of the final product.
Traditional potting soil remains the most beginner-friendly option. It holds moisture well, contains some inherent nutrients, and mimics natural growing conditions. When using potting soil, seeds typically don’t require any supplemental feeding, making it an excellent starting point for new growers.
Coconut coir, a sustainable medium made from coconut husk fibers, has grown in popularity due to its eco-friendliness and sterile nature. It is clean, easy to work with, and biodegradable. However, coconut coir lacks nutrients, so a liquid fertilizer must be introduced after the seeds germinate. In practical growing routines, growers start adding a diluted nutrient solution around day four to support optimal growth.
Another option for those experimenting with sprouts rather than full microgreens is to use paper towels or cheesecloth as a base. For example, one method involved placing alfalfa seeds on a paper towel-lined tray, which allowed roots to form while preventing seeds from falling through drainage holes. This low-cost method still yielded dense, healthy sprouts in just four days. However, it’s better suited for sprouting than growing true microgreens, which require more support and stability.
There are also commercial options like hemp mats or grow pads, designed specifically for microgreen cultivation. While these provide convenience and cleanliness, they are significantly more expensive than DIY or traditional mediums and may not be ideal for those just starting.
Ultimately, for the best balance of cost, success rate, and ease of handling, most first-time growers should begin with potting soil and experiment with alternatives after gaining some experience.
Trays and Containers
The container you choose to grow your microgreens affects everything from germination success to moisture management and air circulation. While microgreens can technically be grown in almost any shallow container, using purpose-built trays ensures better results and simplifies the process.
The most commonly used trays are the 10-inch by 10-inch or 10-inch by 20-inch black plastic trays with and without drainage holes. The preferred method involves nesting two trays — one with holes (top tray) for drainage and one without holes (bottom tray) to catch excess water. This allows for bottom watering, which keeps the roots hydrated while reducing the risk of mold growth and damping-off, a common fungal issue in microgreens.
In contrast, for sprouting methods like those used for alfalfa, wide-mouth jars are a preferred container. These jars can be made of glass or plastic and should be fitted with mesh covers. The mesh allows for water drainage and air circulation while preventing the tiny seeds from escaping. If a mesh lid is not available, a breathable fabric like cheesecloth secured with a rubber band is an effective substitute. Once soaked and drained, the jar is tilted at an angle to ensure complete drainage while allowing airflow.
Ambient temperature also plays a crucial role when using containers, especially jars. Sprouting in jars is best done in environments where the temperature stays below 80 degrees Fahrenheit or 27 degrees Celsius. Warmer temperatures increase the risk of bacterial growth, which can lead to unpleasant odors and food safety issues.
Trays offer more space and are better suited for growing microgreens that are harvested above the soil line, while jars are ideal for smaller sprouts like alfalfa that are rinsed daily and eaten whole. Both methods are effective but serve different purposes in the broader microgreens ecosystem.
🌿 Recommended Microgreens Supplies |
Watering Tools and Techniques
Watering is a foundational part of microgreens cultivation. It goes far beyond just keeping the growing medium moist. The method, frequency, and type of watering all directly impact the growth rate, flavor, and safety of your microgreens.
In jar-based sprouting methods, such as with alfalfa, water management is centered around a twice-daily rinse. After soaking the seeds in water for four hours, they are optionally treated with white vinegar to reduce the risk of mold, then thoroughly rinsed. This rinsing should be done every twelve hours. The seeds need to be agitated gently in the water to dislodge bacteria and impurities, and then the water must be completely drained. The jar should be inverted and tilted at an angle over a bowl to allow continuous draining. This not only removes excess water but also improves airflow, creating an environment less conducive to mold and bacterial growth.
In tray-based systems, watering varies depending on the stage of growth. At the early stage, when seeds are just placed on the medium, misting is the preferred method. A fine spray of water twice a day ensures adequate hydration without disturbing the delicate placement of seeds. Once the roots begin to penetrate the medium, typically by the third or fourth day, bottom watering becomes ideal. This involves adding water to a tray beneath the one holding the growing medium. The roots draw moisture upward, which strengthens their development and keeps the surface dry. This minimizes the risk of damping-off disease and other water-related pathogens.
Water quality is another critical aspect. While tap water is generally acceptable, it may contain chlorine or other additives that can hinder growth. Using filtered water can lead to better germination and healthier plants. As a preventative measure, a tablespoon of white vinegar can be used during the seed soaking phase to sanitize the seeds, though this is not mandatory. This simple step can reduce the likelihood of mold, especially for beginners.
For small-scale growers, a spray bottle and a nested tray system are sufficient to control moisture levels. Larger-scale growers may invest in capillary mats or timed irrigation systems. However, for most home growers, a reliable watering routine using simple tools ensures excellent results.
Lighting: Natural vs. Artificial
Light plays a central role in microgreens development, especially after germination. Before sprouts need light, they benefit from being kept in the dark. This mimics natural soil conditions, encouraging robust root formation. Blocking light during the first two to three days helps ensure even germination. In practical terms, jars can be covered with a dark cloth, while trays can be stacked or placed in a dark cabinet.
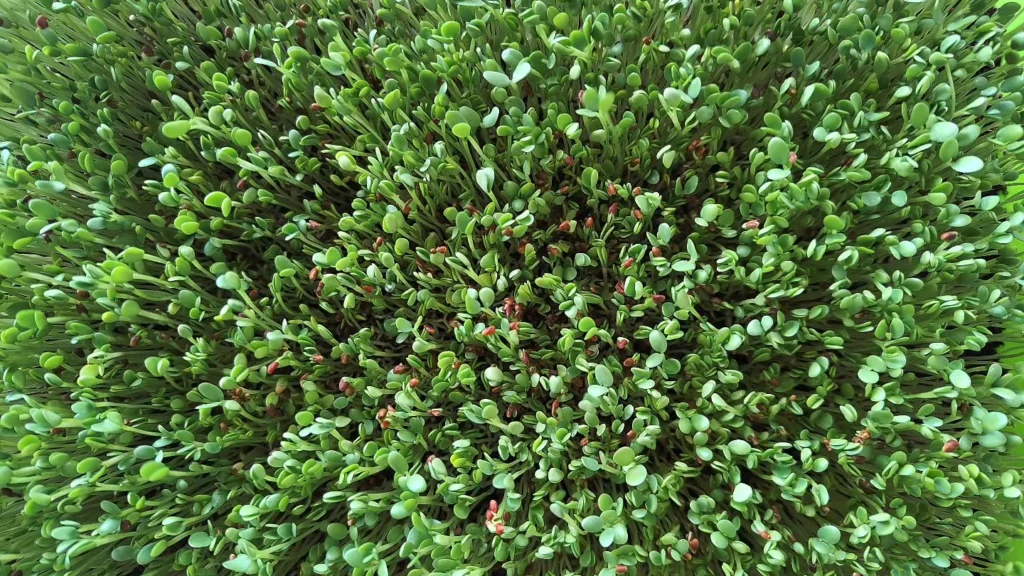
After the initial germination phase, the sprouts require exposure to light to initiate photosynthesis. This process is what causes the color of microgreens to turn vibrant green and improves their nutritional content. In one real-world example, alfalfa sprouts placed under light after day three developed a richer green hue, indicating the successful production of chlorophyll.
There are two primary sources of light that growers can rely on. The first is natural sunlight. Placing your tray or jar near a bright windowsill can provide enough light during the day to support healthy growth. However, sunlight can be inconsistent, especially in winter months or in homes with limited natural exposure. This inconsistency can result in pale, leggy microgreens that lack structure and flavor.
The second option is artificial lighting. LED grow lights that offer full-spectrum light closely mimic the wavelength of natural sunlight. These lights are energy-efficient, low-heat, and provide a consistent light source year-round. When using grow lights, positioning them about six to twelve inches above the plants and keeping them on for twelve to sixteen hours per day yields optimal results.
For beginners, artificial lighting may seem like an added expense, but it provides greater control over your growing environment and ensures more predictable outcomes. Whether using natural or artificial light, what matters most is that microgreens receive enough light during the post-germination stage to grow thick, strong, and flavorful.
Temperature and Ventilation
Maintaining proper temperature and ventilation is vital for successful microgreens growth. Seeds such as alfalfa germinate best in a temperature range between sixty-five and seventy-five degrees Fahrenheit. If temperatures fall below this range, germination slows, and growth becomes uneven. On the other hand, if temperatures rise above eighty degrees Fahrenheit, the risk of mold and bacterial growth increases significantly.
In practical examples, growers have noted the importance of keeping room temperatures below eighty degrees during sprouting. This is particularly important when using jars, where humidity and warmth can build up quickly inside a confined space. Excessive heat, combined with moisture, creates an ideal environment for harmful microorganisms, which can spoil an entire batch.
Ventilation works hand in hand with temperature control. Good air circulation prevents stagnant moisture from accumulating around the growing medium. In tray systems, using a lid with a built-in gap allows for airflow while still keeping the environment humid enough for seed germination. In jars, leaving the top open and tilted at an angle helps both with drainage and with air exchange.
A cool, well-ventilated space such as a kitchen counter, windowsill, or utility room often provides the best conditions. If your space tends to be humid or poorly ventilated, using a small fan to circulate the air can be helpful. This is especially true in tray-based systems where high humidity can cause surface mold and poor seed performance.
Experienced growers also recommend avoiding areas with sharp temperature fluctuations, such as near ovens or open windows. Consistent temperatures, combined with reliable airflow, lead to healthier plants, less risk of disease, and faster harvest times.
Sanitization and Mold Prevention
Sanitization is one of the most overlooked yet most important aspects of growing microgreens. Because microgreens are harvested and eaten raw, any contamination in the growing environment can lead directly to foodborne illness. It is critical to keep both tools and practices clean from the very beginning.
One effective and simple step is to treat the seeds with a solution of white vinegar before starting the sprouting process. Using one tablespoon of white vinegar per jar and soaking the seeds for ten minutes helps kill off surface bacteria and fungi. After soaking, the seeds must be rinsed thoroughly with clean water to remove any residue.
Sanitizing your tools is equally important. All growing containers, whether jars or trays, must be washed with hot soapy water and disinfected between uses. For deeper cleaning, a mild bleach solution can be used — one tablespoon of bleach per gallon of water — followed by a thorough rinse to eliminate chemical traces. This practice prevents cross-contamination between growing cycles and helps reduce mold growth.
Once growth begins, mold prevention becomes a daily task. Key practices include proper spacing of seeds, ensuring adequate drainage, using bottom watering when appropriate, and avoiding oversaturation. Crowding seeds too densely creates high humidity zones and reduces airflow, which are the perfect conditions for mold. It’s better to spread seeds out thinly, even if that means using multiple trays or jars.
Airflow also plays a preventative role. Positioning a fan nearby, even at low speed, can significantly reduce the chances of mold by encouraging evaporation of excess surface moisture. If white fuzz develops on your microgreens, it is important to determine whether it is mold or root hairs. Mold typically appears with a musty smell and spreads across the surface, whereas root hairs are attached to the roots and appear evenly around them.
In the event of visible mold, it is best to discard the affected batch, clean all equipment thoroughly, and adjust your watering and ventilation practices before starting again. A clean grow environment results in better yields, fresher taste, and a safer harvest.
Grow Lights and Reflectors
Grow lights are a critical component for anyone serious about year-round microgreens production, especially in regions with limited sunlight during the winter months. While natural sunlight is often adequate during spring and summer, its variability can hinder consistent microgreen yields and quality. This is where full-spectrum grow lights become indispensable.
Grow lights replicate the wavelengths of natural sunlight and promote healthy chlorophyll production, especially after the initial germination phase when the seeds begin photosynthesizing. In one example of sprouting alfalfa, the sprouts were kept in the dark for the first three days to encourage uniform root development. Once they were exposed to light on day four, they rapidly turned green, signaling the beginning of effective photosynthesis. Without light, microgreens tend to become pale and leggy, lacking in both flavor and nutrition.
The most effective grow lights are LED-based. These lights offer several advantages over older fluorescent or incandescent systems. LEDs emit very little heat, which reduces the risk of overheating the tender microgreens. They are energy-efficient, which lowers electricity costs for long-term growers. Most importantly, full-spectrum LED lights provide the blue and red wavelengths essential for plant development.
The position of grow lights significantly influences microgreen growth. Ideally, they should be placed six to twelve inches above the canopy of the plants. This proximity ensures that the light intensity is sufficient without burning the leaves. A consistent light schedule of twelve to sixteen hours per day produces the best results. Using a timer can automate this process and improve consistency, especially for busy growers.
Reflectors can enhance the efficiency of grow lights by directing more light toward the plants. They are especially useful in setups where grow lights are placed in open spaces without enclosing walls. Mylar sheets, reflective panels, or even simple aluminum foil can be used to bounce light back onto the growing trays. This ensures even exposure across all parts of the tray and reduces weak or stunted growth near the edges.
In summary, a good grow light system with thoughtful positioning and reflective enhancements can make a substantial difference in both the yield and quality of your microgreens. It transforms an unpredictable growing environment into one that is controlled, productive, and suitable for year-round indoor farming.
Harvesting Tools
Harvesting is the final and most delicate stage in microgreens cultivation. It not only affects the presentation and shelf life of the greens but also determines how clean and safe they are to consume. Using the right tools and techniques is essential to ensure that you do not damage the crop or introduce contamination.
The most common harvesting tool is a pair of sharp scissors or a clean kitchen knife. These tools should be sanitized before each use to prevent any transfer of bacteria. Dull blades can crush or tear the stems, causing bruising and faster spoilage. Sharp blades, on the other hand, slice cleanly through the stems, preserving their structure and reducing oxidation.
When harvesting, it’s crucial to cut just above the growing medium to avoid pulling up soil, paper fibers, or coco coir along with the greens. Contaminated greens are not only unappetizing but can also harbor harmful bacteria. For microgreens grown on trays lined with paper towels, like alfalfa in the tray method, the roots are firmly anchored, allowing for a smooth, clean cut. Harvesting is typically done on the fourth to seventh day, depending on the crop. In the alfalfa example, the harvest occurred at about three and a half inches tall, on day four.
It’s recommended to harvest just before use when possible, as freshly cut microgreens retain their peak flavor and nutrition. However, if you plan to store them, harvesting during the cooler part of the day or using a cold pack immediately after cutting helps preserve freshness.
Harvesting is also the time to inspect your crop closely. Discard any slimy, discolored, or oddly smelling sprouts, as these may indicate mold or rot. While some variation in growth is normal, uniformity in color and size is a good indicator of a healthy batch.
A clean cutting tool and a careful hand will help ensure that your harvest looks appealing, stores well, and maintains the delicate textures that make microgreens a premium addition to any meal.
Storage Solutions
Proper storage is essential for extending the shelf life of microgreens without compromising on flavor, texture, or safety. Because microgreens are harvested in their tender early stages, they are highly perishable and require precise handling.
Once harvested, microgreens should be immediately placed in a cool environment. The ideal temperature for storage is between 32 and 40 degrees Fahrenheit. At this range, metabolic processes within the plant tissues slow down, preserving freshness and minimizing moisture loss.
In practice, one of the most effective ways to store microgreens is in airtight containers or resealable plastic bags. For example, alfalfa sprouts plucked from trays can be stored in sealed bags and kept in the refrigerator, where they will stay fresh for at least a week. The key here is to ensure that the greens are dry before sealing. Any residual moisture can create a humid environment, accelerating decay and encouraging bacterial growth.
Some growers prefer using perforated containers or breathable clamshells lined with paper towels. These allow slight airflow while absorbing excess moisture, striking a balance between humidity and dryness. This method is particularly useful in high-humidity regions where condensation in sealed containers may become an issue.
It’s also important not to wash microgreens before storage. Washing introduces moisture that shortens shelf life. Instead, rinse them just before use. If pre-washing is necessary, thoroughly dry the greens using a salad spinner and paper towels before refrigeration.
Labeling your storage containers with the harvest date is another helpful practice, especially if you’re growing multiple batches or varieties. This ensures that older greens are used first and helps track how well each batch performs over time.
Proper storage methods not only prolong usability but also protect the delicate flavors and nutrients that make microgreens a valuable addition to the diet.
Optional Advanced Tools and Add-ons
While basic tools are sufficient to start growing microgreens, advanced tools can significantly improve efficiency, productivity, and precision, especially for those planning to scale up or grow year-round.
One useful upgrade is an automated timer for lighting systems. Since microgreens benefit from a consistent 12 to 16-hour light cycle, a timer eliminates the need to manually switch lights on and off each day. This consistency results in better growth rates and more uniform harvests.
For larger-scale operations, heat mats with thermostatic controls can help maintain optimal root zone temperatures. These are particularly useful in cooler environments where ambient temperatures dip below ideal germination levels. Heat mats promote faster germination and uniform sprouting, especially in early stages.
Humidity domes are another useful addition. These plastic covers trap moisture and warmth, creating a greenhouse-like effect that accelerates germination. Once sprouts emerge, the domes can be removed to reduce the risk of mold. Some dome systems include adjustable vents to fine-tune humidity and airflow.
Digital hygrometers and thermometers provide real-time data on environmental conditions. This is particularly helpful when fine-tuning the growing space to ensure consistent outcomes across batches. If mold or uneven growth becomes a recurring issue, having this data helps troubleshoot and adjust settings accordingly.
For irrigation, capillary mats and wicking systems automate bottom watering, reducing the risk of overwatering and minimizing daily labor. This is especially valuable in tray systems where root development is key to healthy microgreens.
Finally, some growers invest in air purifiers or dehumidifiers to maintain optimal air quality. These are not necessary for small batches, but become beneficial when growing in confined or poorly ventilated spaces where mold is a recurring issue.
While none of these tools are mandatory for beginners, they offer valuable enhancements to the growing process. Each of them supports better control over variables, resulting in healthier plants, greater yields, and more predictable outcomes.