
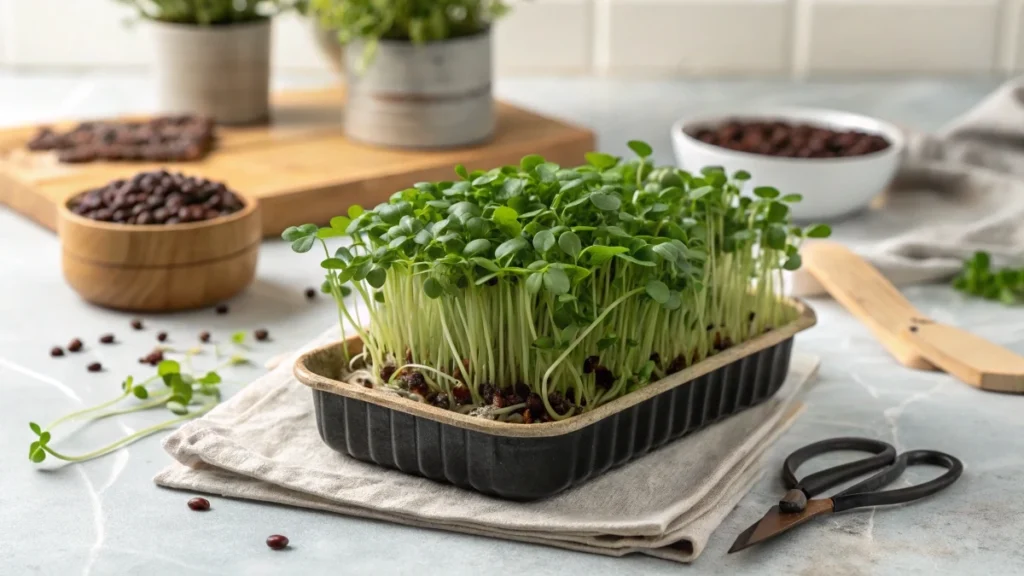
Black bean microgreens are nutrient-dense, flavorful, and simple to grow. They are ready to harvest in about eight to ten days and bring a rich, nutty taste to everyday meals. Their thick stems and tender leaves make them excellent for tacos, salads, omelets, and sandwiches. Even in a small space, you can raise a tray full of greens using just light, water, and quality seeds.
These tiny greens are full of protein, fiber, and antioxidants that support a healthy heart and digestion. They can be grown on coco coir, soil mix, or natural fiber mats with consistent watering and airflow. With a little care, you can produce a fresh crop every week and enjoy greens that stay crisp and flavorful longer than most other varieties.
What Are Black Bean Microgreens
Black bean microgreens are young plants grown from black bean seeds until the first small leaves appear. They differ from sprouts because they grow in a shallow layer of growing medium instead of water and need light to develop color and taste. Sprouts are eaten whole, while microgreens are harvested just above the surface once they have formed leaves.
These microgreens have a mild, earthy taste that reminds you of freshly cooked beans. The stems are crunchy while the leaves remain smooth and tender. This mix of textures makes them ideal for topping soups, stirring into rice bowls, or using as a garnish on breakfast plates. They are also safer and easier to handle than sprouts and last longer once refrigerated.
Preparing for Growth
Selecting Quality Seeds
Always begin with untreated and food-grade seeds to ensure safe growth. Buy from reliable suppliers that specialize in edible microgreen seed. For one growing tray of ten by twenty inches, you will need about two hundred to two hundred and fifty grams of seeds, depending on the seed size. Store the seeds in a cool, dry container away from sunlight to maintain their strength.
Fresh seeds usually sprout at a rate above ninety percent, which keeps your trays even and productive. A uniform crop means you can predict harvest time and achieve consistent yields each cycle, whether you are growing for home use or local sales.
Soaking and Prepping Seeds
Rinse the seeds in clean water to remove dust. Soak them in cool water for eight to twelve hours using one part seed to three parts water. Soaking softens the outer coat and helps them sprout faster. After soaking, drain completely and let the seeds rest in a strainer for about twenty minutes until surface moisture dries off.
Hydrated beans should look plump and firm. If some beans have split or smell off, discard them before planting. Proper soaking gives uniform germination and prevents mold growth later. This single step often makes the difference between an average tray and an excellent one.
Growing Setup and Materials
Trays and Mediums
Use one tray with drainage holes nested inside a solid bottom tray for easy watering. Black bean microgreens grow well on coco coir or a fine mix of coir and compost because it holds moisture evenly without becoming soggy. If you prefer a cleaner setup, try natural fiber mats or hydro felt sheets. They stay tidy and are easy to lift after harvest.
Whichever medium you use, make sure it is level and slightly moist before spreading the seeds. A flat surface ensures even sprouting and healthy roots. Avoid overwatering at the start since beans are larger and hold moisture within their shells.
Sanitization and Setup
Clean your trays and tools with warm, soapy water and rinse thoroughly. Allow everything to air dry before planting. Sanitation prevents mold and bacterial growth, which can spoil the crop quickly. Spread your growing medium evenly about one and a half to two centimeters thick across the tray. Press it gently to smooth the surface without compacting it. Lightly mist with water until it feels evenly damp to the touch.
🌿 Recommended Microgreens Supplies |
Step-by-Step Growth Process
Day 0: Sowing
Spread the soaked seeds across the surface of the tray so that they sit close but not overlapping. Mist lightly to settle them into place. Cover with another tray to keep the seeds in darkness and add a small weight on top to encourage strong root growth. Place the tray in a room with good airflow and a steady temperature of around twenty-two degrees Celsius.
Days 1 to 3: Blackout Phase
Keep the tray covered during these first days while roots anchor into the medium. Check daily to make sure the surface stays slightly moist. Add a little water to the bottom tray when needed rather than spraying from above. By the end of the third day, you should see the beans pushing upward as one solid mat. If moisture builds up or you notice a sour smell, increase air movement and remove any condensation on the lid.
Days 4 to 8: Light Phase
Move the tray into bright light or under LED grow lights. Keep the room temperature steady between twenty and twenty-three degrees Celsius. Start watering from the bottom tray only. Pour water in slowly, let the medium absorb it, and then drain any excess after a few minutes. Turn the tray each day so that light reaches all sides evenly.
During this period, the plants will stretch upward, open their cotyledons, and begin forming the first true leaves. You will notice a deep green color and firm stems when they are at their best. Harvest them between the eighth and ninth day when flavor and crunch are at their peak.
Watering and Mold Prevention
Consistent watering is the key to healthy black bean microgreens. Too much water encourages mold, while too little causes thin, weak stems. After uncovering, rely only on bottom watering. A full tray usually needs about one cup of water each day, depending on humidity.
Keep room humidity around fifty percent and use a small fan nearby to keep air gently moving. This circulation prevents moisture buildup on leaves and reduces the chance of fungal growth. If you notice white fuzz on the seed hulls, it may mean the air is too still, or the tray is too wet. Remove any affected beans and allow more airflow. Clean all trays and tools after each harvest to prepare for the next crop.
Balanced watering, fresh air, and clean tools ensure your microgreens stay crisp, aromatic, and free from mold every time you grow them.
Harvesting and Storing
Black bean microgreens are ready when cotyledons are fully open, and the first true leaf is just starting to show. This stage usually arrives between day eight and day nine after sowing. The stems feel firm, the flavor is sweet and nutty, and the aroma is fresh. Harvest in the cool part of the day. Use a clean, sharp knife or scissors and cut just above the medium so no debris reaches your container. Avoid pulling because roots can bring up particles that shorten shelf life.
Spread the cut greens in a thin layer on a clean tray and chill them promptly to remove field heat. A quick cool-down preserves texture and slows respiration. If any moisture clings to the leaves, lay them on a dry paper towel for a few minutes. Package in vented clamshells or breathable produce bags. Keep them in the refrigerator at three to five degrees Celsius. Under steady cold and low condensation, black bean microgreens keep their best quality for six to eight days. Handle gently and open containers only when needed to limit moisture shifts.
Nutrition and Benefits
Black bean microgreens provide a concentrated dose of plant nutrients in a small serving. A typical one-hundred-gram portion of fresh microgreens ranges around twenty to thirty five kilocalories with roughly two to four grams of protein and two to three grams of fiber. Young legume shoots, they supply folate, vitamin C, potassium, and a mix of polyphenols that support antioxidant activity. Their dark seed background points to anthocyanin-linked compounds that contribute to color and protective capacity.
Compared with mature cooked beans, microgreens deliver a lighter texture and faster digestibility. They also bring fresh enzymes and vitamin C that are sensitive to long cooking. For readers focused on blood sugar balance, pairing these greens with whole grains and healthy fats can create a steadier post-meal response. For gut health, the blend of fiber and polyphenols supports a diverse microbiome. For heart health, their potassium and low-sodium profile fit easily into daily meals.
If serving raw to young children, older adults, or anyone with a sensitive immune system, source clean seed, follow careful sanitation, and consider a light sauté before eating. This approach keeps flavor while reducing microbial risk.
Flavor, Pairings, and Culinary Uses
The flavor is gentle and earthy with a hint of sweetness. Stems are crisp and juicy, while the leaves are soft. That balance makes them versatile. They brighten tacos, tostadas, and burrito bowls. They bring body to avocado toast and egg scrambles. In salads, they pair well with citrus, sweet corn, grilled peppers, and crumbly cheeses. A quick stir in a warm pan with garlic and lime creates a simple topper for rice and beans. For creamy dressings or pestos, blend them with olive oil, cilantro, and a touch of yogurt or lime to keep the color vibrant.
Easy and Tasty Recipes
Black Bean Microgreen Street Tacos
Prep time: ten minutes
Serves two
Ingredients
Black bean microgreens, two cups loosely packed
Warm corn tortillas six
Cooked black beans, half a cup rinsed
Red onion, two tablespoons, finely chopped
Fresh cilantro, two tablespoons chopped
Lime, one cut into wedges
Ground cumi,n one-quarter teaspoon
Olive oil, one teaspoon
Salt and black pepper to taste
Method
Warm tortillas. Heat a small pan with olive oil. Add black beans, cumin, salt, and pepper, and cook for one to two minutes until fragrant. Remove from heat and fold in one cup of microgreens so they soften lightly. Fill tortillas with the warm mixture. Top with fresh microgreens, onion, and cilantro. Finish with lime juice.
Avocado Toast With Chili Garlic Microgreens
Prep time: eight minutes
Serves two
Ingredients
Sourdough bread, two slices toasted
Ripe avocado, one mashed
Black bean microgreens, one and a half cups
Garlic, one small clove, grated
Red chili flakes, a pinch
Olive oil, one teaspoon
Lemon juice, one teaspoon
Salt to taste
Method
Mix avocado, garlic, lemon juice, olive oil, salt, and chili flakes. Spread on toast. Pile on microgreens and press gently so they set into the avocado. Serve immediately for the best crunch.
Five Minute Egg Scramble With Microgreens and Cotija
Prep time: five minutes
Serves two
Ingredients
Eggs four beaten
Black bean microgreens, one cup
Cotija or feta cheese, two tablespoons crumbled
Butter or olive oil, one teaspoon
Salt and pepper to taste
Method
Warm a nonstick pan and add fat. Pour in eggs. Stir gently until just set. Fold in microgreens and cheese, and remove from the heat so the greens stay bright. Season to taste.
Citrus Corn Salad With Black Bean Microgreens
Prep time: ten minutes
Serves two to three
Ingredients
Black bean microgreens, two cups
Cooked sweet corn, one cup
Orange segments, half a cup
Cucumber half cup diced
Red bell pepper half cup, diced
Lime juice, one tablespoon
Olive oil, one tablespoon
Honey or agave, one teaspoon
Salt and pepper to taste
Method
Whisk lime juice, olive oil, and honey. Toss corn, orange, cucumber, and pepper with the dressing. Fold in microgreens just before serving. Season lightly.
Creamy Microgreen Cilantro Pesto
Prep time: seven minutes
Makes about half a cup
Ingredients
Black bean microgreens, one and a half cups
Fresh cilantro, half a cup packed
Greek yogurt, two tablespoons, or use extra virgin olive oil, two tablespoons,s for a dairy-free version
Lime juice, one tablespoon
Garlic half clove
Salt to taste
Method
Blend microgreens, cilantro, yogurt or oil, lime juice, garlic, and salt until smooth. Adjust with a splash of water for a pourable dressing or keep thick for a spread. Spoon over quesadillas, grain bowls, or grilled chicken.
Troubleshooting Common Issues
If growth looks tall and floppy, the light may be weak or too far from the canopy. Raise the intensity or lower the fixture to reach a moderate range for sturdy stems. If the crop stays pale after uncovering, increase light and ensure nutrition is adequate in your medium. If you catch a sour smell, ll inspect for standing water in the reservoir and drain it immediately. If you see fuzzy, patchy seed hulls, reduce density next cycle, increase airflow, and switch to bottom watering only. If seed hulls cling to cotyledons, lightly brush the canopy with a clean hand or increase humidity for a short period and then resume normal airflow.
Cost, Yield, and Profit Potential
A practical seed rate for one ten-by-twenty tray is two hundred to two hundred and fifty grams. Under steady conditions, this tray produces about five hundred to nine hundred grams of fresh greens, depending on the medium, light, and room climate. That equals roughly seed-to-fresh-yieldld ratio of near two to three by weight.
For a simple cost example, assume seed at moderate pricing, a small amount of coco coir, a little power for lights and fans, and a recyclable clamshell. The total direct cost per tray often lands near the equivalent of a few dollars in most markets. If you portion into one-hundred-gram packs, the cost per pack stays low while retail pricing for fresh microgreens generally supports a healthy margin at farm stands, small grocers, or direct to chef sales. Keep records for each run so you can track your own averages and tune sowing density for the best return.
Final Thoughts
Black bean microgreens reward careful growers with rich flavor, crisp texture, and reliable yields. With clean seed, even moisture, and steady airflow, you can harvest in just over a week and store a bright, nutrient-dense green that lifts everyday meals. Start with one tray, note your results, and scale to a weekly rhythm that fits your kitchen or local sales plan.