
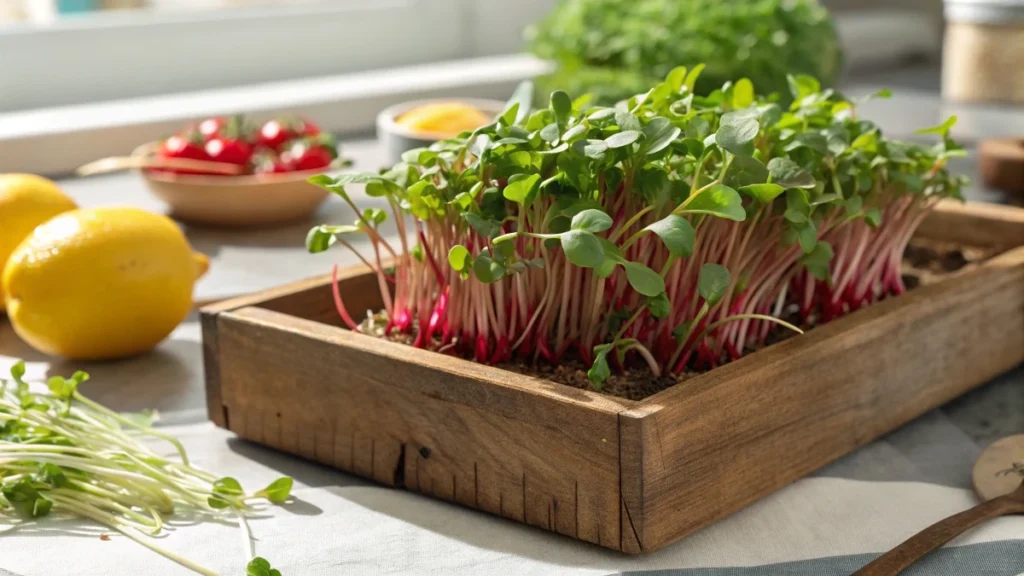
Growing buckwheat microgreens at home is one of the simplest ways to add fresh nutrition and color to your meals. These tender greens, sometimes called “buckwheat lettuce,” sprout broad, leafy tops and vibrant stems in just 7 to 14 days.
Unlike many other microgreens, they thrive in both soil and coconut coir, making them versatile for any setup, from a kitchen counter tray to a shaded outdoor shelf.
A small sowing can produce a surprisingly generous harvest, with some growers reporting over 13 ounces from just 2 ounces of seed in ten days.
Beyond their ease of cultivation, buckwheat microgreens are packed with vitamins A, B, C, and K, minerals like iron and magnesium, and the antioxidant rutin, known for supporting circulation.
With a crisp, zesty flavor, they are perfect for salads, smoothies, soups, and wraps—nutritious food ready at your fingertips.
Nutritional Benefits of Buckwheat Microgreens
Growers consistently point to a rich profile of vitamins and minerals. Buckwheat microgreens are described as a good source of vitamins A, B6, C, K, and folate, along with iron, calcium, potassium, magnesium, chlorophyll, amino acids, and active enzymes. Several growers also note a meaningful protein contribution of around fifteen percent for this stage of plant growth, with plenty of fiber.
A standout compound is rutin, a polyphenol associated with healthy circulation. Growers who sell to the public emphasize rutin as a key reason customers add buckwheat microgreens to mixes and bowls. They also share a practical serving note. Eating more than about forty grams a day can trigger a temporary skin sensitivity in some people. Vendors often portion punnets at about forty grams to stay within a typical daily serving.
These greens are usually eaten fresh soon after harvest. That is when texture is crispest and flavor is brightest, and when the nutrient profile is at its peak for this early growth stage.
Preparing to Grow Buckwheat Microgreens
Seeds
Choose clean raw buckwheat groats with hulls intact. Several practical seed rates have been proven in the grow room. About 60 grams suits a standard 1020 tray when sowing dry. About 170 to 175 grams, or roughly one cup,p suits a 10 by 10 tray whepre-sproutingng for two days. Another reliable pattern is five tablespoons to cover a 10-by-10 tray of pre-soaked or dry seed. A compact method uses about 2.1 ounces on a single shallow tray and still delivers a heavy harvest.
You can plant dry or soaked. Dry sowing keeps setup simple and can reduce mold risk in humid rooms. Short soaks accelerate germination. One common routine is a quick four-hour soak, drain, then sow. Another routine is a full pre-sprout. Rinse and drain two to three times a day for about forty eight hours until short white tails appear. Plant at that stage before the tails lengthen.
Growing medium
You can grow in straight coconut coir or in a soil-based mix. Coir is clean and convenient and produces good color, although some growers see a slower finish and extend the grow by four to five days compared with soil. Soil blends tend to bulk up faster. A proven recipe uses about sixty percent composted bark, forty percent coco peat, and roughly five percent perlite. One grower weighs out about 1.2 kilograms of this mix for each 1020 tray to bring the surface close to the lip, which makes harvest easier.
A few inexpensive helpers improve consistency. Line trays that have holes with unbleached brown paper so water can drain without losing media. Mist or water the medium thoroughly before sowing so the bed is evenly moist from top to bottom. A light topdress can help. Some growers sift a thin layer of coir over the seed. Others shake on fine vermiculite, especially around the edges, to keep moisture even during blackout.
Equipment
You need two trays for each crop. The top tray has holes and holds the media. The bottom tray has no holes and catches runoff for bottom watering later. Keep a third tray on hand to act as a cover during a blackout. Weights such as mason jars or spare trays add gentle pressure that strengthens stems and helps hulls release. Some growers tuck a sheet of builder’s plastic around the covered stack to keep edges moist in a dry room.
Lighting can be simple. LEDs or fluorescents on a shelf work well. A shaded outdoor area with a UV filter also gives excellent results and often a deeper color. Comfortable room temperature for germination sits around 24 to 26 degrees Celsius, with ventilation to move warm air. If your space runs hotter, a quick blast of cooling to keep temperatures within range protects vigor.
A gentle sprayer or low-pressure hose avoids disturbing the seedbed. A salad spinner basket speeds up the washing and drying after harvest. Breathable vegetable cellulose bags help the greens keep in the refrigerator for several days.
Step-by-Step Growing Process
Pre-soaking and sprouting
Choose one of three paths.
Path one uses a quick soak. Cover the seed with water for about four hours, drain, then sow on pre-moistened coir. This jump-starts germination without extra handling.
Path two is a fuller pre-sprout. Rinse and drain two to three times a day for about forty eight hours until you see short white tails. Keep them short. Plant as soon as you see the first tails for fastest rooting.
Path three is a dry sow. Spread dry seed evenly over a fully hydrated medium. This approach is fast and reduces standing water around seed coats.
All paths benefit from clean seed and regular rinsing or careful hydration to avoid stale odors.
Planting
Prepare a level bed about one-half to one inch deep. Pre-water until the bed is fully saturated. Use low pressure so you do not crater the surface. Spread the seed in a single layer with minimal overlap. Fill corners and edges so growth is even. If you like, sift a thin layer of coir over the seed to simulate a shallow planting. Another option is a light blanket of vermiculite that helps edges stay moist. Give a final gentle watering to settle the seed into contact with the medium.
Germination
Cover the tray with a blackout lid and add weight. Gentle pressure produces thicker stems and helps the hulls slip off later. Blackout typically runs about two to three days. Growers use different watering styles in blackout. A soil-based method often skips watering during this period because the pre-soaked bed holds plenty of moisture. A pre-sprout routine often continues two to three gentle waterings a day with full drainage. Either path works if the medium stays evenly moist but never waterlogged.
You will see signs of readiness as the tray begins to lift and seedlings lean against the lid. In some rooms, the whole seed mat can float a bit on moisture. That is your cue to move tothe light.
Light and growth phase
Uncover and move under lights or into bright shade. A simple and effective pattern is to top water once on the first day out of blackout to wake the bed, then switch to bottom watering daily. Bottom watering keeps leaves clean and reduces soil splash. In a coir-only setup, growers often bottom water from the start of the light phase and let the roots self-regulate uptake.
Timelines vary by medium and light. Coir-grown trays often reach a tender harvest around day seven. Soil-grown trays commonly finish near day ten. Some growers extend coir trays to about day nineteen to let more hulls release and to develop deeper color. Outdoor shaded trays frequently develop vivid pink or red stems and shed hulls more thoroughly than indoor trays, even under a UV screen.
Room temperature around 24 to 26 degrees Celsius speeds steady growth. If temperatures rise above that range, a quick cool-down keeps stress low and prevents wilt.
Harvesting
Plan to harvest dry. Avoid watering for about twenty-four hours before cutting so the greens store better. Grasp a small handful, lift slightly to clear the media, and cut low from the inside out so blades never touch soil. Work across the tray in bunches and drop directly into a clean container or package.
Height is a better cue than the calendar. Many growers cut between six and eight inches when leaves are fully open. Expect strong white roots woven through the bed. Yields are generous. A sowing of about 2.1 ounces produced a harvest of nearly 13.4 ounces in ten days in one documented run.
Post-harvest handling
Rinse gently in fresh water to remove any remaining hulls. Use your fingers to tease through the leaves and lift out any that cling. Spin or drain dry until leaves are barely damp. Pack in breathable vegetable cellulose bags and refrigerate. The greens keep for several days, yet the best texture and nutrition come when they are eaten soon after harvest.
🌿 Recommended Microgreens Supplies |
Troubleshooting and Pro Tips
Hull management is the most common question. Use weight during blackout to encourage even push and hull release. Extending the growth by a couple of days can let most hulls fall away on their own. A shaded outdoor finish often produces the cleanest leaves with fewer hulls than a strictly indoor finish. Remember that the hulls are soft and edible, so a few clinging pieces are not a flaw.
Moisture control prevents most issues. Over-soaking can invite mold, especially in warm rooms. Keep air moving, avoid puddles on the surface, and water with low pressure so the bed stays level. If your edges dry out faster, a light ring of fine vermiculite helps hold moisture during blackout. Once under lights, bottom water daily rather than spraying from above to keep leaves clean and reduce splashing.
Temperature steadiness speeds germination and growth. A target near 24 to 26 degrees Celsius works well. If your blackout stack sits on a warm shelf under fluorescents, monitor the room. A brief cool-down prevents the bed from heating past the comfort zone.
Seed rate determines density and air flow. For a 1020 tray, 60 grams of dry seed creates a full canopy without smothering. For a 10 by 10 tray, about 170 to 175 grams when pre-sprouting fills the surface. Another reliable guide is five tablespoons to cover a 10 by 10. Spread evenly into the corners so the canopy closes at the same time.
Media choice sets the pace. Coir is clean and easy but may finish slower, sometimes by four to five days. Soil blends often finish sooner and can produce broader leaves. A balanced soil recipe of composted bark with coco peat and a small amount of perlite drains well without drying too fast. Filling a 1020 tray to the lip with about 1.2 kilograms of this mix gives a firm surface and makes cutting simpler.
Light quality shapes color. Indoor LEDs deliver bright green stems and leaves. A shaded outdoor finish under a UV screen can turn stems vivid pink while keeping leaves tender. Both are excellent for salads. Choose the finish that suits your mix and presentation.
If you want to stack trays during a blackout to save space, keep stacks to a sensible height. Growers commonly stack up to six trays so each sees the same weight and airflow. Watch the moisture. If a tray begins to float on trapped water, shift it to light early and resume the plan with a careful first watering.
Easy Recipes with Buckwheat Microgreens
Once your trays are harvested and washed, the fun part begins. Buckwheat microgreens bring a zesty, slightly tangy flavor and a crisp texture that can brighten both raw and cooked dishes. Their tender, broad leaves and occasional pink stems make them as appealing to the eye as they are to the palate. Here are some thoughtful and practical ways to use them in everyday meals.
Fresh Salad Mixes
The simplest and most popular way to enjoy buckwheat microgreens is to fold them into salads. Their crunch balances well with soft greens such as spinach or arugula. A light vinaigrette of olive oil, lemon juice, and a pinch of salt highlights their natural flavor. Growers who sell at markets often mix buckwheat into gourmet blends because it fills the punnet while adding color and texture. If you want a complete salad, combine chopped cucumbers, cherry tomatoes, toasted sunflower seeds, and a large handful of buckwheat microgreens.
Smoothie Additions
Because they are mild but nutrient-dense, buckwheat microgreens blend smoothly into fruit drinks. Add a small handful to a blender with banana, apple, and a knob of ginger. The chlorophyll and vitamin C in the greens give your smoothie a fresher taste, while the stems add very little fibrous residue. This is also an easy way to introduce microgreens to children who may not want them in raw form on a plate.
Wraps and Sandwiches
The broad leaves make buckwheat greens easy to tuck into wraps and sandwiches. Spread a tortilla with hummus or avocado, pile on shredded carrot and cucumber, then add a generous layer of buckwheat greens before rolling. In a sandwich, they are an excellent replacement for lettuce, giving a brighter flavor without the heavy crunch. They also pair well with eggs, roasted chicken, or grilled halloumi.
Garnish for Soups
Soups, both hot and cold, benefit from a handful of fresh greens on top just before serving. Buckwheat microgreens wilt slightly in hot broth while holding their color, releasing a gentle tang that complements lentil, miso, or tomato-based soups. For chilled gazpacho or cucumber soup, the microgreens stay firm and give each spoonful an extra layer of freshness.
Buckwheat Power Bowl
If you want a more complete meal, build a grain bowl that features your microgreens as the crown. Start with a base of quinoa, rice, or roasted sweet potatoes. Add roasted chickpeas, steamed broccoli, and sliced avocado. Top with a large mound of buckwheat microgreens and drizzle with tahini or a yogurt-based dressing. The greens provide crunch, color, and circulation, supporting rutin in every bite.
Storage and Serving Notes
Always harvest dry and refrigerate quickly in breathable produce bags to preserve quality. Eat them as fresh as possible, since nutrition and crispness are highest in the first few days. If stored in vegetable cellulose bags, they will keep for several days without wilting. Portion sizes are usually moderate. A small punnet of about forty grams is considered a typical serving, which also stays below the level associated with skin sensitivity from overconsumption.