
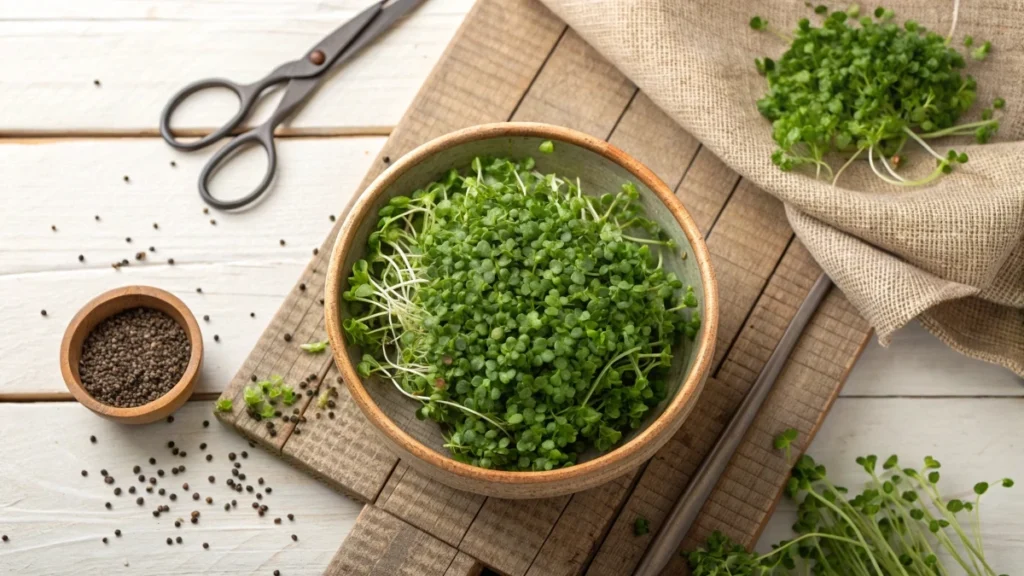
Chia microgreens are one of the easiest and most nutritious greens you can grow right in your kitchen. These young seedlings are ready to harvest in just 7 to 14 days, making them perfect for anyone who wants fresh greens without much space or effort.
Packed with calcium, magnesium, iron, fiber, omega-3 fatty acids, and antioxidants, chia microgreens provide more concentrated nutrition than mature plants. You can grow them with simple methods using cocopeat, paper towels, or even just water.
Once ready, they add a crisp texture and a slightly bitter or citrus-like flavor to salads, smoothies, and stir-fries. Learning how to grow chia microgreens at home gives you affordable, healthy greens year-round.
Health Benefits of Chia Microgreens
Chia microgreens are harvested young, generally within 7 to 14 days after germination. At this stage, they are tender and concentrated in nutrients. Observations from multiple home grows show that sprouting improves the appeal of chia for everyday use and may increase the availability of nutrients compared with keeping the seeds dry. One controlled study that compared ungerminated seeds to sprouts reported that germinated chia contained higher levels of beneficial compounds. Broader research on microgreens also points to higher nutrient density than mature plants, which supports what growers see in practice.
Key nutrients frequently highlighted for chia include calcium, magnesium, iron, fiber,omega-33 fatty acids, and various antioxidants. These are present in dry seed form and are widely discussed in nutrition databases. While official entries often focus on the dry seed, home growers favor sprouting to unlock nutrition in a form that is easy to add to salads, sandwiches, and warm dishes. Several taste notes came up across different grows. The flavor can be slightly bitter, with some batches leaningtoward citrus-likee or tart. Because of that, people often mix chia microgreens with other greens, fold them into omelets, blend them into smoothies, or use them as a garnish rather than eating them by the handful.
There is also a practical benefit. Sprouting lets you eat the seed within a week or two rather than storing it long term. That shortfield-to-fork window encourages frequent use, and several methods require only water and a simple container, which lowers the barrier to adding fresh greens to meals.
Growing Chia Microgreens at Home
Materials Needed
- Chia seeds. Grocery bulk seed works. One test used 25 grams from a store bag and achieved a full tray harvest.
- Containers. Options include glass dishes, shallow bowls, or plant trays. Trays with holes help when using cocopeat or grow mats because they allow bottom watering.
- Growing surface. Choose one of the following based on your preference and space:
a. Paper towel-lined dish
b. Tissue paper layered in a lidded container,
c. Cocopeat in a small tray,
d. Grow mat, such as a biostrate-style fiber mat
e. Bare plate with water only - A spray bottle for misting.
- A lid, blackout dome, or an inverted tray to create darkness during germination.
- Clean water. Several growers used filtered or purified water.
- Optional light. Ambient light can work. A simple grow light speeds up greening after germination.
🌿 Recommended Microgreens Supplies |
Methods with Timelines
Paper towel in a shallow dish
This approach balances moisture while avoiding standing water.
- Line the bottom with a paper towel trimmed to fit. Two layers worked well in a glass dish.
- Add seeds. One practical measure was half a tablespoon for a small dish.
- Add water. One-third cup of filtered water moistened the seeds and the towel in that same setup.
- Leave in a place with airflow and ambient light. After day 3, any batch sitting in pooled water showed mold. The towel-lined dish avoided this and kept germinating cleanly.
- By day 6, sprouts were strong enough to move under a light. A light mist once daily maintained moisture.
- By day 10, the canopy was dense and ready to cut. Use scissors and harvest what you need, leaving the rest for another day.
What to watch
If you skip the towel and keep seeds in standing water, mold can show by day 3. The towel helps absorb excess and gives roots something to grip.
Tissue paper in a lidded container
This is a simple, soil-free method that fits in a small kitchen.
- Fold three to four sheets of tissue into a thick pad and place it in the container.
- Spread a spoonful or a small handful of seeds evenly across the surface.
- Mist lightly. The method performs best with light moisture. It was explicitly noted that chia does not like too much water.
- Place the lid loosely. It should not be airtight.
- Mist every three days or whenever the surface looks dry.
- By day 5, you should see visible growth. By day 10 to 1,4 harvest begins.
What to expect
Yield from very small containers is modest. One grower combined the harvest with spinach for a quick stir-fry.
Cocopeat in trays
Two variations were shown, both without placing weight on top. This is different from many microgreen crops because chia has a gel-like seed coat that does not respond well to stacking.
Variation one
- Fill a small tray with holes using cocopeat as the base.
- Spread the seeds evenly.
- Cover with a thin layer of cocopeat.
- Mist to moisten.
- Place in darkness for a few days. No weight is used.
- Move to light for growing on.
Variation two
- Fill a small tray with cocopeat.
- Spread seeds evenly on the surface without covering.
- Flip another tray on top to create a blackout.
- Keep in the dark for a few days, again with no weight.
- Move to light and grow to harvest.
Both variations keep moisture stable and give roots a firm anchor. They also reduce the chance of mold compared with dishes that hold standing water.
Grow mat with purified water vs coconut water.
Side-by-side test on two ten-by-twenty trays seeded at 25 grams each shows what works and what to avoid.
- Both trays used a fiber grow mat.
- Germination took place under blackout domes for two to three days with regular misting.
- After the blackout, the team switched to bottom watering.
- One tray received plain purified water. The other received coconut water as an experiment.
Results
The tray with purified water grew cleanly to harvest by day 8. The coconut water tray developed an unpleasant odor by day 5 and was discarded. The successful tray produced 201 grams of microgreens from 25 grams of seed, which is a strong return for a home project. The taste was described as very strong and better when mixed with other foods.
Water only on a plate
This is the simplest path from seed to plate.
- Spread seeds thinly on a plate.
- Add just enough water to moisten the surface without submerging the seeds.
- Keep in a dark place.
- Check on day 2. If the surface looks dry, add a small amount of water.
- On day 5, move to light to green up. Sunlight helps the sprouts turn a healthy green.
- By day 7, you can harvest.
This method demands careful watering. Too much water increases the risk of mold. Too little slows growth.
Key Tips for Success
- Manage moisture carefully. Chia forms a gel around the seed when wet. That gel helps germination but also traps water. Paper towel, tissue, cocopea,t or a fiber mat all buffer moisture and reduce mold risk compared with standing water.
- Use a short darkness period. Two to three days of blackouencouragees even germination. With chia, there is no need to add weight on top.
- Favor bottom watering after emergence when using trays. This kept the successful tray clean through harvest.
- Keep air moving. Open shelves with ambient air reduced mold pressure inthe dish that grows.
- Move to light as soon as sprouts appear. A simple grow light or bright window from day 5 onward improves color and vigor.
- Harvest with scissors. In small dishes, cutting an inch above the surface is easier than uprooting. You can cut what you need and let the rest continue for a few more days.
- Be cautious with additives. Coconut water caused odor by day 5 in one test, and the tray was discarded. Plain filtered water performed best.
- Expect flavor variation. Several growers found chia microgreens on the bitter side or strongly flavored. Plan to pair them with other greens or use them as a component rather than the entire salad base.
Harvesting and Storage
Harvest timing varies by method. Water-only plates were ready in about 7 days. Paper towel dishes produced a dense canopy by day 10. Trays grown on fiber mats with purified water reached harvest on day 8. Cocopeat trays typically move from blackout after a few days and then grow on to the 10 to 14 day window, depending on light and temperature.
How to harvest
Use clean scissors and cut above the surface. In tissue-lined containers, lift the pad and trim about one inch from the top. In paper-towel-lined dishes, snip portions and leave the rest to continue for a short time. In tray setups, cut in sections so you harvest fresh at the moment you plan to eat.
Storage guidance for home use
The most consistent advice from home growers is to eat fresh. Because chia microgreens can taste intense, small, frequent harvests work well. Prepare only what you plan to use that day, whether for a salad, sandwich, smoothie, omelet, or a quick stir fry combined with another leafy green.
Recipes with Chia Microgreens
Raw Uses
Chia microgreens can be eaten raw straight after harvest, and this is often the most convenient way to use them. Adding a small handful to a salad increases its nutrient profile and gives it a slight bitterness that pairs well with sweeter vegetables such as cherry tomatoes or fruit such as blueberries. A common note from growers is that the taste is not as mild as that of broccoli or radish microgreens. Instead, it can be slightly bitter or tart, and in some cases, it was even described as having a citrus-like undertone.
Because of this, many people prefer to blend chia microgreens into foods rather than eating them alone. Smoothies are an easy option. The bitterness is masked when combined with banana, mango, or other sweet fruits. Sandwiches and wraps are another place where chia microgreens work well. When tucked in with fresh vegetables, hummus, or cheese, they provide crunch and freshness without overpowering the flavor.
Sprouts grown in small containers or trays can also be used as a garnish. A pinch sprinkled over soups or on top of roasted vegetables adds color and extra nutrients. The small yield from simple methods like the tissue paper grow fits this kind of use, as you can harvest just a handful and use it as a topping without needing a large harvest.
Cooked Uses
Chia microgreens can also be lightly cooked. One preparation that has been demonstrated is a spinach and microgreens stir fry. The microgreens are washed and finely chopped together with spinach. Cooking begins with coconut oil in a pan. Mustard seeds are added until they pop, followed by curry leaves, green chilies, and dried red chilies. Then onions are sautéed for a minute or two with a little salt, half a teaspoon of red chili powder, and half a teaspoon of turmeric powder. Once the base is fragrant, the spinach and microgreens are added. They are cooked only until the water released from the greens evaporates, usually two to three minutes.
Finally, shredded coconut is stirred in, and the dish is finished with a drizzle of coconut oil. This preparation balances the strong taste of chia microgreens with the sweetness of coconut and the flavor of spices, making it easier to enjoy them in a cooked dish.
Other cooked uses mentioned include folding chia microgreens into omelets, adding them to soups just before serving, or mixing them into vegetable curries. The key is to cook them briefly or add them at the end so that they retain their nutrients and fresh character.
Chia Microgreen Salad Recipe
One simple way to enjoy chia microgreens is in a fresh salad. This preparation makes use of common kitchen ingredients and highlights the greens without letting their strong flavor dominate.
Ingredients
One cup of fresh chia microgreens
One cup chopped cucumber
One cup of cherry tomatoes cut in halves
Half a small red onion, thinly sliced
Two tablespoons extra virgin olive oil
Juice of half a lemon
Salt and freshly ground black pepper to taste
Preparation
Wash and dry the chia microgreens carefully so that they remain crisp. Place them in a large bowl with the cucumber, cherry tomatoes, and onion. In a small cup, whisk the olive oil, lemon juice, salt, and pepper. Pour this dressing over the vegetables and toss gently until everything is coated. Serve immediately for the freshest taste.
Notes
Because chia microgreens can be bitter, combining them with cucumber and tomato helps balance the flavor. Lemon juice brightens the salad, while olive oil provides smoothness. This is a light side dish that can be made in minutes, and it is best enjoyed right after preparation to preserve the texture and nutrient value.
This salad makes good use of the modest harvests from small home grows and shows how easily chia microgreens can be integrated into everyday meals.