
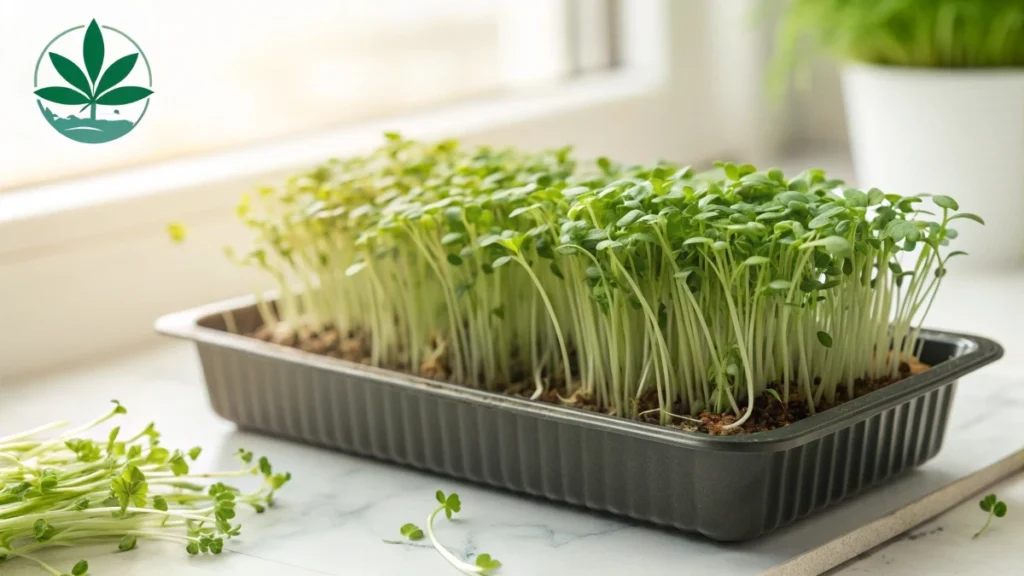
Hemp microgreens are quickly becoming a favorite among health enthusiasts and home gardeners. These tiny greens, harvested within 7 to 14 days, are packed with protein, antioxidants, and essential minerals such as iron, magnesium, and zinc.
Unlike mature hemp plants, hemp microgreens contain no psychoactive effects, making them safe and nutritious for anyone to enjoy. Growing hemp microgreens at home is simple, affordable, and requires very little space. With the right seeds, light, and care, you can harvest fresh greens every couple of weeks.
In this guide, you’ll discover how to grow hemp microgreens step by step, explore their health benefits, and learn tasty recipes to add them to salads, smoothies, and everyday meals.
Benefits of Hemp Microgreens
Protein and amino acids
Hemp microgreens deliver a noticeable protein lift compared with common salad greens. One grower who trials multiple species reports about five times the protein of lettuce, and a Pennsylvania producer highlights that they provide all twenty amino acids, something uncommon in single plant foods, and a reason their protein quality compares favorably to greens like kale. Because the plants are harvested very young, the tissues are tender and easier to chew, which supports intake.
Healthy fats and plant compounds
Producers working with these greens emphasize their content of plant-based fats, including omega 3 and omega 6. These fats are often discussed as neuroprotective and are part of why growers position the crop for brain and nervous system support. Several speakers also note the presence of phytoestrogens, which some consumers seek for women’s health. A repeated lab finding from a Pennsylvania farm was tocopherol measured at about thirty-one parts per million in their greens. Tocopherols are vitamin E compounds that contribute to immune support and are involved in normal clotting physiology.
Minerals, polyphenols, and antioxidants
University researchers profiling the young plants focus on macro elements such as nitrogen, phosphorus, and potassium, along with micro elements including iron, manganese, and copper. They also analyze phenolic acids and flavonoids using high-performance liquid chromatography to capture a detailed fingerprint of these antioxidant families. Another grower lists zinc, iron, potassium, and magnesium as abundant. Together, these nutrients and antioxidant compounds are the basis for the interest in these greens for everyday salads, smoothies, and blended mixes.
Digestibility and flavor
Several growers point out that the young shoots are easier to digest than hemp seeds. The tissues are soft, and nutrients are more accessible when the plant is harvested within about two weeks. Flavor depends on light management. Jar-grown sprouts kept in the dark remain yellow and taste sweeter. If the crop is greened up under light, tasters commonly describe notes of hazelnut and citrus with a light pepper finish similar to a mild arugula.
Cannabinoid and THC notes
Cannabinoids do appear in trace amounts even at the microgreen stage. An academic team measuring plants harvested in under two weeks reported about one percent of cannabinoids in the tissues. Multiple growers stress that THC at this stage is extremely low. A Pennsylvania producer quantified THC at about zero point zero zero one percent in their fourteen-day harvest with detectable CBD but no intoxicating effect.
How to Grow Hemp Microgreens at Home
Choosing seeds
Home growers do best with fiber-type hemp seed. University extension presenters price bulk fiber seed at roughly two to three dollars per pound, which is dramatically less than specialty CBD lines that can cost a dollar or more per seed. Fiber varieties are widely used for microgreens because they are affordable and vigorous. One Pennsylvania operation cites catalog germination around eighty to eighty-five percent for fiber seed, although real-world results can be lower, so they sow extra seed to ensure a full canopy.
Check your local rules before you start. One Arizona visit reported that hemp microgreens were legal to grow there at that time, while other states were still considering the category. A Canadian educator explains that commercial production in Canada requires a license that costs about two thousand dollars. In Pennsylvania, growers described added rules such as cutting at the substrate for retail packages. These examples show that rules differ by place and can affect harvest style and shelf life.
🌿 Recommended Microgreens Supplies |
Growing methods
Substrate trays for microgreens
For most home setups, a tray with a growing medium is the simplest path. A basic germination mix works well. Several growers also report success with hemp fiber mats, coco coir,r and rockwool. One educator seeds about eighty grams per standard tray to create a dense, uniform stand. After sowing, one home method is to keep the tray in a dark place for a day or two to promote even sprouting, then move it under lights. University guidance emphasizes very light feeding because excess nutrition makes stems grow tall and thin, which complicates harvest and reduces quality.
Jar sprouting for sandwiches and smoothies.
If you want sprouts rather than microgreens, a jar method is easy. Use a mason jar fitted with a plastic crochet screen as a strainer. Add about four teaspoons of seed. Rinse twice daily, morning and evening, then drain thoroughly and rest the jar at about a forty-five degree angle so water cannot pool. Keep the jar covered to maintain darkness for a sweeter flavor. Ten to twelve days usually yield about half a jar of sprouts. If you expose them to light near the end, the flavor shifts toward parsley and mint with a hint of pepper.
Hydroponic nutrient film technique
Some farms raise hemp microgreens using the nutrient film technique, where a constant stream of dilute fertilizer flows past the roots in small baskets set into PVC channels. This keeps the system very clean and scalable, and one producer has designed a small end table-sized version using parts from typical home stores. There are tradeoffs. Labor can be significant because many baskets must be seeded and cleaned. Germination in baskets can be uneven, so farms often place three to five seeds per basket. By contrast, an academic group reported that hydro setups using fine felt did not hold the seeds upright and that large channels kept too wet caused seedlings to collapse. For a first home crop, a substrate tray is the easiest place to start, with hydro left for later experimentation.
🌿 Recommended Microgreens Supplies |
Growing conditions
Light and nutrition
Supplemental lighting is one of the two strongest levers for higher yield in small spaces, according to university notes. Bright, consistent light produces compact stems and bigger cotyledons. Feed lightly. A quarter-strength nutrient solution is the rule of thumb repeated by the academic team. More than that pushes leggy growth, which makes harvesting difficult and reduces shelf appeal.
Timeline and harvest
Typical harvest is seven to twelve days after sowing. Many farms pick at twelve to fourteen days for a slightly larger leaf. An Arizona field visit mentioned trials showing twenty to forty days, depending on varieties and conditions, but the tender stage preferred for garnishes is usually closer to ten days, especially if you sowed about eighty grams per tray. Harvest with clean scissors right at the surface of the medium. Keep tools sanitized.
Storage
Cold storage matters. Researchers who stored cut greens at thirty-two to forty degrees Fahrenheit in plastic bags to keep humidity found that the quality can hold for a couple of weeks when the cold chain is respected. A Pennsylvania grower ran side-by-side checks and saw about five days of good shelf life when shoots were cut at the substrate, as some rules require, compared with roughly fourteen to seventeen days when sold with roots attached. At home, you can keep roots on to extend freshness if your container allows it.
Troubleshooting quick hits
Seeds that fail to stand upright often reflect too coarse or too fine a mat or excess water at the surface. Stretchy stems almost always indicate too much fertilizer or insufficient light. Patchy trays come from low germination and are solved by sowing a little heavier next time.
How to Use Hemp Microgreens
Everyday salads
A simple formula keeps the taste balanced. For two servings, combine three cups of tender greens with one cup of hemp microgreens. Add a citrus element, such as orange segments or lemon juice, to complement the light pepper note. Finish with olive oil, salt, and cracked pepper. Because the crop is rich in minerals and protein for a leafy green, you can keep the dressing light and still feel satisfied.
Smoothies with gentle sweetness
For a single smoothie blend one ripe banana with one cup kefir or plant milk, one small apple, one cup packed hemp microgreens, and a few ice cubes. The fruit softens the mild bitterness that some people notice and lets you use a full cup of greens without overpowering the drink. If you prefer less sweetness, swap the banana for an avocado.
Sandwiches and grain bowls
Use a generous handful on sandwiches in place of lettuce. The compact leaves add texture without sogginess. For bowls, toss a cup of microgreens into warm cooked quinoa or rice with a squeeze of lemon and a spoon of tahini. The heat wilts the leaves slightly, which brings out the nutty tones several tasters describe.
Quick sauté
Treat them like baby spinach when you want something warm. Heat a pan, add a splash of olive oil and a clove of sliced garlic, then fold in two cups of microgreens and cook for thirty to sixty seconds. Season and serve over eggs or fish. Keep the cook time short to preserve color and nutrients.
Flavor notes to guide pairings
Dark-grown sprouts tend toward sweet and pair well with citrus and fresh cheeses. Light-grown microgreens lean towards hazelnut and citrus with a light pepper finish and play nicely with tomatoes, vinaigrettes, and grilled vegetables.
Hemp Seeds Benefits
Healthy fats and protein
Growers repeatedly point to the food value of hemp seeds. They are known for a generous share of plant-based fats, notably omega-3 and omega-6, and for high-quality plant protein. Several producers compare their protein favorably to common greens, while emphasizing that sprouts and microgreens are even easier to digest. Using seeds along with greens lets you stack complementary nutrition from the same plant.
Minerals and vitamins
Seeds contribute minerals such as magnesium, phosphorus, potassium, iron, and zinc, which were also highlighted in the young greens. Vitamin E compounds like tocopherols are commonly associated with seeds and nuts. One farm measuring their greens reported about thirty-one parts per million tocopherol, and seeds are historically recognized as a source as well. Including both seeds and greens in meals is a practical way to cover a range of micronutrients.
Fiber and digestion
Seeds bring dietary fiber that supports regularity and satiety. Several growers point out that while seeds are nutritious, the sprouted stage is gentler on digestion. Rotating between seeds, sprouts, and microgreens gives you options for texture and digestibility across recipes.
Practical context and safety
Producers focusing on food use stress that hemp foods are not intoxicating. A Pennsylvania producer quantified THC at about zero point zero zero one percent at the two-week stage for greens. Canadian and Arizona voices emphasize that legal categories can differ by place and that commercial production may involve permits in some regions. For home cooks, that means seeds are widely available for pantry use, and microgreens can be grown where local rules allow.
Hemp Seeds Recipes
Salads and grain bowls
Sprinkle two to three tablespoons of raw hulled hemp seeds over a mixed green salad to add texture and a nutty flavor. When combined with quinoa, lentil,s or roasted vegetables, the seeds enhance protein and mineral content while keeping the dish light. Because the seeds are small and soft, they blend in seamlessly without the crunch of nuts, making them a good choice for everyday bowls.
Smoothies and shakes
Blend a tablespoon or two of seeds into fruit smoothies for added protein and healthy fats. A common base is banana, spinach, plant milk, and berries. Adding hemp seeds enriches the smoothie with omega 3 and omega 6 fats and supports creaminess. Unlike chia, they do not need soaking, so they are convenient for quick blending.
Hemp seed milk
Hemp seeds can be used to prepare a mild-flavored plant milk. For a half liter, combine half a cup of hulled seeds with two cups of water in a blender. Blend until smooth, then strain through a fine cloth if you prefer a thinner consistency. A dash of vanilla or a date can add sweetness. The milk keeps in the refrigerator for about three days and is suitable for coffee, cereal, or baking.
Energy bars and granola
Fold hemp seeds into homemade energy bars or granola mixes. Combine oats, nut butter, dried fruit, and hemp seeds, press into a tray, and chill to set. Seeds hold up well in baked goods, too, adding protein and a mild nutty background without dominating the flavor. This makes them useful for muffins, bread,s and cookies.
Cooked dishes
Sprinkle hemp seeds over sautéed vegetables or stir them into soups just before serving. The soft seeds dissolve slightly, enriching the broth while contributing minerals and protein. They also pair well with rice pilaf or couscous for a warm side dish that is both hearty and nourishing.