
Learn how to grow mixed microgreens for salads with a simple step-by-step method that fits on any counter. This guide covers seed choices and seed rate, tray setup with coco coir, water from below for clean growth, and the short blackout that creates an even stand.
You will see when to move trays under LED lights, how close to keep them, and how much to water as roots fill the mat. We will finish with harvest, packing, yield targets, and shelf life tips so your salad mix microgreens stay crisp.
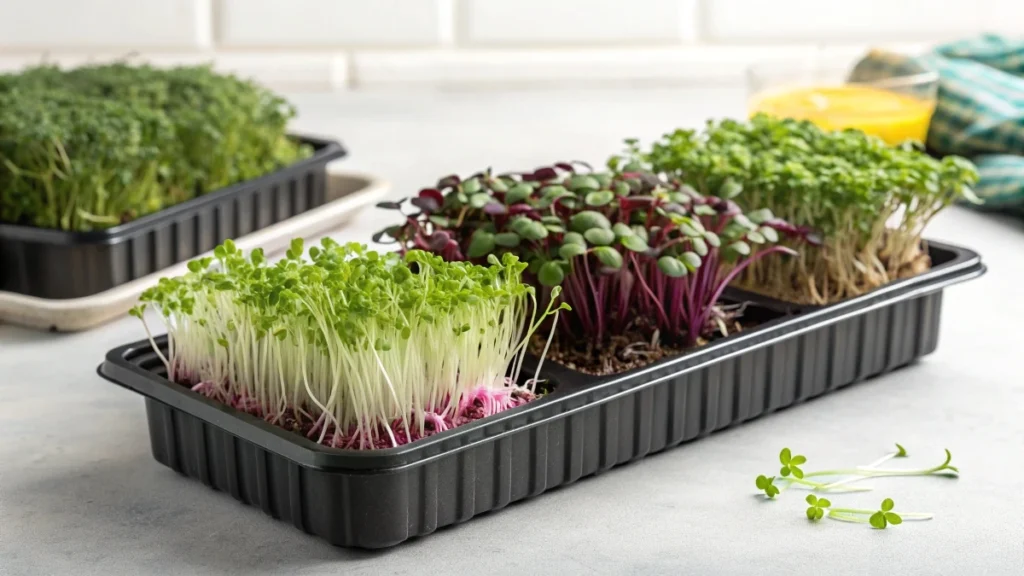
Whether you use a spicy brassica blend or a classic mix with alfalfa and radish, you will get predictable greens that look great, taste fresh, and sell fast.
Step-by-step guide to growing mixed microgreens for salads
Step 1: Gather a simple kit that works every time
Use a holed tray nested inside a solid tray so you can water from below without disturbing seedlings. Keep a third tray to apply weight during germination. A tall, black two-inch tray is ideal for blackout because it blocks light and gives headroom for the first stretch. Prepare Coco Coir as the growing medium. Hydrate a block and spread a shallow, even layer. About six cups of coir per ten-by-twenty tray works well. Another workable measure is roughly half of a small coir block per tray. Have a fine mister, a small scale to weigh seed and harvest packs, clip-on or shelf LEDs, a small fan, labels, clamshells, and optional humidity packs for storage.
Step 2: Choose your salad mix and set the seed rate
Spicy salad blends often combine kohlrabi, broccoli, mustard, and arugula. Classic salad blends often include alfalfa, radish, clover, and broccoli. Pre-mixed bags are consistent, or you can create your own by mixing the seed yourself. If you want uniform height, grow single varieties in separate trays and combine after harvest. For mixed brassicas, a practical starting rate is twenty to twenty-four grams of seed per tray. For blends with small alfalfa and clover seed, twenty-five to twenty-eight grams per tray is common. Adjust by a few grams based on how crowded the stand looks after early growth.
Step 3: Prepare the tray and sow evenly
Press the coconut coir firmly so the surface is flat and the corners are filled. Lightly mist the surface before sowing, so the seed will stick where it lands. Broadcast the seed evenly across the full tray. A clean spice shaker makes this fast and even. Label the tray with the mix name, seed weight, and the date so you can track results from run to run.
Step 4: Hydrate deeply at sow and press for contact
Mist thoroughly after sowing so the surface is fully hydrated without standing water. The aim is to carry the tray through germination and often through blackout without needing to water again. Place an empty tray on top and add weight. About fifteen pounds presses seed into the medium, keeps early lift in check, and improves even contact for strong sprouting.
🌿 Recommended Microgreens Supplies |
Step 5: Germinate under weight and add a short blackout
Keep the tray under weight in the dark for about two to three days. When you remove the weight, the seedlings should be well attached. Add a true blackout by placing a tall, black two-inch tray upside down for about one to two days. This blocks stray light and gives stems room to rise, which produces a more upright stand that is easy to cut and looks full in a mixed salad tray. An alternative is to stack a fresh sown tray on top to maintain contact, but the tall blackout lid is more consistent for mixed species.
Step 6: Move to the light at the right moment and keep it close
As soon as sprouts appear, usually around day three or day four, move trays under LEDs. Keep lights about one to two inches above the canopy and raise them gradually as plants grow, so the distance stays consistent. Both long-day and continuous schedules are used successfully. Some growers run lights twenty-four hours and slide clips on bars during the day to cover the full tray. Others run sixteen to twenty-four hours. The constant is a steady intensity and close placement. Fast brassicas usually green up within a day after the blackout ends.
Step 7: Switch to bottom watering and add optional light feeding
Begin bottom watering once the sowing moisture is used, commonly around day four to day six. Lift the holed tray and pour water into the solid tray so roots drink from below. Early volumes around three-quarters of a cup per tray are common. As the canopy builds, daily needs often range from about half a cup to one and a half cups, depending on room temperature and how deep the coir layer is. Shallow coir dries quickly and can require about half a cup up to three times per day in warm rooms. Two gentle feeding strategies are used with good results. One is a mild nutrient solution mixed at about zero point five ounce per gallon. A working batch is two point five ounces in five gallons. The other is a small pinch of Epsom salt dissolved in the water. Use one approach lightly rather than heavy doses of both. Many spicy brassica mixes respond well to mild daily nutrient water and can run a bit slow on plain water alone.
Step 8: Manage airflow and humidity, then dry the canopy before harvest
Keep a small fan moving air across the canopy and maintain general room circulation. In warm seasons or humid rooms, a dehumidifier helps keep excess moisture from settling inside the stand. The final day before harvest is critical. Reduce or skip watering and focus on airflow so leaves are dry to the touch. You can feel inside the canopy with clean fingers to check for moisture. Dry greens store far longer. Storage times reported include about ten days in the refrigerator when packed with a small paper towel to absorb humidity and as long as three to four weeks when the crop is harvested very dry, packed with a humidity control pack, and kept cold.
Step 9: Harvest cleanly and pack for freshness
Cut just above the medium so no coir ends up in the product. Many growers harvest directly into clamshells because it produces a better presentation and saves time. A common pack size for salad mix microgreens is fifty-six grams, which equals two ounces. Label with crop name, weight, and date, then chill promptly. Typical yields range from about five and a half to seven or more ounces per tray, which translates to about two and three-quarters to three and a half standard packs depending on medium depth, blackout technique, and watering control.
Step 10: Adjust the next run based on what you see
If the stand looked leggy, shorten blackout and keep the lights closer. If growth seems slow, start gentle feeding earlier and verify your light coverage. If the canopy was wet or storage life was short, increase airflow and focus on a thorough dry down before cutting. If the tray dried out too fast, add a little more coir next time. For a showpiece look, consider growing each variety in its own tray and mixing after harvest so you can match heights and textures in every pack.
This step-by-step method uses real-world numbers from successful salad mix microgreen runs. Seed rates of twenty to twenty eight grams per tray, fifteen pounds of weight for two to three days, one to two days of blackout under a tall black lid, bottom watering volumes that start around three quarters of a cup, pack weights of fifty six grams, yield ranges near five and a half to seven plus ounces, and storage times from ten days to three to four weeks when harvested very dry. Following these checkpoints will help you produce a reliable salad blend with bright color, clean flavor, and excellent shelf life.