
Onion microgreens are a flavorful, nutrient-rich garnish that can be grown at home in as little as ten to thirteen days. These delicate greens offer a mild onion taste with a hint of sweetness, making them perfect for soups, salads, canapés, and egg dishes.
Growing onion microgreens is simple, whether you use soil trays, vermiculite, or a hydroponic flood and drain system. With minimal cost and effort, a small tray of seed can yield fresh harvests packed with flavor and visual appeal.
This guide explains proven methods, practical tips, benefits, and easy recipes so you can enjoy fresh onion microgreens from seed to plate.
Why Onion Microgreens
Onion microgreens deliver a gentle allium note with a touch of sweetness. They taste like a softer version of green onions and do not leave a strong aftertaste. Because the flavor is delicate, they shine as a fresh finish on soups, salads, canapés, and eggs. Heat mutes their character, so add them to the table rather than simmering them. Cooks like them for precision and looks since short, bright shoots with the occasional seed cap read clean and modern on the plate. Typical growing time is fast for a fresh herb garnish. In soil systems, the first good harvest window often arrives around day twelve to day thirteen from sowing. In flood and drain setups, the tender stage can be reached in about ten days.
Onion Family Options and What To Expect
You can grow several alliums this way. Bunching onions and scallions give slender green shoots with a mild aroma. Chives are similar in look and feel and work well with the same routine. Leeks produce a slightly broader shoot and are well-suited to the vermiculite and flood table approach. All of these are monocots, so they emerge with a single cotyledon. Pushing them to the first true leaf is slower than many other microgreens and can stall under less than ideal conditions. One grow showed that waiting for a true leaf led to some die back and a crop that never layed over into a dense mat. In practice, most growers harvest at the cotyledon stage or just after greening for a reliable, tender product, accepting that some seed hulls will still be present.
Gear and Growing Media
Trays determine workflow and moisture control. A proven soil setup uses three trays. The bottom tray is solid and holds water. The middle tray is mesh or slotted and holds the medium so roots can pass through. A second solid tray on top traps humidity and applies very light pressure,e which aids even germination without weighing down the delicate shoots. For lighting, three twenty-watt T5 LED bars cover a small rack well and are an affordable way to green up the stand once it comes out of darkness.
Mediums that work include a peat-based potting mix with a gentle nutrient charge. One example uses an NPK ratio of 0.12 0.12 0.12 and consistently germinates well. Remove twigs and clumps so seeds contact the surface evenly. A thin top layer helps with moisture and seed-to-medium contact. Vermiculite is a clean top-dress alternative that keeps the surface airy and reduces crusting.
Water can be reverse osmosis or clean tap water. The nutrients for the early stage are already in the seed, so enriched solutions are not needed. Some growers keep a dilute sanitation routine using food-grade hydrogen peroxide from a thirty-five percent stock that is properly diluted before use to help limit fungus and gnats in humid rooms. Hydro growers may prefer a flood and drain table that periodically fills and empties to re-oxygenate the root zone. That cycle keeps young roots supplied with moisture and air and suits short harvest schedules.
🌿 Recommended Microgreens Supplies |
Seed and Medium Quantities You Can Copy
For a compact sprouting tray filled with soil, two cups of medium level out to a good depth. For a standard ten-by-twenty tray, you can double the amount. A reliable sowing rate in the small tray is about two tablespoons, which is roughly nineteen grams for chive or scallion types. For large batch work, one onion trial used seventy-five grams of seed across a broader area to explore density limits and timing to first true leaf. Use these numbers as starting points, then adjust slightly for your tray footprint and air movement.
Method A in Soil with the Three Tray Stack
Prepare the mesh tray with two cups of the potting mix. Fluff, remove sticks, and level the surface. Sow about nineteen grams for a sprouting tray or double for a ten by twenty. Spread the seed evenly and avoid clumps. Add a very thin layer of the same soil on top and tamp lightly so seeds make contact without being buried deeply. Mist the surface until uniformly moist but not puddled. Place the empty solid tray on top as a humidity cap. Heavy weights are unnecessary for onions because the seedlings are delicate.
Keep the stack in a dark spot with airflow. Mist in the morning and evening during this stage. Around day four, you should see the first signs of lift. By day six, the seedling push will often raise the soil and peek from the sides, which is the cue to move under lights. Start bottom watering by filling the solid bottom tray so roots drink from below. Check roots for color and vigor, and allow the mat to draw water before refilling. By day seven, the stand greens up, by day nine, it usually looks dense and uniform, and by day twelve to day thirtee,n you can harvest for short, tender shoots. If soil bits cling, harvest slightly higher and give a gentle shake. Rinse right before eating if you want a pristine finish.
Method B with Flood and Drain Hydro
Flood and drain suits micro onion sprouts grown short. After germination, place the traonin a table that periodically fills and then drains on a timer. The media absorbs moisture, then drains and re-oxygenates between cycles, which young roots love. In a well-tuned table, onion sprouts reach an appealing stage at about ten days. They are usually shorter than chive microgreens and often carry the seed cap. The flavor at this stage is soft and a little sweet with a clean allium finish. Because the profile is delicate, these are best used fresh as a garnish on soup, chilled plates, and small bites. Cooking is not the goal here; brightness is.
Method C with Soil and Vermiculite for Leek and Onion
This method begins in a small container or a ten-by-twenty flat. Sow evenly on a level soil surface, and top with a very light coat of vermiculite or a fine sift of soil. Press the surface flat with a board or a spare tray. A flat seedbed improves contact and even moisture, which delivers a higher and more uniform stand. Water gently from above at first so you do not displace the seed. Keep the propagation area ventilated and clean. Early signs of sprouting often appear by day three or day four. Around day seven, seedlings are upright and green. By week two, they are taller and ready for cutting if you want length. Some growers move these trays to a flood and drain system after the first week to hand off watering duty to the table and keep foliage dry.
Watering, Humidity, and Airflow
Young alliums prefer consistent moisture without saturation. During germination, use a fine mist twice a day to keep the top layer uniformly damp. A loose cover, such as an empty tray or breathable cloth, holds humidity while letting air move across the surface. Avoid sealed lids that trap condensation since still, wet air invites fungus. Once the stand moves to light, switch to bottom watering so foliage stays dry. Fill the bottom tray, let the medium wick, then empty any excess rather than leaving the roots in a bath. In rooms with high-density growth, steady airflow from fans and an exhaust path keeps conditions fresh. If you notice a musty smell or webbing, reduce seed density slightly, increase air exchange, and consider using a properly diluted food-grade hydrogen peroxide rinse for trays and benches between crops. Keep your surface flat, avoid over-seeding, and do not over-compact the medium. These three habits solve most moisture and airflow problems before they start.
Light Management
Even light brings out color and keeps growth uniform. A practical setup uses three twenty-watt T5 LED bars over a rack. Place the tray so all shoots receive similar intensity from edge to edge. Move out of the darkness when you see the soil lift and seedlings peeking along the sides, which commonly happens around day six in soil systems. Keep the lights close enough to prevent stretching yet far enough to avoid leaf tip stress. Watch the stand during the first two days under lights. If you see excessive lean, adjust height or spacing so the canopy receives an even wash. In a flood and drain table, the same rules apply. Consistent coverage gives you short tender shoots that green quickly without becoming lanky.
Growth Stages and Harvest Timing
Alliums start with a single cotyledon. This stage is the dependable harvest window for most growers because it is tender and uniform. In soil systems, you may seethe first pop around day four, followed by a visible push that lifts the soil by day six. Greening is obvious by day seven, and density builds by day nine. A pleasing harvest arrives from day twelve to day thirteen for scallion and chive types that were sown in small sprouting trays. Hydro tables bring a shorter timeline, and micro onion sprouts reach a bright, tender stage around day ten.
Trying to push to the first true leaf can be unpredictable. One onion plant that waited for a true leaf saw some die back and sluggish transition. If you wanta taller product, extend only a few days past the cotyledon stage and make sure airflow and moisture are dialed in. Seed hulls often cling to onion shoots, and that is normal. A thinner top layer at sowing reduces the amount of medium that lifts and makes a cleaner harvest.
Yield and Economics
A soil tray example for scallion and chive types gives clear numbers you can use. About nineteen grams of seed in a sprouting tray produced eighty-one grams of fresh cut greens, which equals two point eight five ounces. That is a fresh weight increase of about three hundred twenty-six percent from seed to harvest. The seed cost in that example was three dollars and fifty cents per tray, and the soil cost was sixty-nine cents per tray. The total input for seed and soil came to four dollars and nineteen cents.
When you compare the two point eight five ounces to a store price of about three dollars per ounce, the tray value is roughly eight dollars and fifty-five cents. The difference is about four dollars and twenty-six cents saved per tray while also getting peak freshness. Alliums are delicate, so expect lighter weights than heavy hitters such as brassicas or sunflowers, but the value per ounce is strong because the flavor and presentation are premium.
Quality and Troubleshooting
Stuck seed hulls are part of the look. If you want fewer hulls, top with a very thin layer of fine medium or vermiculite and harvest slightly later without chasing the first true leaf. A musty smell or webbing signals too much moisture and not enough air. Reduce seeding density a touch, switch to bottom watering after the move to light, and improve room airflow. Clean tools and tray rims between runs. Some growers rely on a sanitation step using properly diluted food-grade hydrogen peroxide made from a thirty-five percent stock to limit fungus and gnats around benches and propagation areas.
Uneven stands often start with an uneven seedbed. Level and lightly firm the surface before sowing, and spread the seed carefully so clumps do not create blank patches later. If soil clings at harvest, cut a little higher and gently shake the bundle. Rinse only right before serving, so storage life remains strong.
Food Safety, Cleaning, and Storage
Keep foliage as dry as possible during growth and storage. Bottom water after the move to light, so the canopy stays dry. Drain excess water from the bottom tray so roots do not sit in a bath. Harvest with clean scissors and a clean catch container. Chill quickly after cutting. Store in a breathable clamshell or a lidded container lined with a dry towel. Avoid washing before storage to prevent condensation. Rinse right before eating if needed. Regularly clean trays and benches, and allow them to dry fully between cycles. Good airflow and a steady room schedule reduce issues that can come from stagnant humidity.
Benefits Snapshot
Flavor is the main reason to grow onion microgreens. They bring a mild, sweet allium note without the sharpness of a mature bulb and without lingering aftertaste. They add brightness and a polished look to soups, canapés, eggs, and salads. Timing is friendly. In soil, the window appears around day twelve to day thirteen, and in flood and drain systems around day ten. Inputs are modest since the early growth relies on the energy in the seed. With careful seeding and clean technique, the results are consistent week after week.
Easy Recipes
Creamy potato soup with onion greens
Simmer diced potato with garlic and a splash of milk or stock until tender. Blend until smooth and season. Ladle into bowls and add a generous handful of onion microgreens at the table. The warm surface releases a gentle aroma without dulling the fresh taste.
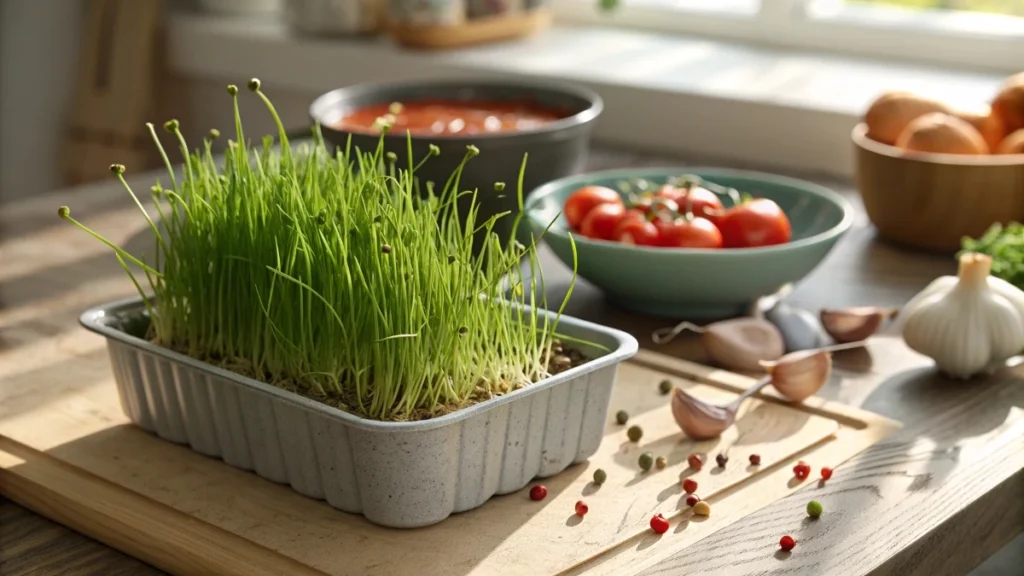
Tomato and garlic soup finished with greens
Cook tomatoes with onion and garlic until saucy, then blend until silky. Season to taste. Serve hot and crown each bowl with a mound of micro onions and a thread of olive oil. The contrast of sweet acidity and fresh allium works in every season.
Canapés or toast with lemon and oil
Top toasted bread or small crackers with mashed avocado or soft cheese. Add lemon zest or a few drops of lemon juice and a scatter of onion microgreens. Finish with a drizzle of olive oil and a pinch of salt.
Soft scramble folded off the heat
Scramble eggs slowly until just set and creamy. Remove from heat and fold in a handful of onion microgreens so they warm gently without cooking through. Add black pepper and serve immediately.
Quick Start Checklist
Choose your method. Soil with a three-tray stack or flood and drain table, or soil with a light vermiculite top.
Measure inputs. Two cups of soil for a sprouting tray and about nineteen grams of seed for scallion or chive types. Double both for the aten-by-twentyy tray.
Prepare the bed. Remove clumps, level and lightly firm, then sow evenly and top very lightly.
Moisture and cover. Mist to damp and cap with an empty tray. Keep in the dark with airflow and mist morning and evening.
Move to light. When the soil lifts around day six, place under LEDs and begin bottom watering.
Watch the timeline. Expect greening by day seven, a dense look by day nine, and a harvest window from day twelve to day thirteen in the soil. Expect around day ten for short hydro sprouts.
Harvest and store. Cut cleanly, keep dry, chill quickly, and rinse only before eating.
Track results. Note the seed rate, room conditions, and yield. The scallion example yields eighty-one grams from nineteen grams of seed with a total input of four dollars and nineteen cents for seed and soil, which is a helpful benchmark for future runs.