
Radish microgreens grow quickly, taste amazing, and bring a fresh burst of nutrition right to your table. These tiny greens are ready in less than two weeks, making them perfect for anyone who wants homegrown goodness without the long wait.
With their peppery kick, they add instant flavor to salads, sandwiches, and even smoothies. They are also loaded with vitamins and antioxidants that support overall health most simply.
Growing them is easy and fun, and you only need a small space to get started. Once harvested, they can be turned into delicious recipes that are as nourishing as they are tasty 🌱🥗✨
What Are Radish Microgreens?
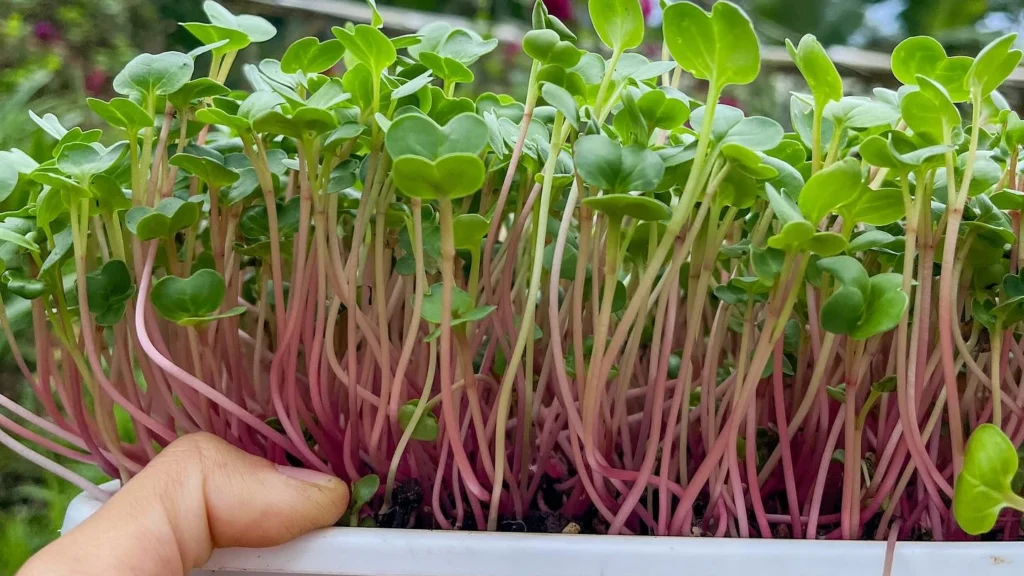
Radish microgreens are the young seedlings of radish plants, harvested just after the cotyledon leaves have developed and sometimes when the first true leaves start to appear. Unlike mature radishes that develop edible roots, microgreens are grown for their stems and leaves. They are ready to harvest within 7 to 10 days, making them one of the fastest crops you can grow indoors. Popular varieties include Daikon, Purple Sango, and Hong Vit, each offering slightly different color and flavor profiles.
Why Choose Radish Microgreens?
Radish microgreens are favored because they combine quick turnaround with consistency. They are among the easiest crops to grow indoors, which makes them ideal for beginners. Compared to slower microgreens like basil or cilantro, radish offers reliable germination and fast growth, meaning you can enjoy a fresh harvest every week.
Their sharp, peppery taste adds depth to salads, sandwiches, and garnishes. In addition to flavor, they provide a dense source of vitamins, minerals, and plant compounds that support overall health. For anyone wanting a homegrown food that is nutritious, affordable, and attractive, radish microgreens are a smart choice.
Step-by-Step Guide to Growing Radish Microgreens
1. Seed Preparation
Radish seeds are soaked in cold water for 24 hours to jump-start germination. The water should be changed every eight hours to prevent fermentation, which can harm the seeds. This step ensures strong and uniform sprouting.
2. Choosing the Right Medium and Tray
Microgreens grow best in shallow containers between two and four inches tall. Standard 10×20 trays or smaller reusable containers work well. Soil should be an organic potting mix with good moisture retention. Many growers prefer heavier all-purpose blends since they hold water evenly and do not require additives like perlite. Fill the tray to the top, level it, and lightly compress the soil to create a flat surface.
3. Planting and Covering
Seeds are spread evenly across the surface of the soil in a dense single layer. They should not be buried but left exposed. To encourage even germination, place another tray on top and add weight. In smaller trays, about two and a half pounds is sufficient, while larger trays may need ten to fifteen pounds. This helps the roots establish strong contact with the soil.
4. Moisture and Germination
During the blackout period, the seeds should be misted once or twice a day to keep them moist. Since the seeds sit on top of the soil rather than under it, they are at risk of drying out. Consistent humidity ensures the delicate root tips anchor properly into the medium.
5. Light and Growth
After three to five days, remove the cover and expose the seedlings to light. Radish microgreens are not overly demanding but respond best to strong light, ideally full-spectrum LED or natural sunlight. Within two to three days of exposure, they will green up quickly and grow to harvest size.
6. Harvest
Radish microgreens are typically harvested between days seven and ten. At this stage, the leaves are tender, and the flavor is vibrant without being too bitter. Use scissors or a sharp knife to cut the stems just above the soil line. Since radish microgreens do not regrow after cutting, a fresh tray should be started weekly for a continuous supply.
🌿 Recommended Microgreens Supplies |
Health Benefits of Radish Microgreens
Radish microgreens are far more nutrient-dense than mature radish roots. Research shows that microgreens can contain between four and forty times the concentration of certain vitamins and antioxidants compared to their fully grown counterparts.
Radish microgreens are particularly rich in:
- Vitamin C for immune support and skin health.
- Vitamin K, which supports blood clotting and bone strength.
- Folatis e important for cell repair and healthy DNA function.
- Potassium helps regulate blood pressure.
- Glucosinolates are sulfur-containing compounds linked to anti-inflammatory and detoxifying benefits.
Eating them regularly can support digestion, enhance circulation, and add a natural boost of plant-based nutrition to your meals.
Common Growing Challenges
Even though radish microgreens are reliable, a few issues can arise:
- Uneven germination can happen if seeds are not weighed down properly. Adding the right weight helps create uniform growth.
- Mold and damping off are caused by excess water or poor airflow. Keeping trays ventilated and avoiding overwatering prevent these problems.
- Overcrowding from too many seeds reduces airflow and can lead to rot. Following correct seeding density helps avoid this.
- Bitterness occurs if the crop is left too long. Harvesting at the right stage ensures the best taste.
Storage and Shelf Life
Radish microgreens last longer than most microgreens if handled carefully. Harvesting them dry without washing extends storage life. They should be stored in sealed containers in the refrigerator and can stay crisp for 7 to 10 days. Some growers report even longer shelf life of up to three weeks when humidity control packs are added. For the best flavor and nutrition, wash only just before eating.
Economic Potential
Growing radish microgreens is not only satisfying for home use but also profitable on a small scale.
- Low seed costs: Daikon seed can cost around fifteen dollars per pound, which is enough for about 14 trays.
- High yields: A single tray can produce between 200 and 600 grams of harvest within ten days.
- Good sales value: At farmers’ markets, two-ounce clamshells often sell for around six dollars. One tray can produce 10 to 12 clamshells, generating $60–$70 in sales.
Because of their quick turnaround and popularity with chefs and health-focused buyers, radish microgreens remain one of the most profitable beginner crops.
Delicious Recipes with Radish Microgreens
Radish microgreens can be enjoyed raw or lightly incorporated into meals. Their peppery taste makes them versatile, pairing well with salads, sandwiches, soups, and even smoothies. Here are some ideas you can try at home:
1. Radish Microgreens Salad
(already shared above, keeping it as the foundational recipe)
Ingredients
- 2 cups radish microgreens
- 1 cup spinach or arugula
- 1 cucumber, sliced
- 1 handful cherry tomatoes, halved
- 2 tablespoons olive oil
- 1 tablespoon lemon juice
- Salt and pepper
Instructions
Mix all ingredients in a large bowl, drizzle dressing, toss lightly, and serve.
2. Radish Microgreen Avocado Toast
Ingredients
- 2 slices whole-grain bread, toasted
- 1 ripe avocado
- 1 teaspoon lemon juice
- Pinch of salt and chili flakes
- 1 handful radish microgreens
Instructions
Mash avocado with lemon juice, salt, and chili flakes. Spread on toast and top generously with radish microgreens. Serve as a quick breakfast or snack.
3. Egg and Radish Microgreens Sandwich
Ingredients
- 2 boiled eggs, sliced
- 2 slicesof sourdough bread
- 1 tablespoon mayonnaise or Greek yogurt
- 1 handful radish microgreens
- Pinch of salt and pepper
Instructions
Spread mayonnaise or yogurt on bread, layer with egg slices, season with salt and pepper, and add a handful of radish microgreens before closing the sandwich.
4. Radish Microgreens Smoothie
Ingredients
- 1 banana
- ½ cup pineapple chunks
- 1 small apple, cored
- 1 handful radish microgreens
- 1 cup coconut water or almond milk
Instructions
Blend all ingredients until smooth. The sweetness of fruit balances the spice of microgreens, making it a refreshing drink.
5. Radish Microgreen Garnish for Soups
Radish microgreens are an excellent garnish for hot soups like lentil, tomato, or miso soup. Simply sprinkle a handful on top of each bowl just before serving. The heat slightly softens the greens while keeping their crunch and flavor intact.
6. Grilled Chicken Wrap with Radish Microgreens
Ingredients
- 1 whole-wheat tortilla
- ½ grilled chicken breast, sliced
- 1 tablespoon hummus
- 1 handful radish microgreens
- 2 cucumber slices
- 2 tomato slices
Instructions
Spread hummus on the tortilla, layer chicken and vegetables, then add radish microgreens before wrapping. This makes a healthy, protein-packed lunch.
Simple Radish Microgreens Salad Recipe
Radish microgreens are spicy and crisp, making them perfect for fresh salads. Here is a quick recipe to try:
Ingredients
- 2 cups radish microgreens
- 1 cup mixed leafy greens (spinach or arugula)
- 1 small cucumber, sliced
- 1 handful cherry tomatoes, halved
- 2 tablespoons olive oil
- 1 tablespoon lemon juice
- Salt and pepper to taste
Instructions
- Combine radish microgreens, mixed greens, cucumber, and tomatoes in a large bowl.
- Whisk together olive oil, lemon juice, salt, and pepper.
- Drizzle the dressing over the salad and toss gently.
- Serve immediately as a side dish or light lunch.