
Red spinach, often classified under the Amaranthus genus, is a fast-growing leafy vegetable known for its deep red or burgundy stems and leaves. When grown as microgreens, red spinach offers not only a vivid pop of color to any dish but also a mild and slightly earthy taste that complements both savory and fresh meals. These young seedlings are harvested before they develop true leaves, usually within a week or so after germination.
What makes red spinach an interesting choice for microgreens is its balance between nutrition and ease of cultivation. Compared to standard green spinach or water spinach varieties, red spinach microgreens tend to have a more striking visual appeal and often contain higher concentrations of anthocyanins and betalains. These compounds are known to support cellular health and are responsible for the deep red pigmentation.
People are increasingly growing red spinach microgreens at home for their aesthetic appeal, quick turnaround time, and versatility in the kitchen. Whether it’s a home gardener seeking fresh greens or a chef looking for a nutrient-dense garnish, red spinach delivers both form and function in small-scale growing systems.
Understanding Red Spinach as a Microgreen
Red spinach seeds are typically small, similar in size to water spinach or traditional green spinach seeds, and are well-suited for dense microgreen planting. As microgreens, the plants are harvested between 7 and 10 days after sowing, just before or at the appearance of their first true leaf. This short cycle makes red spinach ideal for those who want fast results in a limited space.
The germination process begins within two to three days under warm, moist conditions. Optimal growth requires moderate humidity and a growing medium that retains moisture well without becoming waterlogged. Based on the practices used for water spinach and green spinach, it is recommended to use cocopeat for its light texture and ability to maintain consistent hydration.
One distinctive trait of red spinach microgreens is their rich pigment. The red stems and leaf veins are not only attractive but also indicative of their nutritional properties. Taste-wise, red spinach microgreens have a more subtle flavor compared to mature spinach, with a slightly nutty and earthy profile that becomes more noticeable when raw.
These microgreens are commonly consumed raw, though they can also be lightly wilted into warm dishes. Their short production window and simple requirements make them ideal for kitchens, balconies, or indoor farms with minimal equipment.
Materials and Setup Needed
To successfully grow red spinach microgreens, it’s important to create a growing environment that mimics the natural conditions spinach thrives in—consistent moisture, breathable air circulation, and a good light source.
Start by choosing high-quality red spinach seeds. They should be untreated and specifically labeled for microgreen use when possible. Similar to water spinach seed preparation, a quick quality check can be done by soaking the seeds in water and removing any that float. These seeds typically have lower germination potential and are best discarded.
Cocopeat is the recommended growing medium due to its water retention, lightweight structure, and sterile nature. It can be used on its own or mixed with other soilless media if desired. Before sowing, cocopeat should be moistened with clean, chlorine-free water. One effective way to dechlorinate tap water is to leave it in an open container for at least 24 hours to allow the chlorine to evaporate.
Containers can be improvised using shallow foam bowls, seedling trays, or any plastic container with holes drilled at the bottom for drainage. These holes ensure that excess water does not accumulate, which can lead to fungal issues.
Lighting is a key factor. A simple LED tube light setup, such as the 18-watt T8 lights emitting around 2000 lumens at 5000 Kelvin, provides enough intensity to support strong, upright microgreen growth. These lights are both affordable and effective for indoor growers.
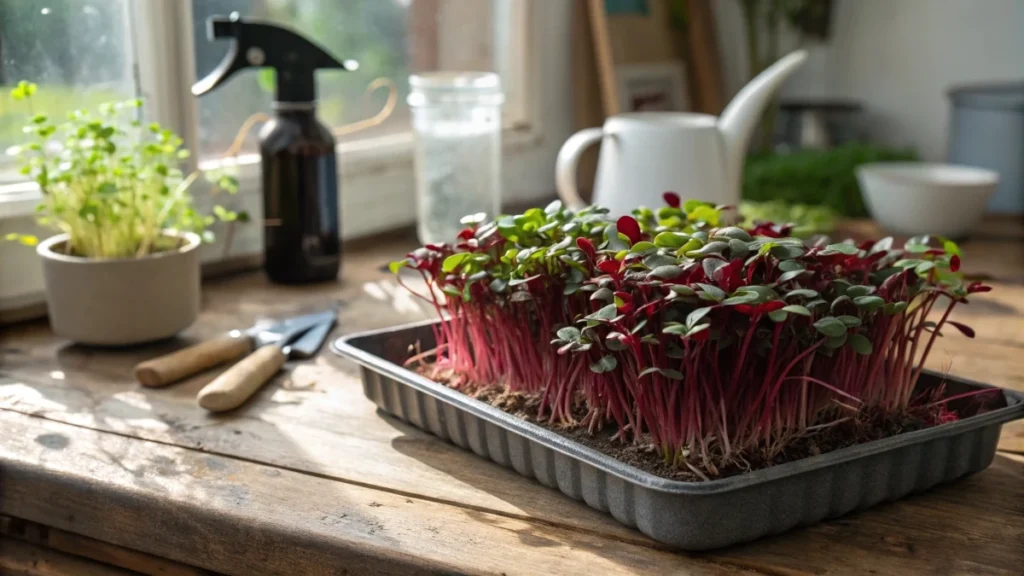
Finally, a spray bottle for watering ensures the seeds and seedlings are gently hydrated without disturbing their position in the growing medium. A breathable cove,r like a cloth or sack,ck is useful during the initial germination stage to keep the environment humid and warm while still allowing airflow.
🌿 Recommended Microgreens Supplies |
Step-by-Step Growing Process
Seed Preparation
The process begins with thoroughly washing the seeds two or three times to remove dust and debris. This also activates the seed coat and starts hydration. As a best practice, discard any seeds that float during this process.
After rinsing, the seeds are soaked in a mix of hot and room-temperature water. This method helps to soften the seed coat and improve germination. For best results, soak for about 8 to 12 hours. Once soaked, rinse them again to remove any remaining surface contaminants.
Sowing
Spread the moistened cocopeat in a shallow tray to a depth of about two inches. Flatten the surface gently with your hand or a small piece of cardboard. Evenly scatter the seeds across the surface, making sure they are spaced close together but not overlapping excessively. This encourages uniform sprouting and prevents fungal issues caused by overcrowding. After sowing, cover the seeds with a thin layer of cocopeat to support root contact and moisture retention. Mist lightly with clean water to settle the seeds in place.
Germination Phase
During the first two days, the seeds need darkness and steady warmth to sprout effectively. Place a cloth or sack over the tray and apply a gentle weight, such as a small wooden board. This step helps to press the seeds into the moist cocopeat and mimics the natural pressure from soil in outdoor environments.
Keep the tray in a warm, dark area. Check once a day and mist if the top layer of cocopeat feels dry.
Growth Phase
From the third day onward, once the seeds have visibly sprouted and begun developing small shoots, remove the cover and weight. Move the tray to a well-lit area or under artificial lighting. Maintain consistent moisture using a spray bottle or begin bottom watering by placing the tray in a shallow container of water and allowing the roots to absorb moisture upward. This method, seen in the longer spinach growing cycle, encourages healthier root development and reduces the risk of mold.
Continue monitoring growth daily. Rotate the tray if using natural sunlight to promote even exposure and prevent leaning.
Harvesting
By day seven to ten, the microgreens should reach about two to four inches in height. At this point, the cotyledons (seed leaves) are fully expanded, and the red pigmentation should be clearly visible. Use a clean pair of scissors to harvest the microgreens just above the cocopeat surface. Avoid pulling them out to prevent contamination with soil or media.
Post-Harvest Handling
After harvesting, rinse the microgreens gently under cold water to remove any residual cocopeat. It’s best to use a fine mesh strainer or colander to avoid bruising the delicate stems and leaves. Shake off excess water and place them on a clean kitchen towel or paper towel to air dry for a few minutes.
Proper storage is crucial to preserving freshness. Red spinach microgreens should be kept in breathable containers, such as clamshell boxes with small ventilation holes or loosely covered glass containers. Store them in the refrigerator and aim to consume them within five to seven days for the best flavor and nutritional quality.
If planning to sell microgreens, packaging in small, labeled containers with a clear harvest date helps establish trust and traceability.
Nutritional Benefits
Red spinach microgreens are rich in nutrients, offering a concentrated form of the same benefits found in mature amaranth leaves. Their red coloration comes from a class of pigments called betalains, which have been associated with reducing oxidative stress and supporting healthy inflammation responses. These compounds are also found in beets and Swiss chard, giving red spinach a similar nutritional profile.
In addition to antioxidants, red spinach microgreens are a good source of vitamins A, C, and K. They provide iron, calcium, magnesium, and potassium in notable amounts. When consumed fresh, they retain the full range of these nutrients without loss due to cooking or long storage.
Unlike fully mature spinach, microgreens contain a lower amount of oxalates, making them easier for the body to absorb certain minerals like calcium and iron. For individuals looking to increase their intake of micronutrients without drastically altering their diet, red spinach microgreens offer a convenient and visually appealing solution.
Culinary Uses and Recipes
Red spinach microgreens are valued not only for their nutrition and striking appearance but also for their delicate texture and subtle flavor. They blend well into a variety of cuisines, especially where a fresh, earthy note is needed. The vivid red coloration of the stems and veins makes them a favorite among chefs looking to enhance the visual presentation of their dishes.
While these microgreens are best consumed raw to retain their nutrient content, they can also be added toward the end of cooking in warm dishes where a slight wilting is desired. Below are several easy and creative ways to incorporate red spinach microgreens into daily meals.
1. Fresh Microgreen Salad
This simple recipe showcases the natural flavor of red spinach microgreens.
Ingredients:
Red spinach microgreens, cucumber slices, cherry tomatoes, thinly sliced red onion, lemon juice, olive oil, a pinch of sea salt, and black pepper.
Preparation:
Toss the microgreens with the other ingredients just before serving. Drizzle with lemon juice and olive oil for a light, refreshing salad.
2. Avocado Toast with Microgreens
This quick breakfast or snack is both filling and nutrient-rich.
Ingredients:
Whole grain bread, ripe avocado, lemon juice, chili flakes, red spinach microgreens.
Preparation:
Toast the bread, mash the avocado with lemon juice and a little salt, spread it on the toast, and top with a generous handful of microgreens. Sprinkle chili flakes for added flavor.
3. Egg Omelet with Microgreens
Incorporating red spinach microgreens into an omelet adds color and texture without overpowering the dish.
Preparation Tip:
Prepare your omelet as usual, then just before folding, add a small handful of red spinach microgreens. This keeps their color vibrant and prevents overcooking.
4. Microgreen Smoothie Add-In
For those looking to add greens to their smoothies, red spinach microgreens offer a mild flavor that blends easily.
Ingredients:
Banana, frozen strawberries, almond milk, chia seeds, and half a cup of red spinach microgreens.
Preparation:
Blend all ingredients until smooth. The microgreens add extra fiber and micronutrients without changing the flavor profile significantly.
5. Spicy Garnish (Inspired by Southeast Asian Methods)
This use case is drawn from methods used with water spinach microgreens. A simple mix of soy sauce, garlic, chili, and vinegar can be drizzled over microgreens for a punchy side dish or garnish for rice and noodles.
Common Growing Issues and Fixes
Growing red spinach microgreens is generally straightforward, but a few common issues may arise, especially for new growers. These problems often stem from environmental imbalances or improper handling during early growth stages.
Mold or Fungal Growth
One of the most common problems in microgreen production is mold. This typically occurs when the medium is kept too wet or when airflow is poor. To prevent this, use a breathable cover during germination and avoid stacking trays in enclosed spaces. Always ensure drainage holes are present and not blocked.
Uneven Germination
This can result from seed clumping, poor seed quality, or inconsistent moisture levels. Before sowing, soak seeds to trigger pre-germination and discard any floating seeds, as seen in earlier growing methods. Spread seeds evenly and mist the surface uniformly to avoid dry spots.
Pale or Yellow Leaves
Insufficient light or prolonged darkness after germination often leads to yellowing. Once sprouts emerge, they must receive 12 to 16 hours of appropriate light daily. T8 LED tube lights with around 5000 Kelvin color temperature are suitable for this purpose and promote healthy green and red pigmentation.
Weak or Leggy Growth
Leggy microgreens with thin stems are usually a sign of inadequate light intensity. If natural light is used, ensure the tray is positioned near a bright window. Rotate it daily for even exposure. For artificial lights, adjust the height to keep the source close—ideally two to four inches above the canopy.
Watering Issues
Overwatering can lead to rot, while underwatering can cause stunted growth. During the germination phase, spray the top layer just enough to maintain even moisture. Once microgreens are established, switch to bottom watering every two or three days as done in hydroponic spinach setups.
Advanced Techniques
Once the basics are mastered, growers can consider upgrading their methods to scale production or extend the life cycle of red spinach microgreens.
Hydroponic Approach
Hydroponic setups are especially effective for those with limited space or a desire for precision. This involves using net cups filled with cocopeat placed inside covered containers or jars. The bottom of each net cup should just touch the nutrient solution to keep the growing medium moist for the roots.
Following techniques from spinach cultivation, you can begin feeding the seedlings with clean water for the first few weeks. Around the third week, or when the third leaf emerges, transition to a half-strength nutrient solution. This is prepared by mixing equal parts of dechlorinated water and a balanced hydroponic nutrient formula like MasterBlend. The recommended pH is about 6.3, which allows for optimal nutrient uptake in leafy greens.
As the plants mature or if grown past the microgreen stage, increase toa full-strength nutrient solution. Covering the jars or containers with aluminum foil helps block light and prevent algae from forming inside.
Transplanting for Full-Leaf Growth
If the goal is to grow beyond microgreens, healthy seedlings can be transplanted into individual net cups or soil pots. Select those with well-developed roots and vibrant cotyledons. Transfer them gently to avoid root disturbance. This approach allows the grower to enjoy both quick microgreens and longer-cycle leafy greens from a single batch.
Batch Harvesting
Another advanced strategy is to harvest only the largest leaves while leaving at least four leaves on the plant, similar to the method used in mature spinach systems. This encourages continuous leaf production and allows for multiple harvests over time. Every 10 to 12 days, refreshing the nutrient mix or increasing the strength slightly helps promote sustained growth.