
Sunflower microgreens are packed with crunch, color, and serious nutrition, and growing them at home is way easier than most people think.
With just a handful of seeds, a bit of space, and the right steps, you can start harvesting trays of fresh greens in less than a week.
These little powerhouses grow fast, taste amazing, and look great on everything from toast to tacos. If you’ve struggled with moldy trays or stubborn seed hulls in the past, don’t worry.
This guide cuts through the fluff and gives you a clear and simple way to grow strong and healthy sunflower microgreens that actually thrive. No fancy gear or gardening skills required 🌱💪🌻
Benefits of Growing Sunflower Microgreens
Sunflower microgreens are among the most nutrient-dense and commercially viable varieties available to both home growers and commercial producers. These microgreens are rich in essential vitamins and minerals,s including vitamin E, B vitamins, zinc, magnesium, and protein. Their slightly nutty flavor and crisp texture make them a favorite in salads, smoothies, and gourmet dishes.
One of the most significant advantages of growing sunflower microgreens is their rapid turnaround time. From seeding to harvest, the entire process typically takes six to eleven days. This allows growers to run multiple cycles per month using the same tray space, optimizing both yield and profitability.
For commercial growers, sunflower microgreens are in high demand, particularly within the health-conscious consumer segment. Retail prices can reach up to two dollars and ninety-nine cents per ounce, depending on quality and regional demand. A well-maintained tray can yield up to twenty-three ounces, meaning a single 10 by 20 tray has the potential to produce nearly seventy dollars in retail value.
Sunflower microgreens are also adaptable to a range of environments. They thrive in temperatures between sixty-eight and seventy-seven degrees Fahrenheit. This temperature flexibility makes them a suitable option for indoor growing rooms, home kitchens, or small hydroponic setups.
In addition to their nutritional and economic benefits, sunflower microgreens contribute to a cleaner, more sustainable food system. Their short growth cycle uses less water and energy compared to fully mature crops, and they can be produced with minimal space and inputs.
Choosing the Right Seeds
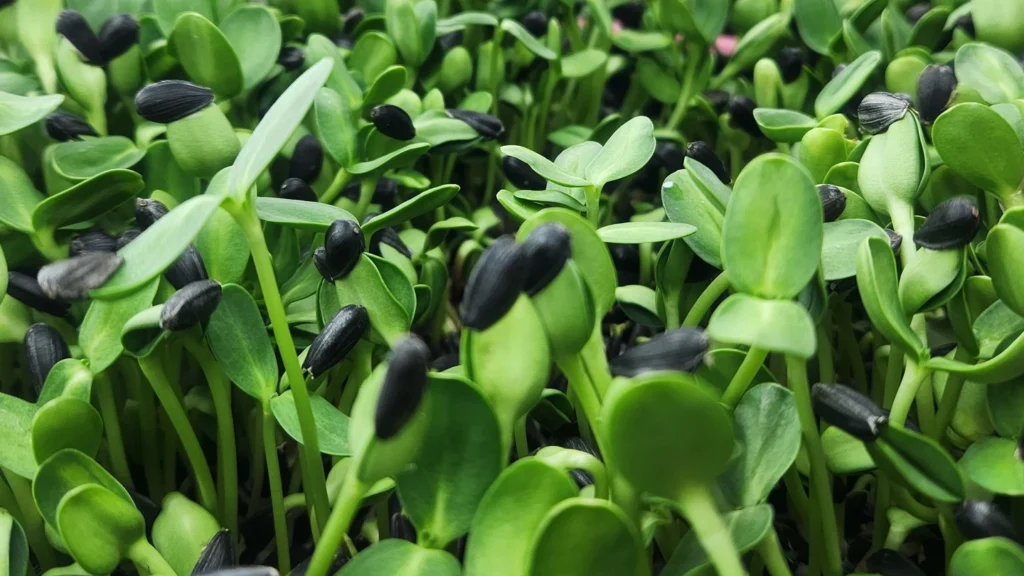
The quality of your sunflower microgreens starts with choosing the correct seeds. The best variety for growing sunflower microgreens is the black oil sunflower seed. This variety is preferred due to its thin hulls, higher germination rate, and consistent performance in tray systems.
High-quality seeds not only germinate more uniformly but also reduce the risk of mold and bacterial growth. Inconsistent or low-grade seeds often result in patchy trays, delayed sprouting, or stunted growth. It is essential to source seeds from a reputable supplier and test each new seed lot before committing to large-scale use. Even minor variations in seed batches can affect optimal soaking times and seeding rates.
For a standard 10-by-20 growing tray, an effective seeding rate is approximately five ounces of dry black oil sunflower seeds. This rate offers a dense canopy without overcrowding, which could otherwise lead to increased humidity and mold problems.
To ensure even hydration during the soak, growers should use mesh strainer bags. Since sunflower seeds tend to float, a heavy object such as a brick can be placed on top of the bag to keep all seeds submerged. This step is crucial because floating seeds do not absorb water evenly, leading to poor germination.
It is important to note that while high-quality seeds are the foundation, each grower’s environment and methods will affect the outcome. Therefore, growers are encouraged to experiment with small adjustments in soak time and seeding density to determine what works best in their specific conditions.
How to Grow Sunflower Microgreens in Soil
Growing sunflower microgreens in soil is widely regarded as one of the most reliable and productive methods. Soil acts as a natural buffer, retaining moisture, supporting root development, and helping the plants stay hydrated throughout the growing cycle.
Start the process by soaking five ounces of black oil sunflower seeds in clean water for four hours. This short soaking period activates the seeds and initiates germination without overhydrating them, which significantly reduces the risk of mold. After soaking, the seeds can be drained and either planted immediately or allowed to dry slightly to make handling easier during seeding.
Use a two-tray system for optimal drainage and moisture control. One tray with drainage holes is nested inside a solid bottom tray. Next, spread a high-quality growing medium such as PRO-MIX MP ORGANIK evenly across the tray. Be sure to fill all corners thoroughly because dry pockets will lead to weak or collapsed seedlings in those areas.
Once the soil is added, press it down lightly using a soil press or an empty tray to create a flat surface. This ensures even contact between the seeds and the growing medium. Afterward, scatter the soaked seeds evenly across the surface of the soil, aiming for uniform distribution. This step is essential for creating a dense and balanced canopy of microgreens.
Water the tray using a gentle shower setting rather than a fine mist. This provides deeper moisture penetration while avoiding surface runoff. The tray is then stacked with others, and a weighted tray is placed on top. A fourteen-pound paving stone works well for this purpose. The weight helps the seeds root into the soil and promotes strong, upright growth by mimicking the natural resistance they would face pushing through the earth.
Germination under weight typically takes three to four days, depending on temperature and humidity. Trays should be monitored daily, and once the seedlings begin to lift the top tray, they are ready to be moved under light.
🌿 Recommended Microgreens Supplies |
How to Grow Sunflower Microgreens Without Soil, Hydroponically, or in Water
Growing sunflower microgreens without soil is possible using hydroponic techniques or simple water-based systems, though it requires greater precision and care. This method is often cleaner and more suitable for indoor or urban environments where soil use may be limited.
For hydroponic growing, popular mediums include coconut coir mats, hemp fiber sheets, and reusable grow pads. These materials provide support for roots while retaining water. Since they lack natural nutrients, growers may choose to use a diluted nutrient solution, although sunflower microgreens typically do not require heavy feeding during their short growth cycle.
The seeds should still be soaked for four hours before planting. After soaking, they are evenly spread across the moistened grow mat. A cover tray and a weight are placed on top to replicate the pressure and darkness needed for germination. Without soil, this pressure becomes even more critical to encourage roots to grow downward and shoots to push upward.
Maintaining the correct moisture level is essential in hydroponic setups. Without the buffering effect of soil, water can evaporate quickly, leading to dry roots or uneven germination. Growers should aim to keep the grow mat consistently moist but never waterlogged. Daily misting or light top watering is typically required until germination is complete.
After three to four days of germination under weight, trays can be moved under lights. As with soil-grown microgreens, hull removal can be a challenge. Without the friction of soil, the hulls are more likely to stay attached. Manual brushing after watering is necessary to remove them effectively.
Growing sunflower microgreens purely in water, such as with floating raft systems, is generally not recommended. These systems offer little to no root stability and often result in poor germination and weak growth. While technically possible, pure water systems lack the structural and moisture retention qualities needed for robust sunflower microgreen production.
Hydroponic and soilless methods can be successful with attention to detail and proper air circulation. However, they often come with increased sensitivity to environmental conditions and a steeper learning curve compared to soil-based methods.
Pre-Soaking and Seeding Process
Pre-soaking is a critical step in the cultivation of sunflower microgreens. It triggers the germination process by hydrating the seed’s outer shell and internal tissues. This process prepares the seed for sprouting and supports a high and even germination rate across the tray.
The optimal soak time for sunflower microgreens is four hours. Extending the soak time may lead to oversaturation, which creates a breeding ground for mold and bacterial growth. On the other hand, soaking for too short a period may result in uneven germination and reduced yield. The four-hour window has been identified as the ideal balance between hydration and seed health, leading to vigorous and consistent growth.
One common issue with sunflower seeds is their tendency to float during soaking. Floating seeds do not absorb water evenly, which leads to poor activation. To address this, growers should use mesh strainer bags to contain the seeds and apply a heavy object, such as a brick, on top of the bag to keep the seeds fully submerged. This simple technique ensures uniform hydration and eliminates dead spots in your germination tray.
Once the soaking period is complete, the seeds should be drained thoroughly. Growers have two options at this stage. Seeds can be planted immediately while still wet, or they can be left to air dry for a few hours to reduce stickiness. Drier seeds are easier to handle and spread more evenly over the growing surface. Whichever method is chosen, it is crucial to proceed promptly after soaking to prevent premature sprouting in the soak container.
This careful attention to the pre-soaking and seeding process plays a pivotal role in producing dense, mold-free, and uniform trays of sunflower microgreens.
Tray Preparation and Growing Medium
Sunflower microgreens thrive when grown in a well-prepared tray system that ensures proper drainage, moisture retention, and root development. The standard method involves using a two-tray system where a tray with holes is nested inside a solid tray. The perforated tray supports drainage while the bottom tray catches excess water, preventing root rot and anaerobic conditions.
The growing medium selected for sunflower microgreens must have the ability to retain moisture while still allowing airflow around the roots. A professional-grade potting mix such as PRO-MIX MP ORGANIK is ideal. This type of soil mix contains a blend of peat moss, perlite, and organic matter that promotes healthy root anchoring and even hydration across the tray.
Even distribution of the soil is crucial. The soil should be spread evenly from edge to edge, paying special attention to corners. Neglecting the corners can lead to dehydration in those areas, causing seedlings to wilt and collapse. Once spread, the soil must be pressed down using either a tray or a soil press. This compaction helps create a flat and firm surface for the seeds, improving seed-to-soil contact and increasing the likelihood of successful germination.
Trays should be prepared just before seeding to ensure the soil remains moist and ready to receive the seeds. A consistent tray preparation process helps eliminate variables and improve tray-to-tray uniformity, which is particularly important for commercial growers aiming for reliable yields and visual consistency.
Watering Techniques During Germination and Growth
Watering practices for sunflower microgreens must be carefully balanced throughout each stage of growth to avoid mold, encourage strong root development, and produce vibrant shoots.
After the initial soil preparation and seed placement, the first watering should be performed using a shower setting rather than a mist. This allows water to penetrate deeper into the growing medium while also preventing excessive evaporation. The goal is to provide enough moisture to sustain the seeds through the entire germination period, which typically lasts three to four days.
Once watering is complete, trays are stacked with a top tray and weighted with approximately fourteen pounds using a paving stone or similar object. This weight creates the necessary pressure for the roots to grow downward and the shoots to push upward. It also maintains a dark, humid environment that promotes rapid germination.
After the germination period, trays are moved under lights, and a shift in watering practices occurs. During the first few days under lights, watering is performed from above. This top watering method helps rehydrate the growing medium and also loosens seed hulls by softening them with moisture. Water should be applied once daily, preferably in the morning, and the soil should remain moist but not saturated.
By the third or fourth day under lights, watering shifts to bottom watering. This method involves adding water only to the solid tray below, allowing moisture to be absorbed through the drainage holes. Bottom watering reduces the risk of mold by keeping the foliage dry, especially during the final days before harvest when moisture on leaves can compromise shelf life and cleanliness.
Throughout both top and bottom watering phases, growers must monitor tray weight and soil appearance to ensure optimal hydration without overwatering. Inconsistent or excessive watering is one of the leading causes of mold outbreaks and poor yields in sunflower microgreens.
Lighting and Environmental Conditions
Lighting and environmental conditions play a crucial role in the development, appearance, and yield of sunflower microgreens. Once the seeds have germinated and begun to lift the upper tray, it is time to expose them to light. At this stage, the seedlings should be strong enough to benefit from photosynthesis, which fuels their rapid growth and deepens their green color.
Sunflower microgreens require a full-spectrum light source that mimics natural sunlight. LED grow lights are commonly used due to their energy efficiency and ability to produce targeted light wavelengths that promote vegetative growth. The light intensity should be sufficient to encourage upward and uniform growth without causing excessive stretching or yellowing.
The ideal light schedule for sunflower microgreens is between twelve and sixteen hours of light per day. This simulates a long daylight cycle and supports photosynthetic activity without inducing stress. Growers should ensure that trays receive even lighting across their entire surface. Inconsistent light can result in uneven growth and patchy trays.
Temperature and humidity also play significant roles. Sunflower microgreens grow well in a temperature range between sixty-eight and seventy-seven degrees Fahrenheit. Within this range, germination and development occur efficiently, and mold risk is minimized. Environments that are too cold slow down growth and reduce yield, while temperatures that are too high can lead to premature wilting or fungal issues.
Good airflow is another key environmental factor. Adequate air circulation helps control humidity and prevents the buildup of stagnant moisture, which often leads to mold and damping-off. Using oscillating fans in the grow room can significantly improve air exchange and reduce humidity pockets.
By maintaining proper lighting and environmental conditions, growers can produce sunflower microgreens that are not only visually appealing but also more flavorful and nutritious.
Seed Hull Removal and Maintenance
One of the most distinctive challenges when growing sunflower microgreens is managing the removal of seed hulls. Unlike many other microgreens, sunflower seeds have a thick, hard shell that often remains attached to the cotyledons after germination. If not removed, these hulls can interfere with photosynthesis, damage tender leaves, or even lead to mold growth where the hull traps moisture.
To facilitate easier hull removal, sunflower microgreens should be top watered for the first two to three days after being placed under light. This watering technique allows the seed hulls to absorb moisture, which softens them and reduces their grip on the emerging leaves. As a result, many hulls naturally loosen and fall off during the growth phase.
Manual hull removal is a crucial daily task during this stage. After each top watering, growers should gently brush their hands across the canopy of the microgreens to knock off remaining hulls. This should be done carefully to avoid damaging the young shoots, especially in the early days when the stems and leaves are more delicate.
A best practice for indoor farming environments is to position sunflower trays on the bottom shelf of grow racks. This placement prevents hulls from falling into trays of other crops or younger sunflower batches, which could create cross-contamination or cleanliness issues. If a grower is managing multiple stages of sunflower growth simultaneously, it is recommended to start brushing the oldest trays first. These trays will shed hulls more easily, and working from oldest to youngest helps keep the grower’s hands cleaner, which is important for hygiene and minimizing seedling damage.
Most hulls will detach naturally within the first one to three days of brushing. However, consistency is key. Daily brushing not only keeps the crop clean but also improves airflow through the canopy, reducing the risk of mold, particularly in more humid grow environments.
Proper maintenance and hull management result in visually clean and harvest-ready trays, which improve both marketability and shelf life for fresh produce sellers.
Harvest Timing and Post-Harvest Handling
Harvesting sunflower microgreens at the right time is crucial to achieving the best flavor, texture, and nutritional quality. Harvest typically occurs on the sixth or seventh day after the microgreens have been placed under light. At this stage, the cotyledons are fully developed, the hulls have mostly detached, and the stems are firm and succulent.
Timing is essential. If harvested too early, the shoots may be underdeveloped and less flavorful. If harvested too late, they can become fibrous, overgrown, or yellowed due to resource depletion or overcrowding. Ideal harvest readiness is determined by observing uniform height, upright posture, vibrant green leaves, and the absence of most hulls.
Before harvesting, it is important to ensure that the crop is dry. This is one of the reasons why watering switches from top to bottom watering around the third or fourth day under light. Bottom watering reduces surface moisture on leaves and stems, which helps prevent post-harvest spoilage and extends the shelf life of the product. Wet microgreens are more prone to bacterial growth and may develop slimy textures when packaged.
Harvesting should be done using a sharp, sanitized knife or scissors. Cuts should be made just above the soil line without disturbing the growing medium. This prevents soil contamination and keeps the harvested product clean and free of debris. After cutting, microgreens should be collected in food-safe containers and transferred promptly to refrigeration.
Post-harvest handling includes removing any remaining hulls, inspecting for off-color leaves or damaged shoots, and gently drying the greens if any residual moisture remains. If refrigeration is available, sunflower microgreens should be stored at temperatures between 35°F and 40°F to preserve freshness, color, and nutritional value.
On average, well-managed trays of sunflower microgreens yield approximately 23 ounces per 10×20 tray. This figure can vary slightly based on seed quality, environmental factors, and grower consistency. Maintaining strict control over each phase of production—from germination to post-harvest—directly impacts both yield and product quality.
For commercial growers, understanding and perfecting the harvest timing and post-harvest protocols is a core element in building a successful, sustainable microgreens business.