
If you love fresh greens but hate the hassle, turnip microgreens might be your new favorite thing. They’re quick to grow, super simple to care for, and you don’t need a garden or green thumb to pull it off.
These tiny sprouts are loaded with flavor and nutrients, and they’re ready to harvest in just 5 to 7 days. It’s the kind of fresh, homegrown boost your meals (and your health) deserve.
With just a tray, some seeds, and a splash of daily care, you’ll be growing like a pro in no time. Fast results. Zero stress. Pure flavor. Let’s make it happen 🌿💚👌
Nutritional & Health Benefits of Turnip Microgreens
Turnip microgreens are a powerhouse of nutrition packed in tiny, tender leaves. Although these greens are harvested early in the plant’s life, they deliver concentrated levels of essential nutrients. Research shows that microgreens in general can contain up to 40 times more vital nutrients than their mature counterparts. Specifically, turnip microgreens are rich in vitamins A, C, and K, along with folate, calcium, magnesium, and iron. These nutrients are crucial for supporting immune health, skin repair, blood clotting, and maintaining strong bones.
Turnip greens also contain a unique class of compounds called glucosinolates, which are known for their anti-cancer and detoxification properties. When consumed, these compounds break down into bioactive molecules such as sulforaphane, which have been shown to fight inflammation and prevent DNA damage.
A notable benefit is their low-calorie and high fiber content, making them an excellent addition for weight management and digestive health. Their slightly peppery taste and crisp texture offer a pleasant sensory contrast when added to raw dishes like salads and sandwiches, or lightly cooked in warm meals.
From a yield perspective, the potential harvest from a small batch of seeds is impressive. In one example, using 50 grams of turnip seeds resulted in a harvest of approximately 869 grams (1.91 pounds) of fresh microgreens—nearly a 17-fold return by weight. This high output makes them both nutritionally and economically rewarding to grow at home.
🌿 Recommended Microgreens Supplies |
Starter Kit
Growing turnip microgreens at home is not only simple but also requires minimal tools. Here’s a breakdown of what you’ll need for a successful setup:
Growing trays
Use two trays of the same size: one with drainage holes and another without. The tray with holes allows excess water to drain, preventing root rot. The second tray acts as a reservoir to catch the water below, maintaining a clean and mess-free growing environment. Some growers also use the second tray as a blackout cover during germination.
Growing medium
Cocopeat is highly recommended for turnip microgreens. It is a natural, renewable material made from coconut husk fibers and retains moisture effectively without becoming soggy. In several demonstrations, cocopeat was used to fill the bottom tray evenly to provide a light, breathable, and nutrient-neutral base for microgreen growth. It’s ideal for indoor microgreens as it’s clean and sterile, minimizing the risk of mold or pests.
Turnip seeds
Turnip seeds of the Seven Top variety are particularly popular for microgreens due to their fast germination and pleasant flavor. Depending on tray size, seed amounts vary: around 7 grams for a small tray, and up to 50 grams for a full-sized tray. Ensure seeds are untreated and intended for microgreen use for best results.
Spray bottle or misting tool.
Watering with a spray bottle helps evenly moisten the soil and seeds without dislodging them. This is especially important during the germination phase when heavy watering can lead to seed clumping or fungal growth.
Blackout cover and weight
In the early stages, a blackout method is essential. A second tray placed on top of the seeded tray helps block light and provides gentle pressure, which encourages the roots to establish in the growing medium. Some growers also place a lightweight (like a small container or stone) on the top tray to simulate natural soil resistance, which enhances sprouting uniformity.
Optional: Natural antifungal treatment
To reduce mold risk, especially in humid environments, some experienced growers soak their seeds in a mild antifungal solution before planting. Although not always necessary, it’s a useful precaution if you’re growing in a damp space.
These basic tools are all you need to start a reliable, low-maintenance indoor turnip microgreen garden.
Step-by-Step Growing Instructions
Growing turnip microgreens at home is an easy and quick process that typically takes just 7 to 10 days from seed to harvest. Here’s a complete breakdown of the process for consistent results:
A. Seed Measurement & Soaking
Start by measuring your seeds according to the size of your tray. For a standard-sized shallow tray, about 7 grams of seeds is sufficient. For larger trays, such as commercial microgreen flats, up to 50 grams can be used. Some growers skip the soaking step, but pre-soaking seeds for about 4 to 8 hours in clean water can promote faster germination. In some cases, an antifungal solution is added to the soak to help prevent mold, which is particularly useful in humid growing conditions.
B. Tray Setup
Use a shallow tray with drainage holes and fill it with about 1 to 1.5 inches of moist cocopeat. Flatten the surface gently with your hand or a small board to ensure an even layer. This uniform base helps maintain consistent moisture levels and ensures even root development. Mist the top layer slightly with water to make it damp but not soggy before seeding.
C. Seeding
Even distribution is key. Sprinkle the seeds uniformly across the surface without clustering. Uneven seeding leads to patchy growth and poor airflow, which increases the risk of mold. Optionally, a very thin layer of cocopeat can be sprinkled on top of the seeds, but many growers skip this to prevent soil contamination on the microgreens during harvest. Once the seeds are in place, lightly mist the surface again to ensure good seed-to-medium contact.
D. Blackout & Weighting
Place a second tray on top to create a blackout environment. This simulates natural darkness and pressure that seeds experience in soil. Some growers also add a gentle weight on top (such as another empty tray with a small object) to encourage downward root growth. This blackout period usually lasts 2 to 3 days. During this time, avoid exposing the seeds to light. Once sprouts start pushing up against the top tray, it’s time to remove the blackout cover and introduce light.
Light Exposure & Growth
Once the seeds have sprouted, they need access to light to photosynthesize and grow into healthy microgreens. Move the tray to a location with indirect sunlight or set it under LED grow lights. A bright windowsill with gentle morning sun works well, but avoid placing the tray in direct, harsh sunlight to prevent leaf scorching.
Water once or twice a day using a fine mist. The growing medium should remain moist but not waterlogged. By the second or third day after removing the blackout cover, you’ll notice visible vertical growth. The greens typically reach 2 to 3 inches in height within 5 to 10 days, depending on temperature and light quality.
Proper airflow is essential during this stage. Use a small fan in the room if needed to prevent damping off disease and mold. This is also a good time to thin out overcrowded areas by snipping excess shoots and using them fresh in meals, as suggested by some home gardeners. Thinning improves light penetration and airflow, leading to healthier plants.
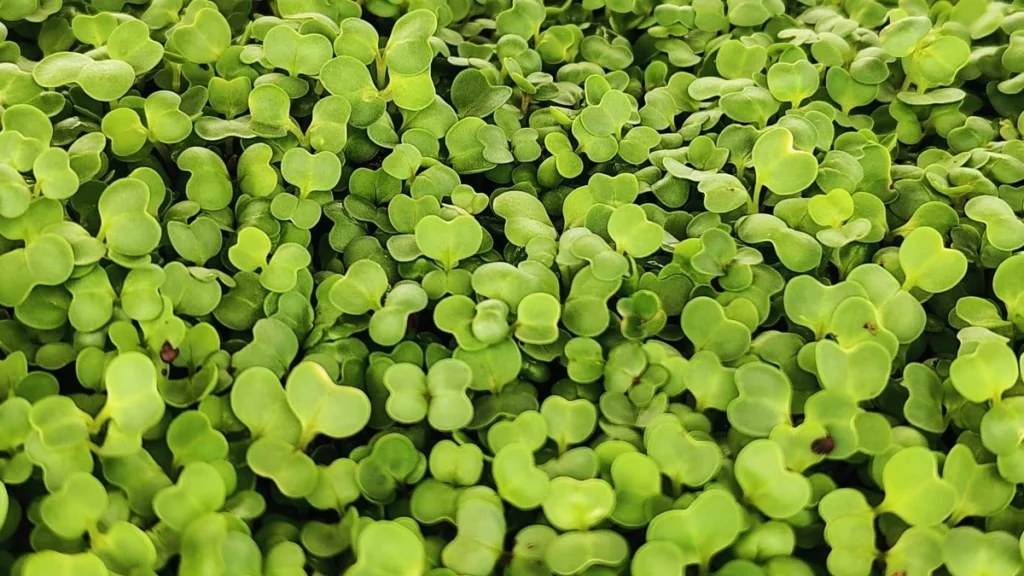
As soon as the first set of true leaves (the second pair of leaves after cotyledons) begins to appear, the microgreens are ready for harvest.
Harvesting Turnip Microgreens
Turnip microgreens are typically ready for harvest between andto 10 days after planting. The optimal time to harvest is when the seedlings have developed their cotyledons (first leaves) and are just beginning to show the first true leaves—the second set that resembles mature turnip leaves. At this stage, the microgreens are at their peak nutritional value and flavor.
To harvest, use a clean, sharp pair of scissors or a knife. Hold a section of the microgreens gently upright and snip them just above the cocopeat surface. Avoid pulling them from the roots, as soil or cocopeat residue can compromise cleanliness and taste. If you plan to store them, it’s best to harvest them dry. Watering should be done the previous evening or several hours before harvest to avoid soggy greens, which spoil faster.
A home grower once reported harvesting 869 grams (1.91 pounds) of fresh turnip microgreens from just 50 grams of seeds, a return of over 17 times the original seed weight. This makes turnip microgreens not only nutritious but also highly productive, offering great value from even a small growing space.
Harvest only what you’ll eat within a few days if you want the freshest experience. Otherwise, you can harvest the entire tray and store it using the tips in section 8.
How to Use Turnip Microgreens
Turnip microgreens have a mild yet slightly peppery flavor, similar to arugula but softer. Their versatility makes them suitable for a wide range of culinary uses—both raw and cooked.
Raw uses
They shine when eaten fresh in salads, sandwiches, wraps, and smoothies. You can mix them with other microgreens like radish, mustard, or broccoli for a spicy, nutrient-rich blend. Their tender leaves and light crunch make them a perfect topping for soups and grain bowls just before serving.
Cooked uses
Although microgreens are most commonly consumed raw to preserve their nutrients, they can also be lightly cooked. One video featured cooking mature turnip greens, which were sautéed with garlic, onions, and olive oil. While microgreens require much less cooking time, the same principles apply. A quick sauté for 30–60 seconds can enhance flavor while retaining most of their nutritional profile.
Flavor balancing
Some people find turnip greens slightly bitter. To neutralize this, add a splash of lemon or lime juice or even a bit of vinegar. These acidic ingredients brighten the flavor and reduce any lingering bitterness. This trick is particularly helpful when using turnip microgreens in warm dishes like scrambled eggs, stir-fries, or soups.
Nutritional enhancer
Due to their high levels of vitamins A, C, K, and antioxidants, turnip microgreens serve as a fantastic booster to your diet. Whether you’re blending them into a green smoothie or garnishing a hearty grain bowl, a handful of these microgreens will deliver a nutritional punch without adding many calories.
Common Mistakes & Troubleshooting
While growing turnip microgreens is relatively easy, several common pitfalls can affect your success. Here’s how to avoid and troubleshoot them:
1. Overwatering or underwatering
Keeping the growing medium too wet can promote mold and root rot, especially in humid environments. A spray bottle is ideal for maintaining proper moisture. The medium should be moist, not soggy. If you’re using trays with holes, make sure excess water can drain easily into the bottom tray.
2. Uneven seeding
Clumped seeds lead to overcrowded patches, resulting in weak airflow and increased risk of mold. Always spread seeds evenly across the tray and gently tamp them into the medium.
3. Skipping the blackout period
Neglecting the blackout phase leads to poor germination and uneven growth. A blackout period of 2–3 days with gentle weight helps the seedlings anchor their roots and sprout uniformly.
4. Insufficient airflow
Poor ventilation is a major cause of fungal growth. Ensure the growing space has good air circulation. If growing indoors, a small oscillating fan placed near the trays can make a significant difference.
5. Using low-quality or untreated seeds
Always source seeds from a reputable supplier. Seeds not labeled for microgreens may contain chemical coatings or be prone to poor germination.
6. Harvesting too late
Waiting too long to harvest leads to fibrous stems and less flavor. Aim to harvest before the second set of true leaves becomes too large, which can signal a decline in tenderness and taste.
By staying aware of these challenges, you can proactively prevent most issues and ensure a bountiful, healthy harvest.
Storage & Shelf Life
Turnip microgreens are best consumed fresh, but proper storage can help maintain their quality for up to 5 to 7 days in the refrigerator.
Post-harvest handling
If your microgreens are dry at the time of harvest, do not wash them until just before use. Washing before storage introduces excess moisture, accelerating spoilage. If you must rinse them, gently pat them dry using a clean kitchen towel or paper towel.
Storage containers
Store the harvested microgreens in an airtight container lined with a dry paper towel. This towel absorbs excess humidity and prevents the greens from wilting. Alternatively, use a produce saver container with adjustable airflow settings for slightly longer storage.
Refrigeration tips
Keep the container in the vegetable crisper drawer or a stable cold shelf. Avoid storing them near the freezer compartment, as extreme cold can damage the tender leaves.
Avoiding compression
Do not pack the greens too tightly. Overcompression damages the delicate stems and leads to faster breakdown. Lightly packed containers allow airflow and reduce bruising.
For the best taste and maximum nutrient retention, consume your turnip microgreens within the first 3–5 days of harvest. If you’re using them for meal prep or garnishes throughout the week, harvesting every few days in small batches is the best strategy.