
Microgreens have gained popularity for their compact size, high nutritional value, and versatility in culinary use. While they may look small and delicate, these tiny greens pack a punch in terms of flavor and nutrition.
The timing of their harvest is crucial to ensuring that you get the most out of these crops, both in terms of taste and nutrients.
This guide will walk you through when to harvest your microgreens and provide essential tips on storing them for optimal shelf life.
Understanding Microgreens Growth Cycle
Microgreens are young, edible seedlings that are harvested at an early stage of growth, just after the first leaves, known as cotyledons, have formed. They are harvested between 6 and 21 days, typically, depending on the variety. The key growth stages of microgreens include:
- Germination: This is the beginning phase when the seed splits, and the roots start to grow. It’s usually the first 2–4 days after planting.
- Cotyledon Formation: At this stage, the seedling develops the first set of leaves, which are not true leaves but act as the plant’s first means of photosynthesis. This period can last between 4 and 6 days, depending on the microgreen variety.
- True Leaf Emergence: After the cotyledons, the plant starts growing true leaves, which are the second set of leaves. These are the ones that provide the plant with full growth potential and are a key indicator that the plant is ready to be harvested.
By understanding these stages, you can monitor your microgreens closely and decide the right time for harvest.
Factors to Consider Before Harvesting
When it comes to harvesting microgreens, several factors can help you decide the perfect time. Here are the most important ones:
Plant Type & Growth Characteristics
Not all microgreens are the same, and different types have different growth patterns and ideal harvest times. For example, Brassica family greens like broccoli and kale tend to have a slightly more forgiving harvest window. You can harvest them a few days early or late without sacrificing too much in terms of flavor and nutrition. These greens remain flavorful even when harvested a bit later.
On the other hand, pea shoots are more sensitive to overgrowth. Once they develop their tendrils and start growing too tall, they can become too tough and chewy, making them less pleasant to eat. Larger sunflowers also require careful attention. It’s best to harvest them before they develop true leaves to avoid seeds staying attached, which can detract from their flavor and texture.
Height and True Leaves
A general rule for harvesting microgreens is to wait until they’ve reached about 2 to 3 inches in height. This ensures they have enough time to absorb the necessary nutrients but are still tender. For most microgreens, the emergence of true leaves signals that the plant has reached its peak nutritional value. Harvesting right when these leaves start showing ensures you get the most flavor and nutrients without waiting too long.
Taste Testing
One of the best ways to judge if microgreens are ready for harvest is by taste. As microgreens mature, their flavor profile changes. Some may become more intense and peppery, while others may become bitter or woody. By tasting the microgreens as they grow, you can determine the perfect harvest day for the best balance of flavor and nutrition. It’s important to remember that the flavor of microgreens can vary slightly depending on the type and growing conditions.
🌿 Recommended Microgreens Supplies |
Signs Your Microgreens Are Ready to Harvest
Knowing when to harvest microgreens involves understanding the key indicators of readiness. Here are some signs to look out for:
Height
For most microgreens, 2 to 3 inches is the sweet spot for harvest. At this height, the microgreens are typically packed with nutrients and have a delicate, tender texture that is ideal for consumption.
True Leaves
The emergence of true leaves is a clear sign that your microgreens are ready for harvest. These leaves develop after the cotyledons and are the plant’s way of beginning to transition into its mature form. True leaves signify that the plant has absorbed enough nutrients from the seed to reach its next growth phase. If you see these leaves forming, it’s time to harvest before the plant starts to get tougher or bitter.
Crisp Appearance
Healthy microgreens should appear vibrant and fresh. If you notice any yellowing or wilting, they may be past their peak. The texture should also be crisp. Soft, floppy microgreens may be overgrown or lacking in nutrients. At the ideal harvest time, the leaves should look glossy, vibrant, and crisp to the touch.
When Not to Harvest
While it’s important to know when to harvest, it’s equally crucial to understand when not to harvest. If you let your microgreens grow for too long, the taste and texture can change significantly:
Overgrowth
Microgreens that are left too long in the growing medium will eventually start to produce true leaves. While this isn’t always a problem for some varieties, like Brassicas, other varieties, such as pea shoots and sunflowers, can become too tough and chewy. This is especially true for pea shoots, where the flavor can change dramatically after overgrowth, becoming unpleasantly fibrous.
Decreased Flavor and Nutrition
Once the plant starts to grow true leaves, the focus of the plant shifts toward producing more biomass. During this stage, the flavor becomes more intense and may turn bitter, and the nutrition levels may decrease slightly. For optimal flavor and nutrition, it’s best to harvest before the plant fully matures into its next growth phase.
Seed Development
For certain types of microgreens like sunflowers, if you wait too long, the seeds may remain attached to the leaves, which can be tough and unpleasant to eat. It’s essential to harvest before these seeds begin to form, as they affect both the texture and flavor of the microgreens.
How to Harvest Microgreens
Harvesting microgreens efficiently and cleanly is vital for maintaining their quality. Here are the main methods to consider:
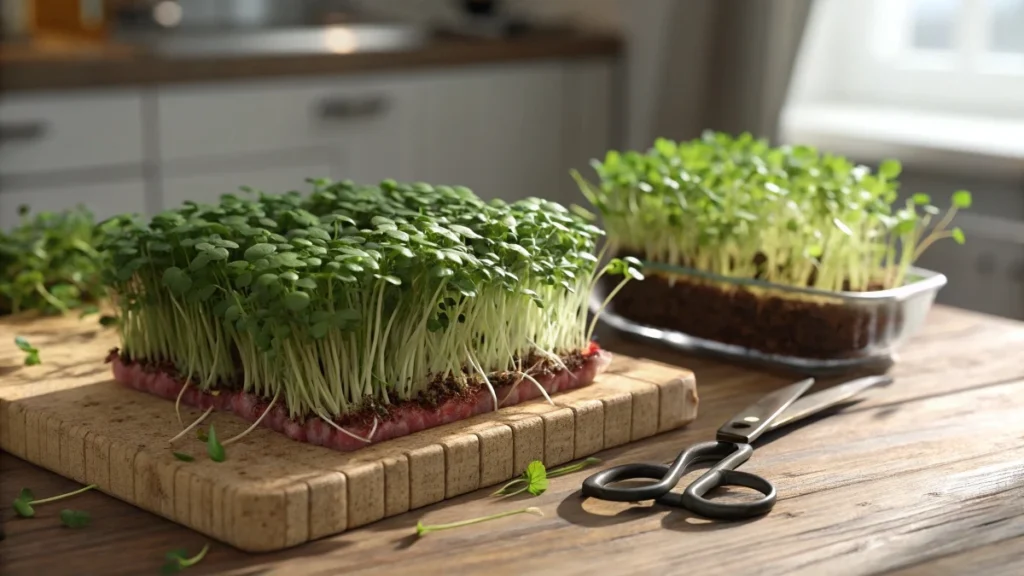
Using Scissors
For home-scale harvesting, scissors are a simple and effective tool. Just grab a handful of microgreens and cut them just above the soil level. This method is slow but works well for small batches. Be sure to avoid getting any soil in the greens to maintain their clean appearance.
Using a Sharp Knife
For larger batches, a sharp knife is more efficient. Cut the microgreens just above the soil, using a steady motion to avoid damaging the plants. Using a longer knife may make the process faster and easier, especially if you are working with larger trays.
Using a Green Cuts Harvester
For commercial-scale harvesting, the Green Cuts Harvester is an excellent tool. This machine allows you to cut large amounts of microgreens quickly and cleanly. It’s especially useful for Brassicas like broccoli or kale, where you need to cut through dense growth. After using the harvester, you might need to go back and trim any remaining greens with a knife to ensure a clean cut.
Using a Barber Trimmer
Some larger-scale growers use barber trimmers, which are effective for harvesting microgreens quickly without damaging them. These trimmers are efficient but may not be as fast or precise as a Green Cuts Harvester.
How to Harvest Microgreens: Post-Harvest Handling, Washing, and Storage
Once you’ve harvested your microgreens, it’s crucial to handle and store them properly to maintain their flavor, nutritional value, and shelf life. Improper post-harvest practices can lead to faster spoilage, loss of nutrition, and reduced freshness. This section covers the steps involved in washing, drying, and storing microgreens efficiently.
Post-Harvest Handling: How to Wash & Clean Microgreens
Proper washing and cleaning are essential for removing any remaining soil, seeds, or debris from your microgreens. Here’s how to do it right:
1. Washing Process
After harvesting, microgreens need to be cleaned thoroughly to ensure they are free from soil and any contaminants. For home growers, you can use a simple tote or bowl of water to submerge your microgreens. If you have a larger batch, using a greens bubbler or similar system is more efficient. These systems gently agitate the water, causing debris, seeds, and dirt to float to the surface, making it easier to remove them.
- Sunflowers and Pea Shoots: Special attention should be paid to microgreens like sunflowers and pea shoots, as they often have large seeds that need to be removed. For sunflowers, gently shake the tray before harvesting to release the seeds naturally. After washing, it’s essential to remove any remaining seeds manually or with a screen or strainer.
- Water Quality: Make sure the water is clean, and consider using cold or room-temperature water to avoid wilting the microgreens. The process should be gentle, as microgreens are delicate and can bruise easily.
2. Drying Process
After washing, drying your microgreens is one of the most important steps. Excess moisture can lead to mold growth, which will significantly reduce the shelf life of your microgreens.
- Using a Drying Table: Spread your microgreens out on a drying table with mesh or hardware cloth. This ensures that the water droplets fall through and are not left on the surface. You can use fans to help speed up the drying process and reduce moisture.
- Manual Drying: If you don’t have access to a drying table, another method is to gently rub your hands through the microgreens while drying them to remove excess moisture. Be sure to handle them delicately to avoid crushing or damaging the tender greens.
- Ensuring Full Dryness: Before storing, ensure that the microgreens are completely dry. The leaves should not feel wet or sticky to the touch. This is a crucial step for extending shelf life.
How to Store Microgreens in the Fridge
Storing microgreens properly in the fridge is key to maintaining their freshness and nutritional value. Here’s how you can do it:
1. Use Airtight Containers
Once your microgreens are completely dry, the next step is storing them. The best way to keep microgreens fresh in the fridge is by using airtight containers. This prevents moisture from entering, which could lead to mold growth or wilting.
- Paper Towels: Line the bottom of your storage containers with paper towels to absorb any excess moisture that might collect at the bottom. This helps keep the microgreens dry and fresh.
2. Optimal Temperature
Microgreens should be stored in the fridge at 40°F (4°C), which is the ideal temperature to slow down any potential spoilage. This temperature helps maintain freshness and prevents the microgreens from wilting or decaying too quickly.
3. Storage Duration
Under optimal conditions, most microgreens will last around 7 to 10 days in the fridge. Brassicas like broccoli and kale tend to last a bit longer, while more delicate greens like pea shoots and sunflowers may begin to deteriorate in 5 to 7 days.
How to Store Microgreens Long-Term
If you want to store microgreens long-term, you have a few options, although not all varieties are suitable for long-term preservation. Here are some methods:
1. Freezing Microgreens
Freezing can be an option for preserving microgreens, though it’s not ideal for all varieties. The texture may change, but some greens, especially spinach, kale, and peas, can be frozen for longer-term storage.
- Blanching: For freezing, it’s recommended to blanch microgreens briefly before freezing. This process involves placing the microgreens in boiling water for about 1–2 minutes and then immediately transferring them to ice water. This preserves color, texture, and some of the nutritional content.
- Storage: After blanching, dry the greens thoroughly before placing them in freezer-safe bags or containers.
2. Dehydrating Microgreens
Dehydrating is another way to store microgreens long-term, though this may affect some of their nutrients and flavor. Dehydrating involves using a dehydrator or oven at a low temperature to remove moisture. Once dehydrated, store the microgreens in an airtight container.
- Limitations: While this method can preserve the greens for months, the flavor may change, and some of the vitamins and minerals may be lost during the drying process. Therefore, it’s best suited for microgreens like herbs and spices.
3. Re-Growing Microgreens
For certain microgreens, you can reuse the growing medium and re-harvest the same crop multiple times. This method works best for microgreens that don’t require a full regrowth cycle. After harvesting, simply leave the tray in place and allow it to continue growing for another round of harvest.
Microgreens Shelf Life: Key Considerations
The shelf life of your microgreens depends on a few important factors:
- Variety of Microgreens:
- Brassicas like broccoli, kale, and arugula tend to last longer than sunflowers or pea shoots. Brassicas typically have a shelf life of 7 to 10 days in the fridge.
- Sunflowers and pea shoots are more delicate and should be used within 5 to 7 days for the best taste and texture.
- Moisture Control:
- Excess moisture is the biggest enemy when it comes to shelf life. Always ensure that your microgreens are thoroughly dried before storage.
- Storage Conditions:
- Temperature and humidity play a significant role in the shelf life of microgreens. Keeping them at the right cool temperature in an airtight container is key to maintaining freshness.
- Handling During Harvest:
- The way microgreens are harvested and handled also affects their longevity. Clean, gentle harvesting and immediate drying can significantly extend their shelf life.