
Microgreens are young vegetable and herb seedlings grown densely in shallow trays and harvested early, usually when the seed leaves (cotyledons) are open and sometimes when the first true leaf is just starting. They’re cut above the growing medium, so you eat the tender stem and leaves, not the roots. (Purdue University)
People love them because they do three things at once: add fresh flavor, add color and texture, and upgrade everyday meals with a small handful.
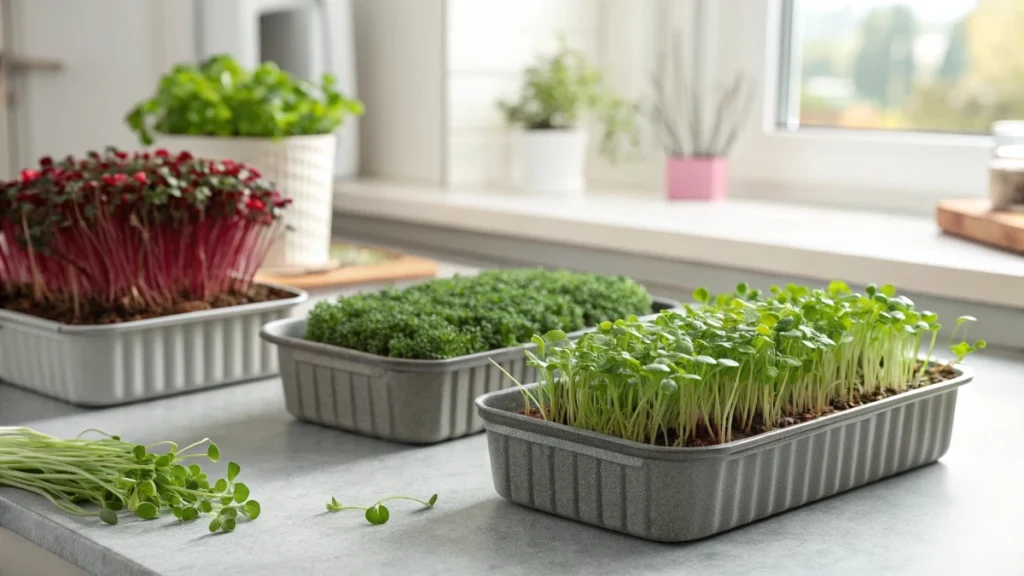
Microgreens vs Sprouts vs Baby Greens
Sprouts
Sprouts are the earliest stage. They’re usually grown in water or very humid conditions and eaten whole (often including the root). They’re quick, but they also carry a higher food safety risk if hygiene slips because the growing conditions favor bacteria.
Microgreens
Microgreens are grown in a medium (soil or a fiber mat) and need light to green up and build flavor. You harvest later than sprouts and cut above the medium. (Purdue University)
Baby greens
Baby greens are older than microgreens, with more developed true leaves and a thicker texture. They’re closer to “small salad greens” than a garnish.
How Long Do Microgreens Take to Grow?
Most common microgreens are ready roughly 7 to 14 days after germination, but slower growers can run closer to 14 to 21 days depending on the crop and your temperature and light. (Purdue University)
A helpful way to think about it:
- Days 1 to 4: germination and rooting
- Days 5 to 10: leaf opening and fast growth
- Days 10 to 21: the harvest window (depends on the crop)
Why Microgreens Taste So Strong
At this early stage, plants are building fast. The leaf surface is tender and aromatic, so flavors come through clearly. That’s why a small pinch can make eggs, soups, noodles, tacos, bowls, and sandwiches feel “finished” instead of flat.
🌿 Recommended Microgreens Supplies |
Are Microgreens Actually More Nutritious?
They can be. Research and extension summaries often report that microgreens may contain higher concentrations of certain vitamins and antioxidants than mature leaves of the same plant, but the exact amount varies by crop, variety, light level, and harvest day. One widely cited university summary notes microgreens can range from about 4 to 40 times higher for some nutrients compared with mature leaves, depending on what you measure.
The practical takeaway: microgreens don’t replace a balanced diet, but they make it easy to add “real plant nutrition” to meals without changing how you cook.
How Microgreens Are Grown (Simple Overview)
1) Tray + growing medium
Most growers use 10×20 trays, but any shallow container works if it drains well and stays clean. Fill with a moist medium and level it. (Purdue University – Extension)
2) Dense sowing
Spread seeds evenly to form a uniform canopy. Different crops have different ideal densities, but “even coverage” matters more than perfection.
3) Germination stage
Many growers cover trays for a few days to hold humidity while seeds sprout. Keep moisture steady.
4) Light stage
Once seedlings are up, give strong light so they don’t stretch. A common indoor target is long light days under LEDs. One university guide recommends up to 18 hours of light per day for indoor production. (Purdue University)
5) Water + airflow
Moist, not soaked. Good airflow helps prevent mold. Bottom watering is popular because it keeps leaves drier.
6) Harvest
Cut cleanly just above the medium. Harvest timing matters because microgreens have a short “best texture” window.
Storage and Shelf Life
Microgreens hold best when you handle them like a delicate herb:
- Cool them quickly after harvest
- Keep them dry on the surface
- Store them in a container that manages condensation (a paper towel liner helps)
A Purdue Extension guide suggests using microgreens within about 5 to 7 days for the best quality.
Some growers get longer in a well-managed fridge, but the real enemy is moisture trapped in the container.
Food Safety Notes That Matter
Microgreens are generally regulated as produce (not the same category as sprouts in FSMA discussions), but they’re still a humid, dense crop. Clean trays, clean tools, clean water, and fresh medium are the difference between “crisp for days” and “slimy by day two.”
Also, seed labels can be confusing. “Microgreen seed” usually means it’s sold for eating and often not chemically treated, but microgreens are defined by how you grow and harvest them, not by special genetics.
Easy Ways to Use Microgreens Every Day
Think “finish,” not “cook down.”
- Eggs: scatter on top right before serving
- Soups: add in the bowl, not the pot
- Rice or noodles: stir in off the heat
- Sandwiches and wraps: use as the crunchy layer
- Tacos and bowls: a small tuft adds freshness fast
A simple portion rule: one small handful per plate is usually enough to taste it without overpowering the dish.
Quick FAQs
Do microgreens need grow lights?
A bright window can work for small home trays, but lights make results consistent and prevent leggy stems. Indoor guides commonly recommend long light days under LEDs for sturdy growth. (Purdue University)
Can I reuse the soil?
For food safety and consistency, most guides recommend using fresh medium and cleaning trays thoroughly between grows.
What are the easiest microgreens to start with?
Many beginners succeed fast with radish, broccoli, pea shoots, and sunflowers because they germinate reliably and show quick progress. (Purdue University )